This is a fairly common issue that many users have faced at one time or the other. And most of the time, it’s either because of an improper BIOS update or due to a damaged motherboard. Black screen after BIOS is a confusing issue, mainly because youre left with no GUI and no instructions at all.If you can somehow access the safe mode, youre in luck, as a fresh Windows installation or a startup repair can fix your problem. However, this will not be the case for a majority of users and in this scenario, you have to resort to other methods. Fortunately, you’re in luck as this guide is prepared just for you. We have listed all the possible ways through which you can fix your black screen and return back to Windows normally. So, continue till the end to understand and troubleshoot your problem.
What Causes a Black Screen After BIOS?
How to Fix the Black Screen After BIOS?
Black screen after BIOS should be taken as a big deal because most of the time, you don’t even know what exactly caused it to happen. However, we have listed all the fixes you can follow to try and solve your problem. If one method doesn’t work for you, be sure to follow every last one until the end.
Verify if Your System Is Responsive
First thing’s first, check if your system is responsive or not. If it’s not responsive, then that’s a totally different problem. However, if it is, then there’s usually something we can do about it. So, press Win + Ctrl + Shift + B on your keyboard and notice if you hear a beep or not. If your computer is responsive, then you’ll hear a beep because the aforementioned key combination restarts your graphics driver.
Ensure Your Cables and Monitor Are Connected Properly
Whenever you face the problem of a black screen on your system, before diving into complicated steps, ensure that your monitor and cables are connected properly. So, unplug your monitor and firmly plug it back on again. Furthermore, you can also check using a different monitor/cable and a different connection method (for eg. switch to DisplayPort instead of HDMI).
Unplug Your External Peripherals
If it’s an external peripheral that’s causing the issue, this method shall help you detect and fix your problem. So, follow the steps shown below:
Check for Faulty GPU
A faulty and misbehaving graphical processing unit can often cause the screen to go black on your system. GPUs can crash when it is dirty, damaged, or overheated. This is not an unusual scenario and in this case, you should first remove your graphics card and see if the screen lights back up. Luckily, we here have a dedicated article on how to remove your graphics card the right way. So, have a look at this guide to fix your issue.
Resume Your Interrupted BIOS Update
Black screen after BIOS usually means that your BIOS update failed halfway through. So, if that’s the case, resuming your BIOS update is the only way to move forward. Listed below are the exact step to continue your BIOS update with three different cases. So, depending on what’s going on in your system, follow the steps shown.
If the Screen Is Completely Black
If the screen in front of you is completely black, without any letters or options, removing your batteries and reattaching them could help you fix your problem. However, this method only works if your system has removable batteries. So, considering this, follow the steps below:
If Your System Restarts and Displays Some Instructions
In case your computer restarts and returns you with three to four steps of instructions, then follow the steps shown below to resume your BIOS update:
If Your System Restarts and Displays Texts With a Yes/No Option
In case your computer restarts and displays texts with yes/no options, then follow the steps shown below to resume your BIOS update:
Perform a Startup Repair
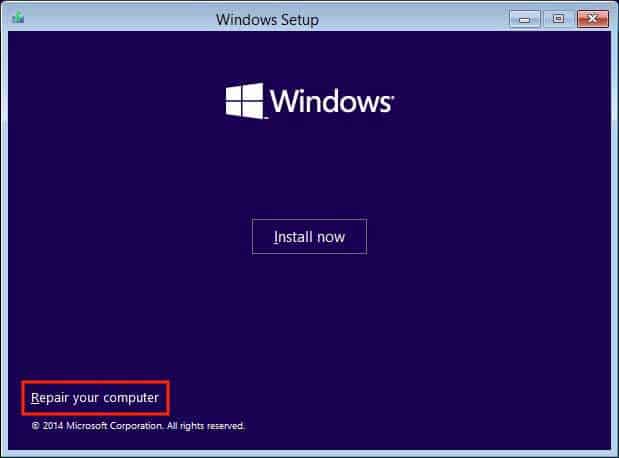
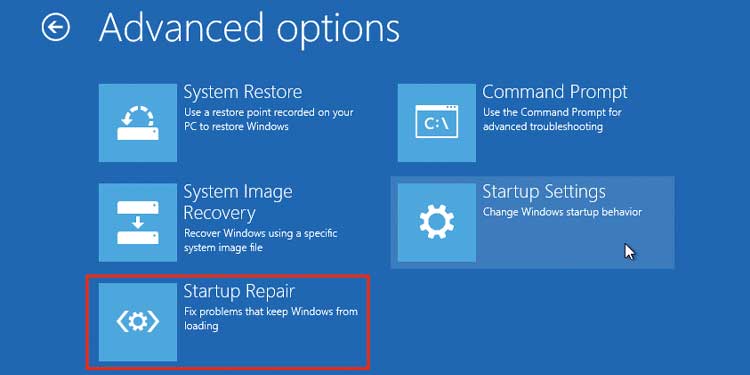
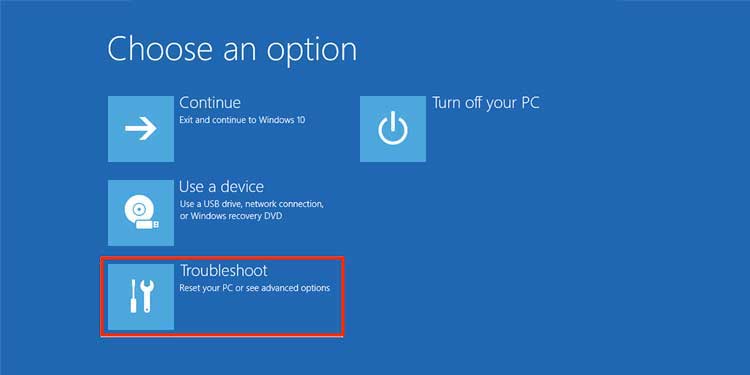
Startup repair is a feature provided by the Windows OS that detects and troubleshoots problems that may arise during Windows startup. It can fix some of the common issues that are preventing your system from logging into the OS.However, to perform a startup repair, you’ll have to access the Windows Recovery Environment.
If You Have a Recovery Drive
If you previously created a recovery drive, it can be useful for you now. If so, then follow the steps shown below:
If You Don’t Have a Recovery Drive
If you don’t have a recovery drive, you’ll need to download the Windows installation file first and then copy it on a USB. Once this is done, follow the steps below:
Repair Boot Record
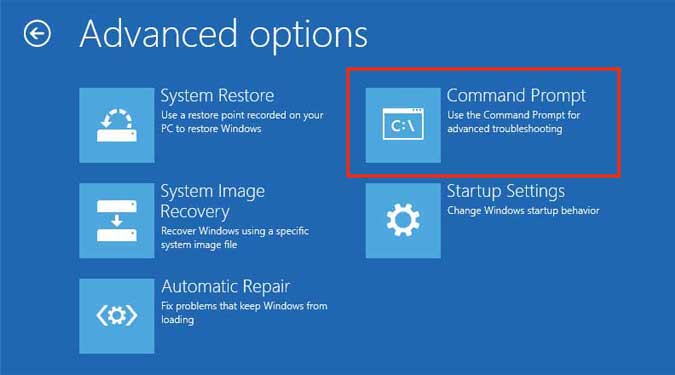
The MBR (Master Boot Record) stores information about the location of your OS on your disk drive. A damaged boot record results in Windows not starting up properly and hence, a black screen. The MBR is created when you install Windows for the first time. For this method, you’ll need the Windows installation file on an external drive (USB), as the MBR is created during the Windows setup process. The steps below show how you can repair your boot record.
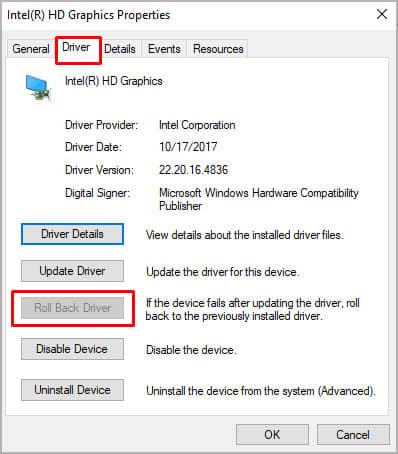
Rollback Your Graphics Driver
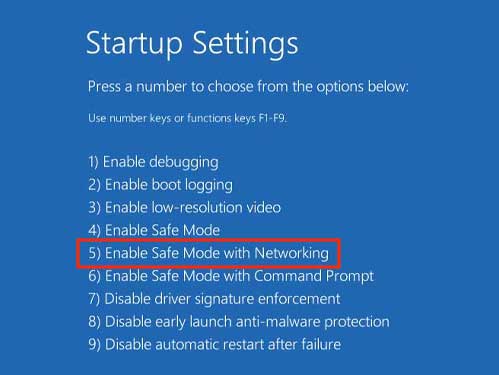
This step requires you to boot your system using safe mode. To do this, you need a recovery drive with a Windows installation file. So, considering this, follow the steps shown below to update your graphics driver.
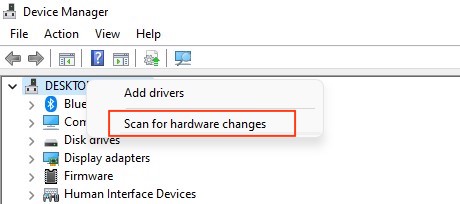
Reinstall Your Graphics Driver
If the Roll Back feature isn’t available to you, you can try and reinstall your graphics driver. Here’s how to do so:
Repair/Replace your Corruptive Peripherals
Corruptive motherboard and disk drives are often known to cause a black screen after backing out of BIOS. This might indicate a problem with your CMOS memory or your CMOS battery. Luckily, this usually can be fixed. So, take your computer to the nearest repair center and see what happens on your internal peripherals. And if unfortunately, that’s not the problem, then the only thing you can do is hope that it’s not beyond repair.
