This service is supposed to protect and repair Windows Update components, but it can malfunction and indefinitely cause high CPU, Disk, and Memory usage.In this article, we’ve explained what exactly WaaSMedic Agent Exe is, why it’s consuming so much system resources and how you can solve this issue.
What is WaaSMedic Agent.Exe? Is It A Virus?
WaasMedic Agent Exe is a Windows service that handles Windows Update maintenance. It’s also known as WaasMedicSvc, or WaasMedicAgent.exe. If this service is running, you can find it in Task Manager under the wusvcs group with the name Windows Update Medic Service.As the name suggests, when Windows update fails for whatever reason, a few maintenance services, including WaasMedicSvc try to get it working again.WaaSMedic Agent Exe is a legitimate Windows service. But users can mistake it for a virus if it’s causing excessive system resource usage. If you’re concerned about this, it doesn’t hurt to perform a quick scan for malware.
What causes WaaSMedic Agent Exe High CPU Usage?
How to Fix WaaSMedic Agent Exe High CPU Usage?
There are a few ways to fix this issue. First, you can just let the WaaSMedicSvc finish its job. It will usually take between 10 minutes to an hour, after which the CPU usage will return to normalcy.The problem with this is that, often, the resource usage will remain indefinitely stay at a high level. So, it’s better to take a hands-on approach and resolve the exact issue yourself or disable this service as a final option. We’ve detailed the steps to do so in the sections below.
Update Windows
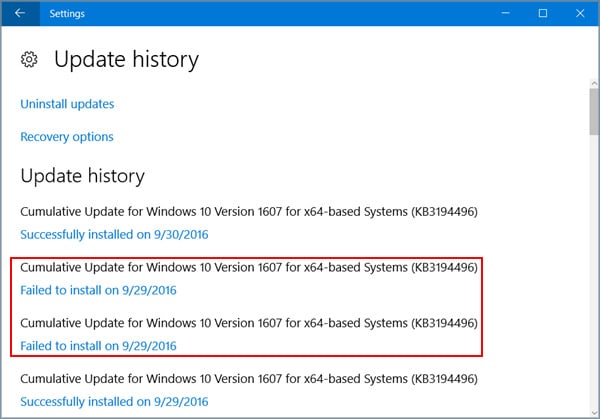
We recommend checking the update history as this will help you figure out which update specifically is failing and due to what reason. Once you know this, you can manually or automatically update Windows as appropriate. Here are the steps to do so:If you receive a specific error code such as 0x80070002, you can troubleshoot for that code specifically.
Run DISM / SFC Scans
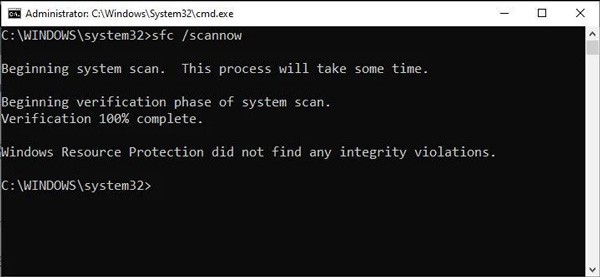
System file corruption is a very common reason for Windows Update failure. The WaaSMedicAgent.exe component itself could be corrupt as well. In such cases, using the DISM and SFC utilities to repair the corrupted components is likely to be helpful. Here’s how you can do so:1. Press Win + R, type cmd, and press CTRL + Shift + Enter.2. Type the following command and press Enter:DISM /Online /Cleanup-image /Restorehealth3. Once the DISM scan completes, type the following command and press Enter:Sfc /Scannow4. Once the SFC scan completes, check if you can update Windows without any issues, then check the WaasMedic Agent Exe CPU usage as well.Note: We have a detailed article on repairing corrupt system files, with step by step instructions on what to do after running the DISM and SFC scans, for your further reading.
Disable WaaSMedic Agent Exe
The final way to fix the High CPU Usage issue is to simply turn off this service. Usually, you would do this via the Services utility, but Windows doesn’t allow doing so for this particular service. So, you’ll have to disable it via the Registry Editor instead. Make note that it’s highly recommended to backup your registry before making any changes. With that said, here are the necessary steps:Windows may automatically re-enable this service at a later point, and you may face the WaaSMedic Agent Exe High CPU Usage issue again. In this case, you should repeat the steps listed above to disable it once more.On the other hand, if you want to re-enable it instead, you can set the value of Start to 2 (Automatic Startup) or 3 (Manual Startup).
Related Questions
How to Fix WaaSMedic Agent Exe High Disk Usage?
The solutions listed above will help resolve high disk usage issue as well. But in addition to them, we also recommend disconnecting any removable drives from your system as this has fixed the disk usage problem for some users.
What is WaaSMedic ETL File?
As the name suggests, an ETL (Event Trace Log) is used to log the details of an event, which could simply be routine procedures or a crash. You can find the WaasMedic ETL Files at C:\Windows\Logs\waasmedic.
How to Fix Windows Update Not Working?
Sometimes, users will encounter a specific error code such as 0xc1900101. We’ve discussed the reasons for such issues in the article above, but further possible causes include:
Insufficient system drive spaceThird-party Firewall or Antivirus
If you know the exact reason why Windows Update stopped working, you can troubleshoot that issue specifically. Otherwise, you can try some of the more general solutions listed below:
Check for any internet connection issuesRun Windows Update TroubleshooterReset Windows Update components and force a re-download of the faulty updateTemporarily Disable third-party antivirus and firewall
How to Fix the Windows Update Cannot Currently Check for Updates Error?
Users mostly encounter the Windows Update Can’t Check For Updates error because the Windows Update components are corrupt.You can try to restart the service via the Services utility, but it likely won’t help. Instead, you should disable the Windows Update services and delete the Update Download Cache. This will resolve the error in most cases, but additionally, if your system has an Intel RST driver, updating or uninstalling it should also help.


