Often the problem lies in Windows settings or some issue with the Razer Synapse software. Once you track it down, a few clicks could have your headphones functioning normally.
Razer Kraken
There are a few different versions of the Razer Kraken. For example, here are the most recent models and their features.
The Razer Kraken X is the only Kraken without a detachable mic. Unlike the others, it also runs on 7.1 surround sound instead of THX Spatial Audio. The Razer Kraken V3 uses a triforce driver to reduce muddy sound and make the sounds more dynamic. The Razer Kraken V3 Hypersense has haptic drivers to create vibrations in the headset, making it more immersive. The Razer Kraken Pro is wireless, has Razer Hypersense, and features a Supercardioid microphone.
However, many people still use older models, like the V2 or the Tournament edition. Most of the steps you take to troubleshoot the Kraken work the same for any version of the headset. However, the models with the removable mic might take a bit of extra work to ensure all the parts are plugged in and functioning correctly.
Razer Kraken Mic Not Working
To troubleshoot your Kraken, start with the most likely issues. Things like settings and connections often create a situation in which your mic won’t work, even though it’s functioning in and of itself.
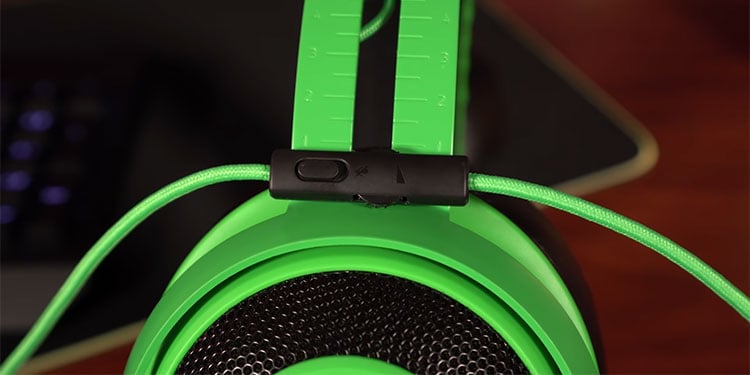
Check the Mute Toggle
Most Razer Kraken models have a mute button somewhere on the headset or cable. Locate yours and make sure it isn’t switched to mute.
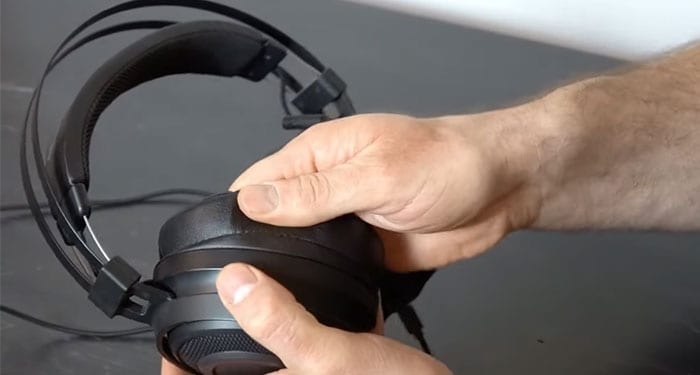
Check Connections and Clean Headset
Sometimes your connections just aren’t working, so the headset isn’t getting the complete attachment to the computer that it needs to work. Clean your headset and check your connections to eliminate common problems quickly.
Unplug the Kraken from the computer. Remove any cables still attached and the mic, if it’s a removable one on your model. Remove the ear cushions. Depending on your model, you might be able to slide them off by grasping the outer edge. You may also have to pry open snap joints around the edges to remove them.Dampen a cloth with warm, soapy water. It should not be dripping. You want it to be just barely wet.Clean the earcups and then the surfaces of the headset. Don’t use water on anything with openings or connections, like the surface of the mic.Check the connector ports for any corrosion or damage. Make sure they look clean and useable.Allow the headset to dry for two hours.Put the Kraken back together and plug it into the computer. The method of connection will vary by model.If it still isn’t working, try using a different port. You can use the sound in the earcups to determine whether or not that function is working, at least.
Once you know the headset is working and connected to the computer, you can focus on more microphone-specific fixes.
Test Cables
If you’re having trouble connecting with your Kraken, test its cables. Computer headset cables are often twisted, yanked, or pulled around and have a shorter lifespan than many other headset parts.All you have to do is get a replacement cable that will function with your Kraken and swap it out for the one you already use. If the microphone still isn’t working and nothing has changed, then your cables are probably fine to use. While you’re troubleshooting, make sure you’re using the Razer V3 Pro in wired mode. It just eliminates an additional source of uncertainty. Remember to make sure the cables are plugged all the way in. Some PS4 players had difficulty getting the mic to work only to find that the audio works if it isn’t completely plugged in, but the microphone doesn’t.
Make sure the device is active
Sometimes a peripheral device is connected to the system but isn’t active. It’s disabled in favor of other devices. There’s a difference between enabling a device and setting it as your default. To do the latter, you first must do the former.
Press Windows key + X.Choose Settings.Search for sound.Click on Sound Settings from the drop-down.Click Manage Sound Devices under the Input menu.Scroll down to find the Kraken in the Disabled list.Click the Kraken entry.Click Enable.
You can also perform this operation from the taskbar.
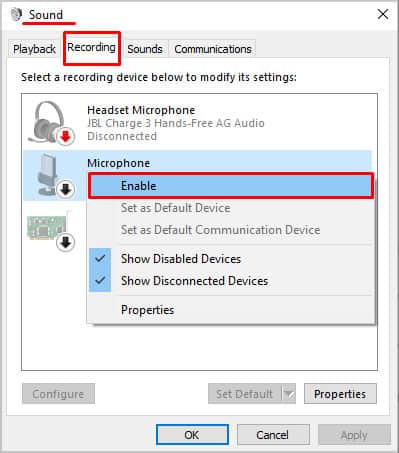
Click the speaker icon on the taskbar.Click Sounds.Choose the Recording tab.Right-click the Kraken.Click Enable.
Now the device is ready to work on your system. If you don’t see disabled devices listed, right-click in the space on the Recording tab area and choose Show Disabled Devices.
Set Your Default Device
You can have multiple sound input devices connected to your computer, but they can’t all be the active default at the same time. If your Razer Kraken microphone isn’t working, it might be because another microphone is set as the primary for your system.You can make the adjustments through the Sound option in Settings.
Press Windows key + X.Choose Settings.Search for sound.Click on Sound Settings from the drop-down.Scroll down to Input.Select your Kraken from the drop-down menu.
You can also do this from the taskbar.
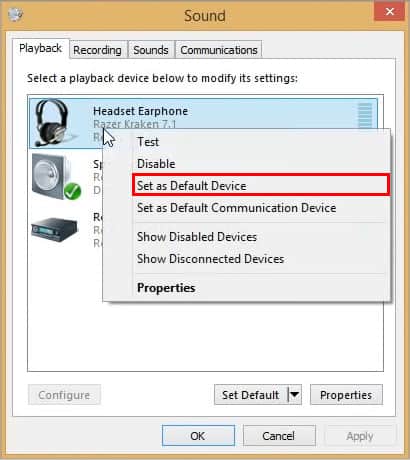
Right-click on the speaker icon on the taskbar.Click Sounds.Choose the Recording tab.Right-click the Kraken.Click Set as the Default Device.Click OK.
Once you change this setting, your Kraken should be set as the default until you manually adjust it again. However, it isn’t unusual for Windows to decide another device should be the default without asking, likely due to other programs that use the mic. If you start experiencing the issue again, check whether the Kraken is still the default device. I like to disable other microphones after selecting one to work as the default. It removes any uncertainty that another mic could be displacing the Kraken. Just right-click on them in the Sound menu and choose Disable to do so.
Enable Microphone Access in Windows
Your privacy settings in Windows can prevent your microphone from working.
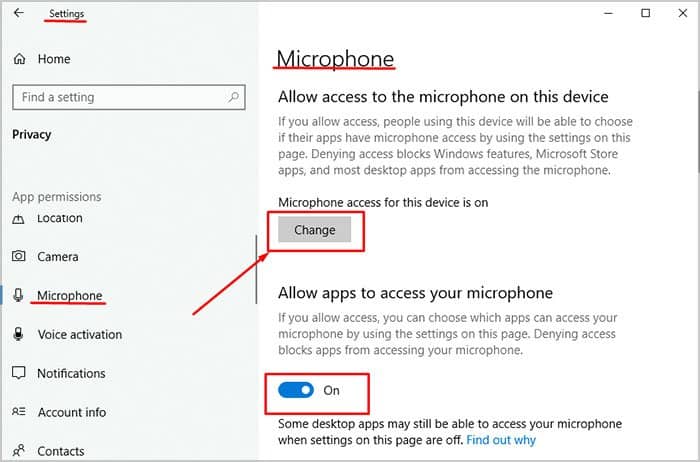
Press Windows key + X.Choose Settings.Click Privacy.Choose Microphone under App Permissions in the left sidebar.Turn on the microphone access by clicking “Change” if device access is turned off.Toggle On to allow apps to access your microphone.Scroll down through the list and make sure microphone access is enabled on the apps you use it for.
If these settings were incorrect, they could be the root of your Kraken’s microphone problems.
Update Your Drivers
For most Kraken headset models, you can update your drivers through Windows. Only the Kraken Tournament model has drivers that you should install by downloading files from Razer. Others will work with the standard driver update method.
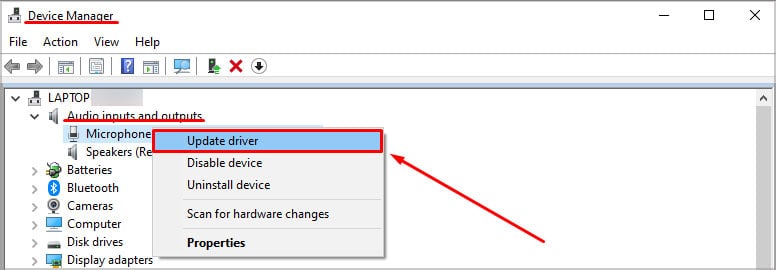
Press Windows key + X.Choose Device Manager.Open the Audio Inputs and Outputs category. Right-click on Microphone.Click Update Driver.Choose Search Automatically for Drivers.Follow the prompts to install a new driver, if necessary.
Once you’re done, shut down the computer, power it on, and check to see whether your mic is working. Check again to make sure it’s still the default device, too.
Check Your Microphone Levels
Sometimes the problem is that the mic doesn’t pick up your voice. Your microphone levels can be adjusted so that people hear you better – but it can be a little difficult to fine-tune.
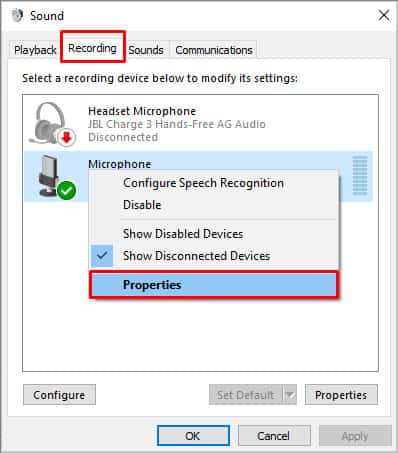
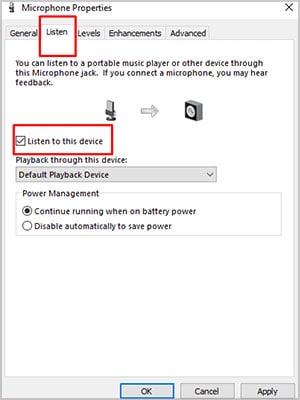
Right-click on the speaker icon on your taskbar.Click Sounds.Choose the Recording tab.Right-click your active microphone.Choose Properties.Click the Listen tab, and put a check by Listen to this Device.Click Apply. Now you’ll be able to hear any sounds your mic picks up.Click the Levels tab.Drag the microphone level and boost bars around, clicking Apply each time you make adjustments.Speak and listen to yourself. If you can hear yourself, work on adjusting the microphone levels to a volume you feel sounds good.Click Apply once you’ve selected the correct levels.Click OK.
If the problem with your Kraken microphone was that the levels were wrong and it wasn’t picking up your voice, it should work now. I have to set my pickup around 50 and my boost at 20 to keep my voice clear without any background noise, personally.
Change Pop-up Behavior
Some users have fixed the problems with their Kraken mics by changing the pop-up behavior of Realtek Audio Manager. Your Audio Manager determines whether or not your computer reacts with a pop-up when a new device is plugged in. Changing that setting sometimes fixes those experiencing problems with the Razer Kraken microphone.
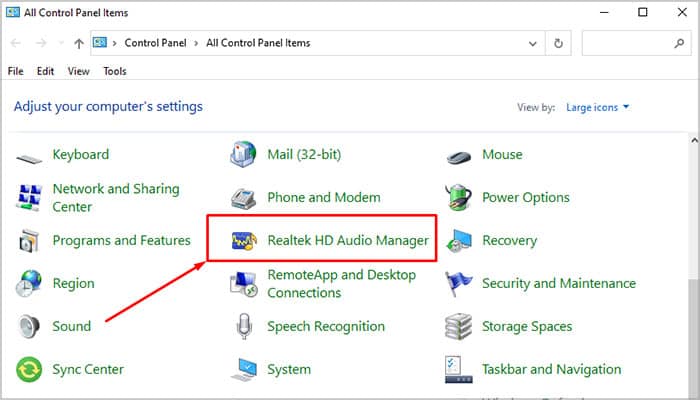
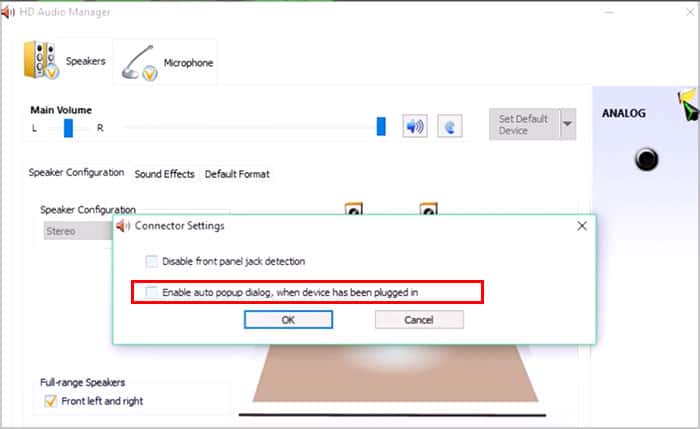
Unplug the Kraken from your computer.Press the Windows key and type “Control Panel” without quotes.Click the Control Panel app.Search for Realtek HD Audio Manager.Click on the result.Open the Settings area. This will vary depending on which system you’re using to manage your sound. For example, I use Republic of Gamers SupremeFX, and the settings icon is a wheel at the top-right.Choose the option to “Enable auto popup dialog when device has been plugged in.”Click OK.Plug in the Kraken.Confirm on the pop-up that your device is a headset with a microphone.Click OK.
Keep in mind that the Realtek HD Audio Manager might be listed as Realtek Audio Console or something similar – if you can’t find it via the Control Panel, try searching from the Windows start menu.Now try testing the Razer Kraken microphone to see whether it works. If it still isn’t working, go back to your Realtek settings and make sure the microphone is checked and enabled. Some systems also can choose Headset with Microphone in the Realtek advanced settings. If only the headset is selected, then the microphone won’t work. Check this setting while you’re in the Realtek area as well. If you’re using the Realtek Audio Console, you can also use the advanced settings to change the device type from headphones to headset by the Analog option. This could also make the Kraken microphone start working.
Run the Microphone Troubleshooter
The troubleshooter can help fix issues keeping your Kraken microphone from functioning correctly.
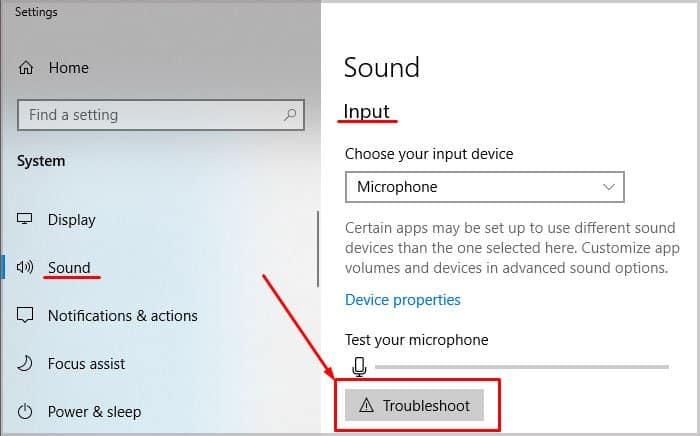
Press the Windows key and type “sounds” without quotes.Click on Sound Settings.Scroll down to Input.Click Troubleshoot.Click Yes to give the scan permission to run. Listen for the test tone. Answer whether you heard it.Follow the prompts to test your microphone and headset. Don’t do any other work in outside programs while trying it.
After the troubleshooter is complete, you may have the option to send a diagnostic report to Microsoft. You can, but it won’t affect your troubleshooting in any way.
Reset the Connection
Resetting the USB audio connection and reestablishing it can also make the Kraken work correctly. If you don’t see it appear in Synapse, this is one way to make it visible.
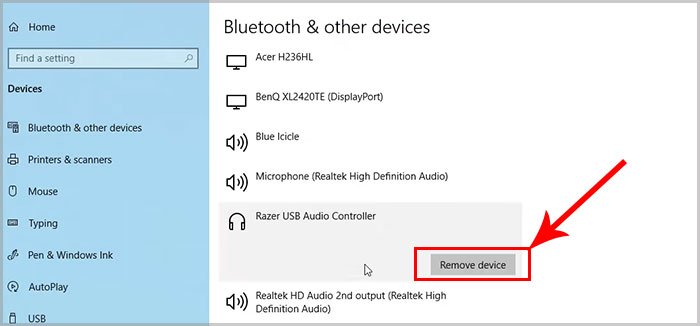
Press the Windows key.Type Bluetooth.Click the Bluetooth and other devices app.Scroll down to the Audio category.Click on Razer USB Audio Controller.Click Remove Device.Unplug your Razer Kraken.Plug it back in.
If that doesn’t work to make it appear, install a fresh copy of Synapse and try again.
Troubleshooting in Synapse
Synapse is Razer’s peripheral management program, and it also manages headphones. It might be the source of the issue with your Kraken microphone.
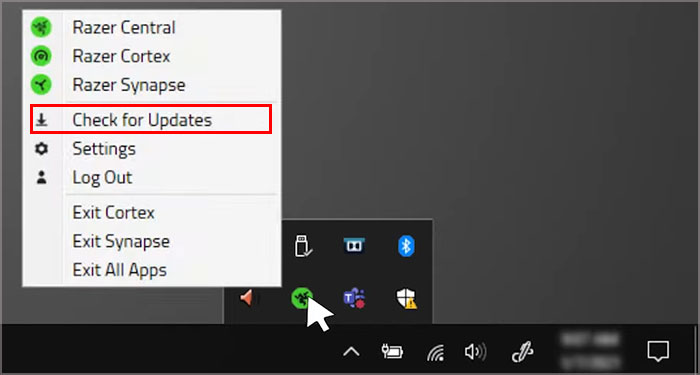
Launch Synapse.Right-click the icon in the taskbar.Click Check for Updates.Restart Synapse after the updates are installed.
Once you know you’re completely up-to-date, you can work on the settings in Synapse itself.
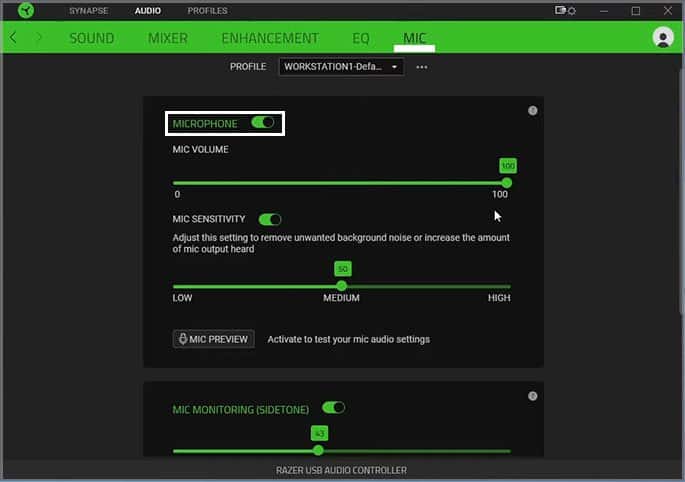
Launch Synapse.Click the USB Audio Controller listing.Choose the Mic category.Toggle the Microphone on.Set the volume to 100.Turn on the Mic Sensitivity and adjust the setting.
The mic sensitivity setting just helps keep the background noise from bleeding through with your voice.Once you’ve set this up, you can ensure the Kraken microphone is still the default communication device.
Does the Razer Kraken Have a Retractable Mic?
The hardware on each version of the Razer Kraken varies depending on which model you get. However, the Razer Kraken Ultimate does come with a retractable mic. It also has active-noise canceling tech built into the headset.
Why Is My Mic Not Working, but My Headset Is?
Your microphone or the cable that controls it may be damaged, and the parts connected to the headset are still working. However, the problem could also be related to microphone-specific settings.
Why Is My Mic Not Working in Games?
Some games have options to choose the default mic for that game only. Check your audio settings to make sure the correct microphone is enabled.