But if the light remains orange as you play, or if it turns steady orange, you may need some troubleshooting. Other times, it often speaks about random bugs, power issues, and lag problems.
Why Is PS4 Controller Blinking Orange
The orange light could be normal or refer to a problem. You will identify it’s an issue if you start noticing other symptoms or malfunctions. Here’s the summary:
A yellow or orange blinking light means the controller is charging on the PS4 while the PS4 is on rest mode.A steady yellow or orange light means the controller is connected to the console, but it’s not charging. It happens because the PS4 is shut off or in Rest Mode. You can enable controller charging while on Rest Mode, which, in turn, would make the orange light blink.
Additionally, the lightbars color represents different users during co-op gameplay. However, the orange color is not part of the list:
Player 1: blue lightsPlayer 2: red lightsPlayer 3: green lightsPlayer 4: pink lights
So far, it’s normal for the PS4 controller to have a blinking orange or yellow light. You’d need to keep an eye for additional issues and clues about what’s happening.So, common dysfunctions that can happen alongside a blinking orange light are:
The controller is lagging (timing problem)The battery can’t charge properly. In particular, the controller starts flashing in orange when it’s charging but stops blinking before it gets a full charge. The controller has a power problem, so it loses charge too quickly or shuts off randomly.Your controller can’t connect to the console. It often relates to a bug on the peripheral or the system. There’s internal damage, which presents itself in many ways. That includes erratic behavior, non-functioning buttons, or failing to sync with the console.
How to Fix PS4 Controller Blinking Orange?
Overall, a blinking orange light may come with connectivity and charging issues. You’d recognize you’ve fixed the issue with the controller’s status lights:
It blinks orange when you connect it to the PS4 if it needs a chargeThe light shines steady white or blue when you use it.
Here’re some easy troubleshooting steps:
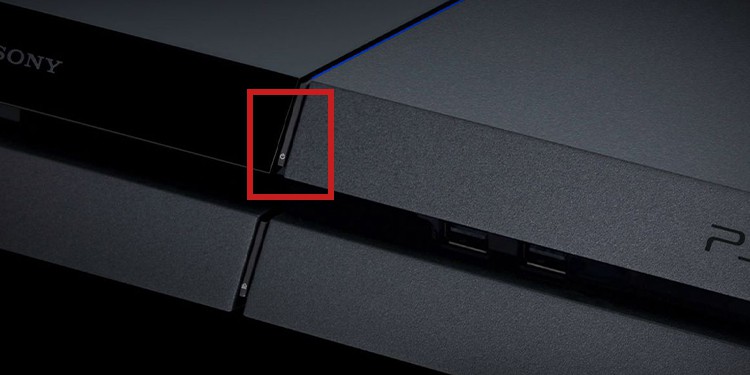
Power Cycle the Console
The first logical step is power cycling the console. It will erase arbitrary power bugs preventing your controller from charging:
Reset the Controller
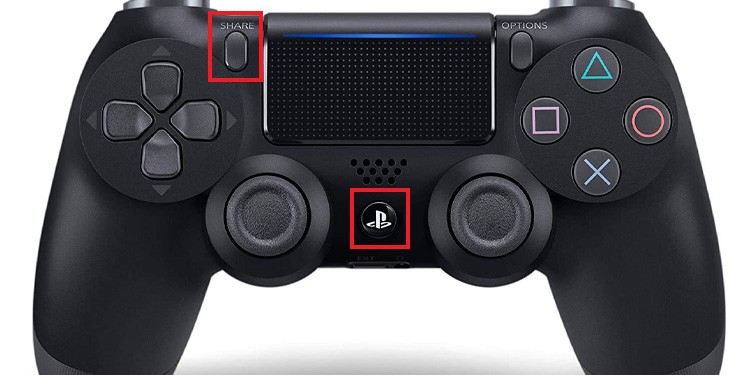
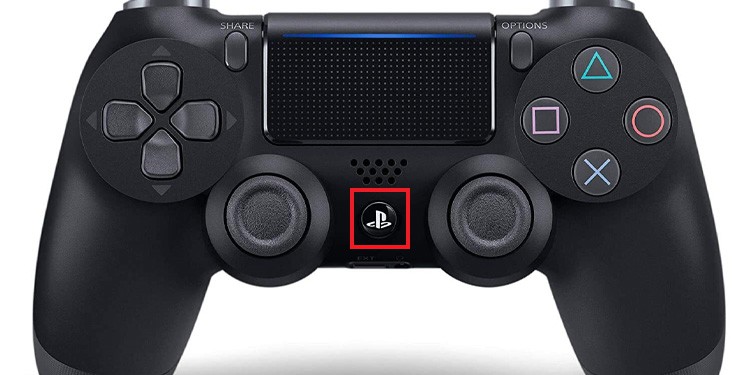
After power cycling the console, you must reset the controller. It puts the firmware back to default, which erases bugs causing timing issues, erratic behaviors, and syncing errors. Here’re the steps:A solution users share on forums is re-syncing the controller automatically. However, you need another controller for the process:
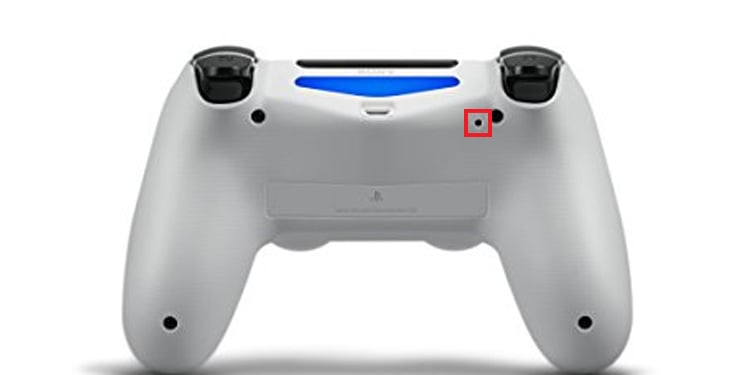
Hard Reset the Controller
If the above solution didn’t work, let’s try taking the controller’s firmware back to default. It will fix the issue 99% of the time. If your controller functions at this point, it will display a blue or white light. It would mean you were dealing with a bug.Otherwise, let’s try the next step.
Enable Charging on Rest Mode
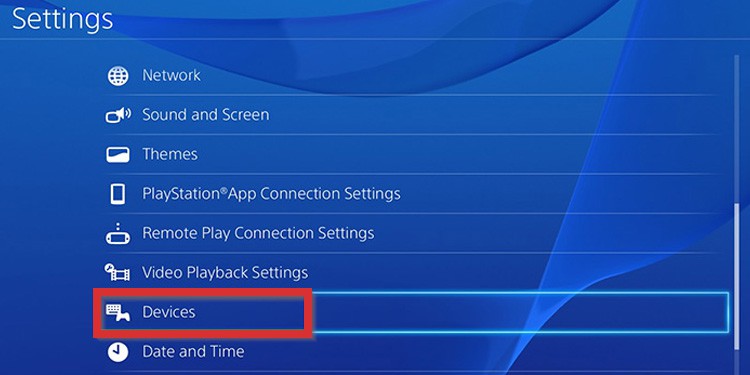
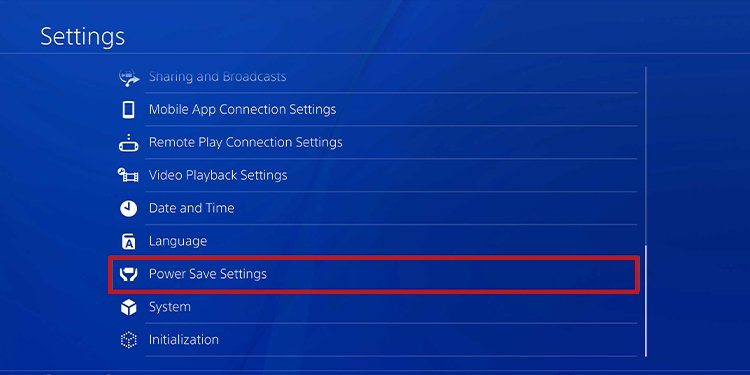
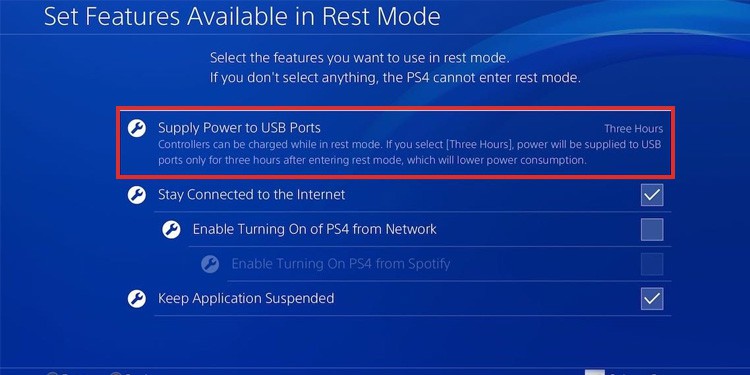
Let’s try recharging the battery for a while. If it’s completely out of charge, it can take about 2 hours to come back to life. So, you must leave it charging for 3 hours, at least. We advise you to charge the controller on the console while on Rest Mode. Make it so the console can charge controllers while on standby:After leaving your peripheral charging for three hours, test it against and see if the light turns white.
Change the Usb Cable and the Usb Port
The problem may be the power supply circuit. It presents itself with the light bar blinking orange when it’s charging but stops before a complete charge.You can verify it by using another USB Type-C cable to charge the controller. Cables are easy to fail.Additionally, you could try another USB port from the PS4. These are prone to failure.
Soft Reset the Console
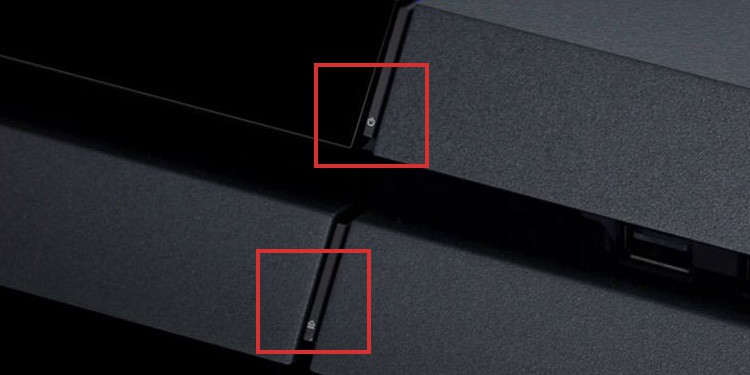
A soft reset is simply restarting a device. It allows electronics to flush and cycle issues, settings, apps, processes, caches, RAM, and protocols. It’s like taking a CD out of your console, putting it back in, or taking out the older Nintendo cartridge to blow air in the pins. Here’s how to do it:
Hard Reset the Console
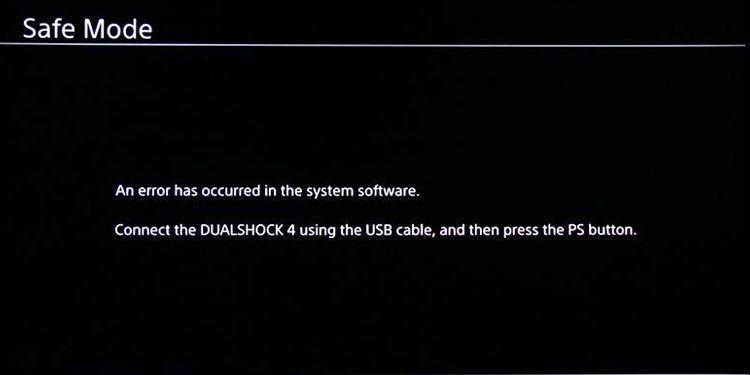
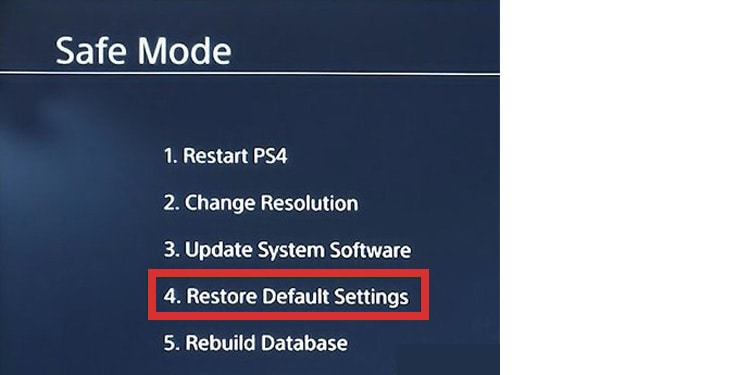
If there’s a bug on the console preventing communication with the controller, let’s try taking it back to factory settings via Safe Mode. It won’t erase your data and apps, but it will erase your settings. Also, it may take some time, but it can potentially save you the cost of a repair or a new controller. Here’re the steps: After the process finishes, the console will restart normally. Now, check if the controller is working normally. You’d also need to check if it charges properly:
Send Your Controller for Repairs
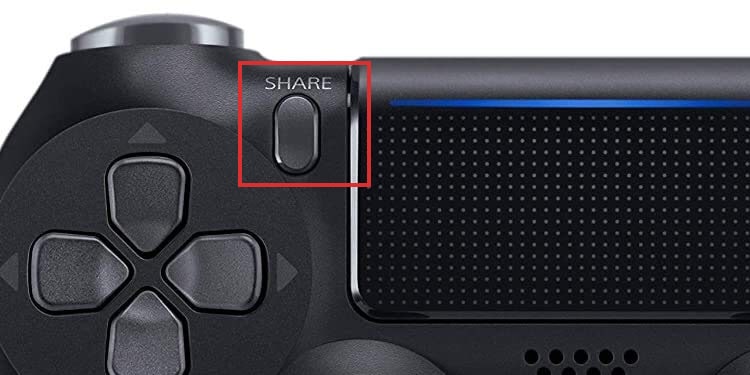
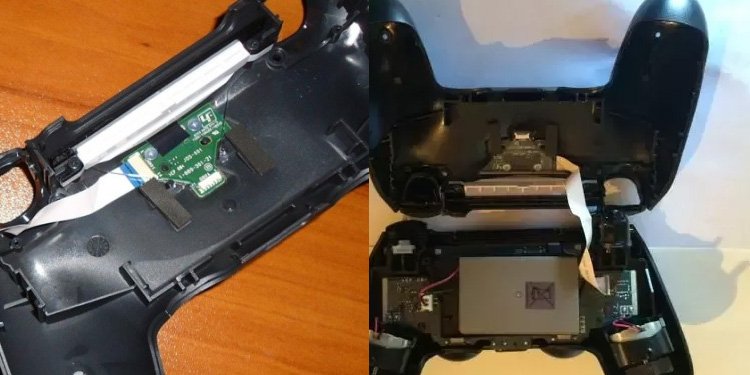
If the issue persists, you’re dealing with internal damage. The typical symptom is your controller can’t charge completely or at all.Commonly, the failure is the USB-C loading port itself. Only a professional would be able to change it.However, other internal electronic components may fail, causing additional issues with your controller. For example, a problematic part is the conductive film, the controller’s circuit board.Another possible culprit is the internal ribbon flex cable. It registers button commands, and it’s prone to failure. In particular, a damaged flex cable also causes lag problems.You can check whether your problem is either the ribbon flex or the conductive film by holding the Share button. If the light blinks, it means there’s internal damage. If it doesn’t, you could resolve the issue with one of the solutions above. If you’ve found weird behaviors and the solutions below didn’t do a thing, you’re facing some kind of internal damage. Again, the answer is to send your controller for repairs.
Can You Change the Components Yourself?
If you’re a hands-on, tech-savvy type of person, you could try changing the internal components yourself.Here’re the tools you’d need: Then, you would need to fully open the controller. Use your plastic tool to pry open the case very carefully.Once open, you should check the ribbon cable. It should line correctly between the upper side of the case (the buttons) and the circuit board. If you see any damage, you’ll have to change it. Also, ensure the USB port makes a proper connection with the circuit board.
