How Do I Debug Motherboard Problems?
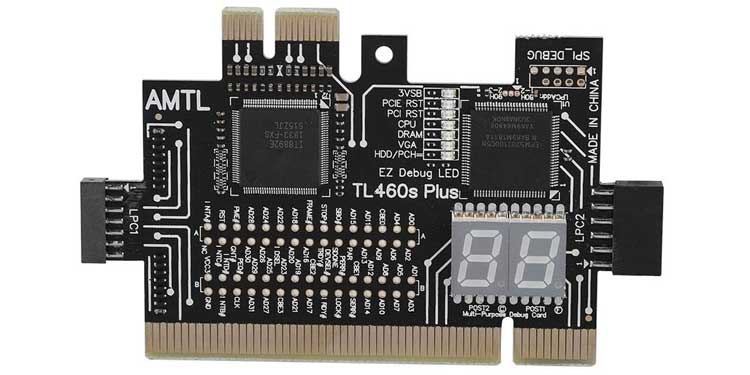
The motherboard has several in-built diagnostics systems. One key diagnostics tool is the Power-On Self-Test (POST). In the POST, the motherboard generates a two-digit POST code if there is a hardware issue during the booting process (e.g., a memory-initialization error associated with your storage device or RAM). You can debug motherboard problems checking the POST code by installing a POST test card into a PCI-e slot or by viewing the hexadecimal display on your motherboard if it has one.Alternatively, many systems also have a beeping system that performs the same function. Through a series of long and short beeps, you’ll be alerted to the problems that your motherboard is encountering in the boot process. For example, two short beeps or the number 26 could indicate that the video card was not read. In such a case, restart the associated component (e.g., the GPU) as a first step to addressing the issue.Importantly, the POST and beep codes are manufacturer-dependent. Identify the manufacturer of your motherboard and visit their website. On there, you’ll be able to find a copy of your motherboard manual which will provide additional details about POST and beep codes. You can also directly contact your manufacturer to obtain this information.
How to Fix Motherboard Not Turning On
Component Seating
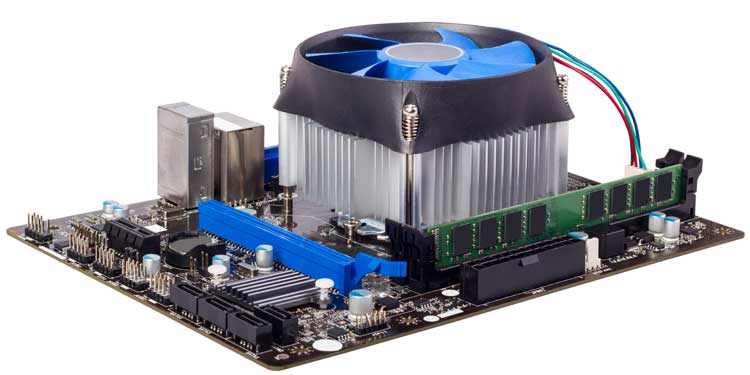
One major why your motherboard won’t turn on is because of improperly installed components. Visually check your hardware and peripherals to ensure that every device is evenly seated on your motherboard. An improperly seated component can cause the boot process to fail.The pins and slots of the processor should be lined up with the motherboard and the heatsink of the processor should also be firmly attached. The video card should be evenly seated across the PCI-e slot of the motherboard. In addition, both wings of the RAM slot should snap evenly over each memory stick.
Motherboard Not Getting Power
If you have a faulty or an underpowered PSU, your motherboard won’t be getting any power which can cause your motherboard won’t not to turn on. Check your connections. The motherboard is connected to the PSU via a 20 or 24-pin connector, while the CPU is connected by a 4 or 8-pin connector. Ensure that these connections are clean, tight, and properly seated. You can check your manufacturer’s website to verify that your PSU is rated for the power draw of your motherboard and CPU. In addition, to rule out compatibility issues, you can also use a hardware utility to check the power draw of your system against the rating of your PSU.
Short Circuits
The motherboard is a very sensitive hardware component. Even a light touch of your motherboard against your device case can lead to a short circuit. Capacitor blowouts, short circuits, start-up failure, and random crashes are all indicators that your motherboard may be in contact with a metallic surface like your case wall. To avoid these issues, ensure that your motherboard is positioned at least a quarter-inch from metallic objects like your computer case. Board standoffs should come with your case or motherboard, or they are readily available online. Also, ensure that no parts of the motherboard are bent towards the case walls and that internal wires are fully shielded by a rubber or plastic coating.
No Start-Up Command
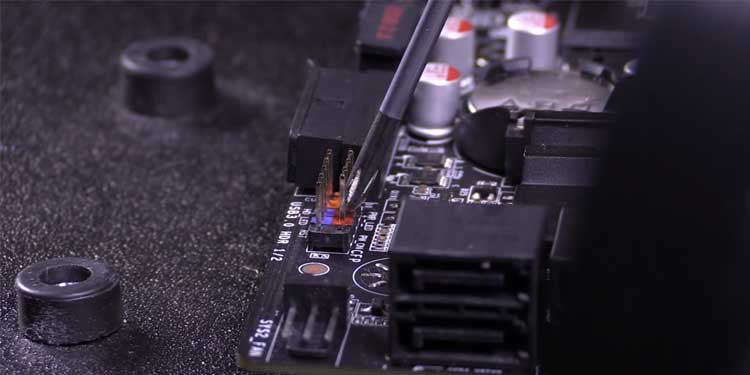
Sometimes the power light on the motherboard will be on, but you won’t be able to boot your PC. One reason why this might be happening is that the motherboard isn’t receiving a signal from the case to start the boot sequence when you press the power button.If this occurs, check whether you can boot your PC directly from the motherboard. If your motherboard has an onboard power button, press it to see if your PC turns on. Otherwise, you’ll need to connect the two power switch headers with a metallic object (e.g., the head of a screwdriver). These headers will be labeled as PWR_SR + and –. Remove any wire leads connected to these pins and ensure that the PSU is connected to the motherboard and CPU. If you need help with finding these headers, you can reference your manufacturer’s manual, which is downloadable for their website. If your PC boots, then your motherboard is functioning correctly. Your PC’s start-up issue may reside with the wire connectors to the power switch headers or with the case power button. Check the wires to make sure that they are connected securely and are fully insulated. Also, make sure that the case power button is functioning correctly. Replace any defective parts as needed. If your PC does not begin the booting process, then there may be other component failures and connector issues. Continue with the other debugging steps in this article to further isolate the problem.
Hardware Incompatibility Issues
New hardware is not always backward compatible with older firmware. If you’re trying to install new hardware, one reason why your new motherboard might not be turning on, going through POST, or triggering the booting process is that your BIOS/UEFI version may be outdated. You can find the latest version of your firmware from your manufacturer’s website. Download and install this version after reinstalling your old hardware and performing a reboot. Now, reinstall your new hardware. This should resolve your compatibility issues.
CMOS Battery
Your CMOS battery is another culprit for motherboard and booting issues. Resetting your CMOS battery will refresh your boot configuration, thereby eliminating configuration issues with new hardware.To clear the boot settings and reset your boot configuration, firstly remove your CMOS battery for about 30 seconds and reinsert the old battery or replace it with a new one. Alternatively, after turning off your PC and disconnecting the power supply, hold the clear/reset button in your case for 5-10 seconds. Reboot your system and enter the BIOS menu to update your settings.
Conclusion
Always contact your device manufacturer if you believe that your motherboard may be defective. The device manufacturer can provide additional debugging steps and/or replace your motherboard if needed.


