Well, there are different types of audio interfaces, and modern circuit boards can have six or more embedded in them. However, this depends on the model, and you may even find comparatively fewer ones on yours. Likewise, a laptop motherboard mostly comes with just one audio port, which can work as both input and output.Since different audio devices require different connections, it’s essential that you have proper knowledge about these interfaces. In this article, you will learn about all the audio ports found on a motherboard, along with their location and color.
Do All Motherboards Have the Same Audio Ports?
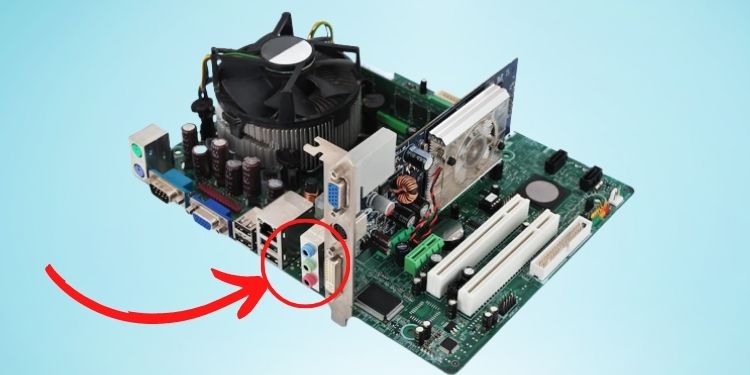
Basically, an audio interface allows the connection and communication of any audio device with a computer. Although the number differs on every motherboard, most modern ones adopt the PC System Design Guide and come with five or six ports.Before we dive into the details of specific ports, the table below includes everything that should help you distinguish different audio ports on a motherboard. Moving on, the location of audio ports on most motherboards remains identical. Well, they are all grouped together on the back I/O panel.However, you may also notice audio ports on the front panel of a PC casing. But you need to note that they are not embedded in your motherboard. Instead, they require a connection with the audio headers, which we’ll save to discuss some other day.
What are the Different Types of Motherboard Audio Ports?
Like any other computer port, the audio interface is primarily categorized into two – input and output. While the former fetches audio signals into the computer (for example, the input of your voice using a microphone), the latter sends an audio signal out of the PC (for example, sound coming from a speaker).Indeed, choosing the correct port is quite essential. This is because if you do not connect your audio devices to the right port, you may experience problems like the speaker not working, the computer not detecting the microphone, etc.However, this case doesn’t apply to those motherboards (mainly laptops) with only one dedicated audio interface that can function as both ports. Once you connect the peripheral, the necessary driver is automatically installed and performs as required.Well, most motherboard manufacturers use standard colors to distinguish the input from output ports. Nonetheless, some do not apply this to their models and instead have just the black ones. Therefore, icons or labels are the best way to identify the interface.Regarding the same, this section includes everything you should know about the different types of motherboard audio ports, along with their colors and labels.
Mic-In
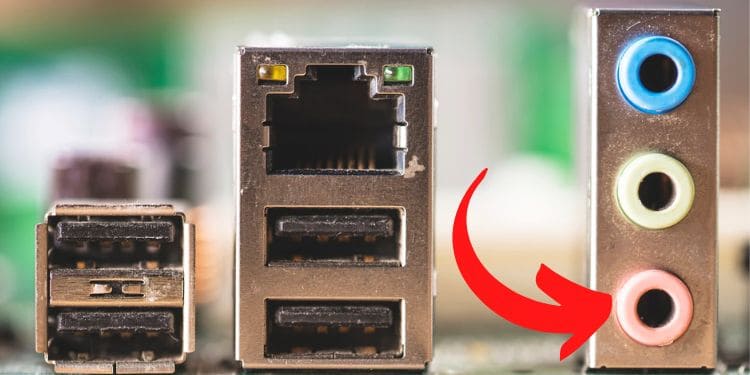
Microphone-In or Mic-in is the dedicated input audio port for plugging microphones. This port is present in almost every motherboard and is generally recognized by its pink color. To connect a microphone to the motherboard, you require a 3.5 mm audio jack, which usually comes attached to the audio device. Usually, the Mic-In ports come with a pictogram of a mic or, in some models, labeled as MIC. Hence, even if yours doesn’t have this audio interface, you should recognize it without any fuss.Moreover, you will likely not find the pink port on your laptop’s motherboard. Instead, it has one audio interface that can take in both input (microphone) and output (headphone/speaker).
Line-Out
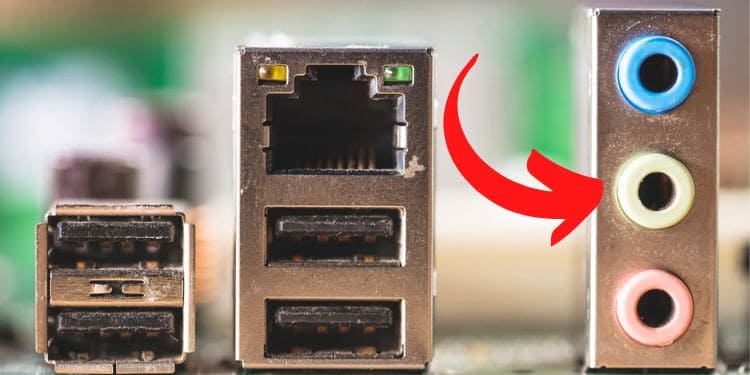
The Line-Out, also recognized as the Headphone-Out or Audio-Out, is an output port that transfers a PC’s audio to speakers and headphones. Usually, it is recognized by its green color and also with a headphone or outgoing sound wave icon. In some motherboards, it may also be labeled “AUX”.Well, this type of port is suitable for a 2.0-channel system, meaning you can connect any stereo device (headphones or speakers). To connect these audio peripherals, all you need is a 3.5 mm audio cable. Interestingly, a few motherboards are equipped with a 6.35 mm, drawing more power to the headphones. Thus, a 6.35 mm audio cable provides comparatively lower resistance and capacitance to support high-end audio equipment.
Line-In
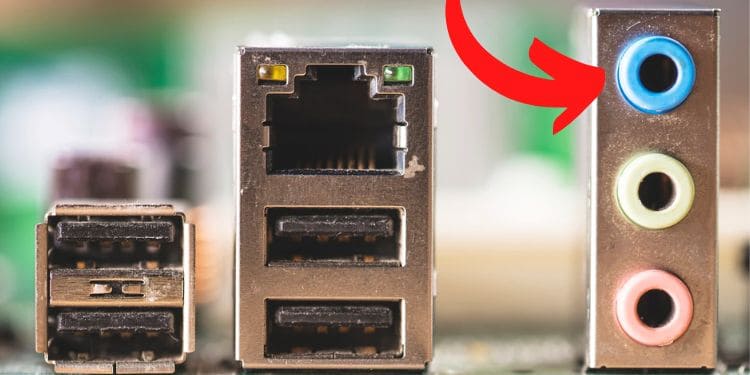
Another primary port that comes embedded in most motherboards is the Line-In port. If you’re trying to get audio input signals from an external audio device to record, play, or modify their sound, this should be the one you’re looking for.Basically, you can connect any audio input peripheral here, like amplifiers, CD/DVD players, MIDI instruments, and many more. In fact, plugging in a microphone will also make it work completely fine. However, we recommend using the above-mentioned Mic-In port for this device as the amplification is much better there.Moving on, the Line-In port is light blue in color, and you may also recognize this by an incoming sound wave icon beneath it. However, such a port is absent on laptop motherboards, and you’ll need regular audio ports to connect the input audio devices.
CS-Out
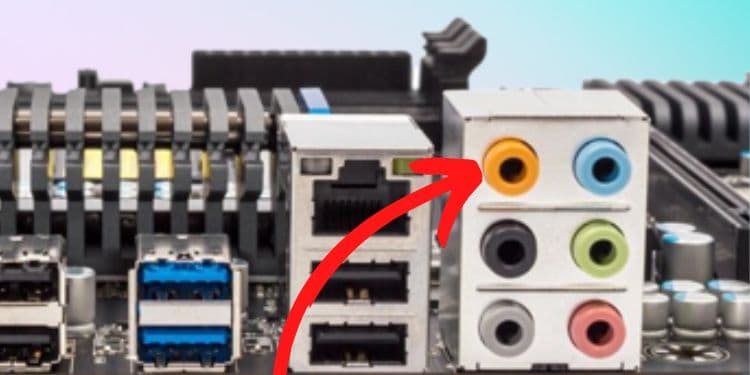
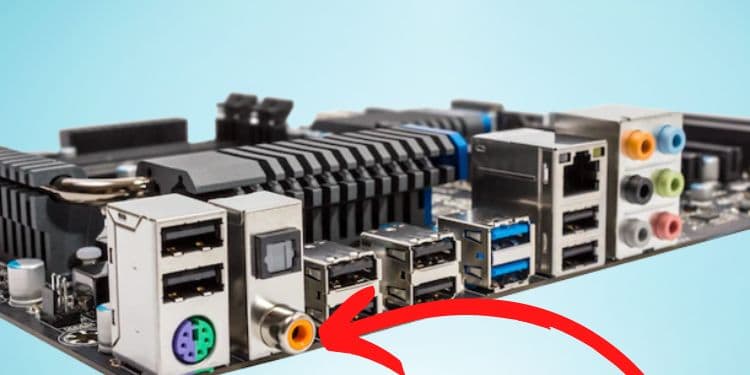
Center Speaker-Out, or simply CS-Out, is an audio output port found in high-end motherboards that support the connection of surround sound systems. Well, they are orange or lime-colored and can be recognized by the label “c/sub” or a pictogram of a speaker.To be precise, this is the dedicated interface for connecting a subwoofer, center/front speaker, or soundbar to your TV or even computer. Hence, these devices provide extra bass to your sound system and are perfect for music lovers.
RS-Out
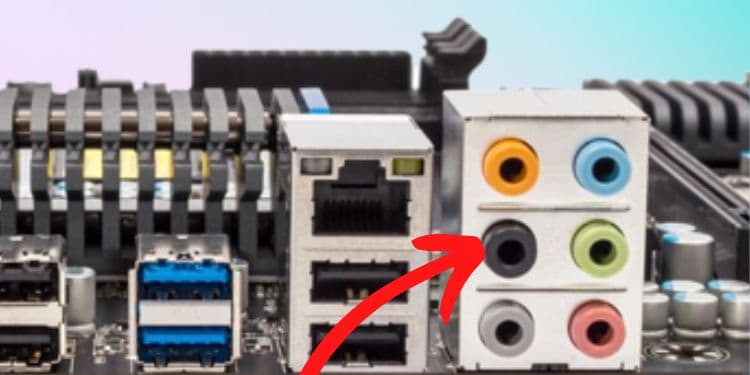
Rear Speaker-Out or RS-Out is the audio output port for the speakers behind you or the back of the center speakers. Like the CS-Out, you can use this for connecting surround sound systems.Moreover, identification of the port is also easy, like the other audio interfaces. All you have to look for is the black port. But in those motherboards that do not follow the color standards, you should check the label “rear” accompanied by a speaker symbol.
SS-Out
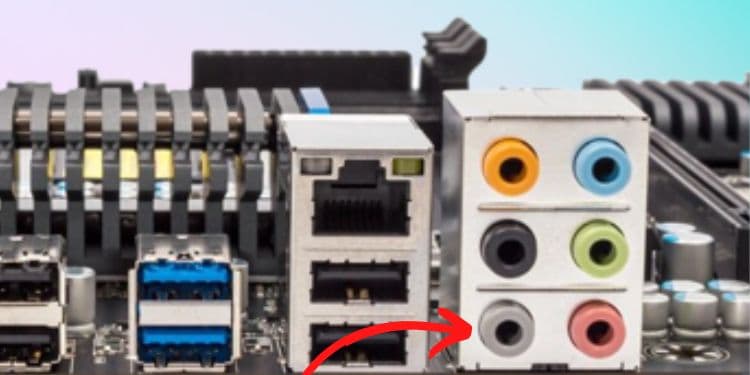
Another audio output port on the motherboard dedicated to the surrounding sound system is the Side Speakers-Out or SS-Out. In fact, the presence of this interface allows for the setting up a 7.1 audio channel system.Furthermore, SS-Out can be of different colors – white, silver, or grey. But if your motherboard has no colors in the audio ports, you can check the label that indicates “side” and a speaker icon.
S/PDIF-Out
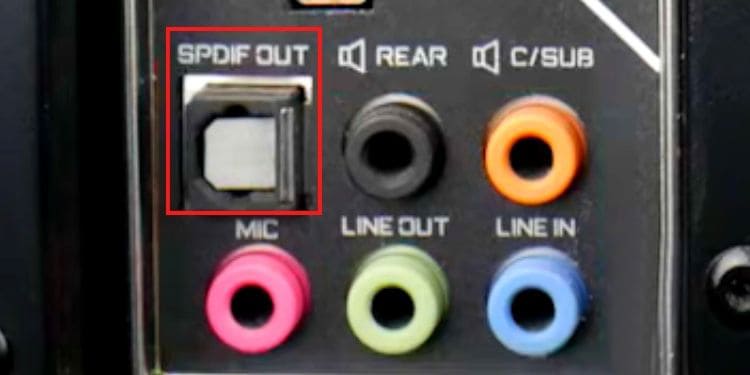
Until now, we’ve only covered the audio ports that work on analog signals. Now, let’s focus on the interface that outputs digital signals, the S/PDIF-Out (Sony/Philips Digital Interconnect Format), which is present in most modern motherboards.Unlike the regular ones, these optical ports are square-shaped and may even illuminate lights out of them. Moreover, they require digital optical cables for transmitting digital signals from a PC to an audio output device.Depending on the model, you may find different types of optical ports on a motherboard. These can be identified using the labels “Digital Audio Out”, “TOSLINK”, “S/PDIF”, etc.
Coaxial-Out
Coaxial-Out is another digital output port on a motherboard. Basically, it works very similarly to the S/PDIF-Out port, and the only difference is that it requires a copper or RCA cable to establish a connection with your speaker.An advantage of using Co-axial Out is that they do not just carry audio but also digital signals. Moreover, it supports comparatively higher bandwidth (up to 24-bit/192kHz) than the optical port (up to 96kHz). Thus, Co-axial-Out is best for connecting home theater systems, digital speakers, and headphones.
Other Ports
Apart from just the dedicated audio ports, you can also use other motherboard ports that can carry audio and digital signals. These include USB, HDMI, and DisplayPort.Indeed, USB headphones are getting popular these days, and they even have a microphone attached. In such a case, you do not have to look for dedicated input or audio port; you can simply connect the device to a USB port. Now, the headphone automatically adapts to the digital interface, and your computer installs the required drivers to function correctly. Undoubtedly, this is much more advantageous on laptop motherboards that do not have the standard 3.5 mm analog output ports.Likewise, HDMI speakers have also gained popularity in the past few years. Thus, if you’re looking to connect such a device to your motherboard, the correct port you should look for is the HDMI ARC. Unfortunately, this port might be absent on some models.
Verdict
Connecting your speakers and headphones (open-back or close-back) to the appropriate port isn’t as challenging as one might think. If you already have stereo headphones, you can directly plug the device into the dedicated headphone out port on the motherboard.Likewise, if you’re trying to connect a home theatre system to your PC, you can use either the optical/coaxial or the standard 3.5 mm ports. In the case of the latter one, you can utilize all the Line-Out, CS-Out, RS-Out, and SS-Out ports.Suppose you have a 7.1-channel setup (two rear speakers, two front speakers, two side speakers, and a subwoofer). Here, you need to connect the front speakers to the Line-Out, the rear speakers to RS-Out, the side speakers to SS-Out, and the subwoofer or central speakers to CS-Out. You can follow a similar technique to connect 3.1, 5.1, or 6.1 surround systems to the motherboard ports.