Follow our guide on how to fix an SSD that does not show up in the BIOS to save yourself countless hours and money spent on shipping “not working SSD” back and forth.
Why Is My SSD Not Showing Up in Bios
Before you read through the troubleshooting steps, be aware of the most common causes that an SSD is not being recognized.
The SATA power and data cords are faulty/not fully connectedThe driver for the SSD is not enabled in the BIOS settingsThere is a physical problem with the motherboard connector pinsThe drive itself is malfunctioning/defective or brokenThe SSD drive is not formatted or is not assigned a drive letter
The steps listed below will directly address all of these issues. The order in which you perform the troubleshooting is critical, so please don’t just jump to random steps midway and instead go methodically from the first step to the last one. The order is meant to narrow down the possible causes, as oftentimes, it’s tough to pinpoint why a hardware part is not showing up.
How to Get Your System to Recognize the New SSD
Check the Cables!
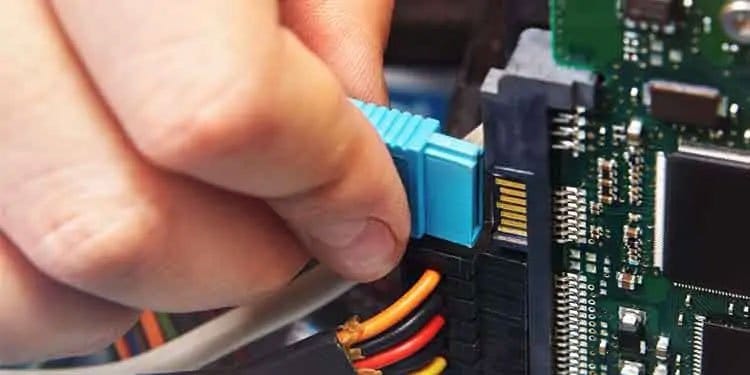
You can save hours of troubleshooting if you find that the SSD was into the wrong motherboard connector. Maybe the SATA cable was faulty or did not make complete contact.This step will help to physically examine the connector cables from the SSD to the motherboard and power supply. They are usually around the edges of the motherboard, either on the right side or the bottom side.
Unplug the SSD from the motherboardClean all SATA cable endings and the motherboard connector pinsCheck that your PSU has enough power to support an extra hard drive Always press the SATA cables firmly until they click/snap in placeEnsure there are no extreme creases and bends in the cables Ensure that the motherboard pins are not bent
Confirm That the Motherboard Drivers Are Up to Date
The first step is to check if your motherboard has the latest driver installed. If the motherboard driver is outdated, it could have issues detecting some newer models of SSD’s.
Update Your Storage Controller Driver
If the SSD is not showing up in BIOS, you can troubleshoot it in the following way:
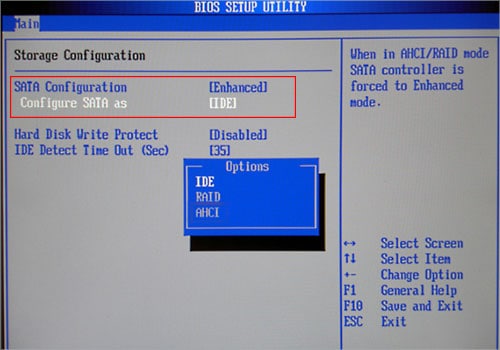
Reboot the computer and spam the appropriate key until BIOS opens upLocate the SATA configuration menu Select the option of “Configure SATA as” and set it to “IDE.”Save changes and restart, the SSD should appear in the BIOS device section upon reboot
Whenever you install new hardware parts, the computer automatically detects and configures them.
Formatting an SSD to Make It Appear in BIOS
Formatting was often a quick fix when I was trying to recover DATA from older hard drives in the past. From personal experience, I resolved most of my issues after correctly formatting the hard drive.To conduct this procedure, please follow these steps:
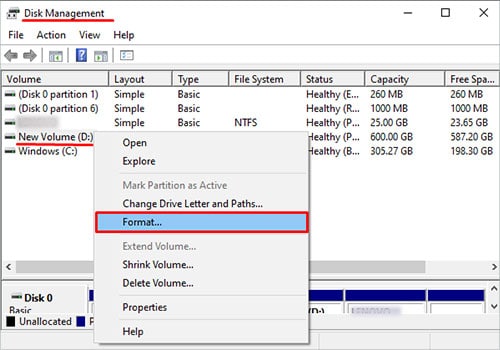
Open the windows menu and click on the search fieldType in the word “RUN” and press enter You will see a command menu appear where you need to type the phrase “diskmgmt.msc” You will see the Disk Management menu appearLocate the SSD you are having trouble with and right-click on its nameClick on “Format” and format the disk by choosing the appropriate options.Choose If the hard disk will become the primary drive and what types of data to assign.Configure this prompt as per your liking and complete the process by clicking on “next.”
After formatting is complete, please restart your computer and check if the SSD is correctly recognized or working.I successfully resolved about 90% of the cases from my past dealings with difficult hard drives via formatting them.
Check if the SSD Itself is Defective
Do these small steps in order so we can narrow down the potential cause of your SSD issues.
Test the SSD with another set of SATA connectors and power cables to eliminate the possibility of faulty wires. If you don’t have a spare, swap the SATA cables from your main drive instead.Remove the SSD and plug it into another system if possible.
If the SSD is not detected on two separate systems/ builds, it’s most likely damaged or dead on arrival.
How to Enable an SSD Only by Using the BIOS Settings During Startup
Open the BIOS (click, click, click)Carefully read through the information on all tabs related to hardware and devices Ensure that any options and tabs labelled as “hard drive” or “storage” are not disabled.Some motherboard manufacturers will have a toggle switch, whilst others might have a tick box
All motherboards have a different interface configuration and the way you reach certain settings can vary. This is just the universal way of describing how to enable any disabled hard drives.
Try the Systems Devices and Hardware Diagnostics, Troubleshooter
The Windows operating system’s convenient built-in feature allows users to input commands and execute tasks manually. You can access the Hardware panel by clicking the windows key > Control panel on the right side. If the “Hardware and Device” troubleshooter is not in the control panel menu do this instead:
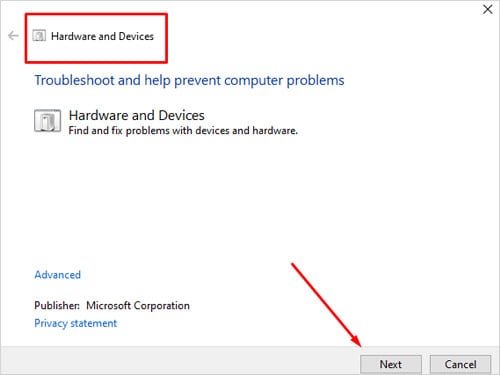
Open the windows menu and type “CMD” in the search field. After pressing enter, you will see a jet-black popup menu. To use the command prompt to run the diagnostics tool Type the following command – “msdt.exe -id DeviceDiagnostic,” then press the enter key.A menu will pop up asking the user to troubleshoot and prevent computer problems.
When the “Hardware and Devices troubleshooter” is run, the System will automatically configure and fix any current SSD issues. Press “Next” and wait until the program has entirely run its course.
Fix a Faulty SSD by Assigning a Different Drive Letter
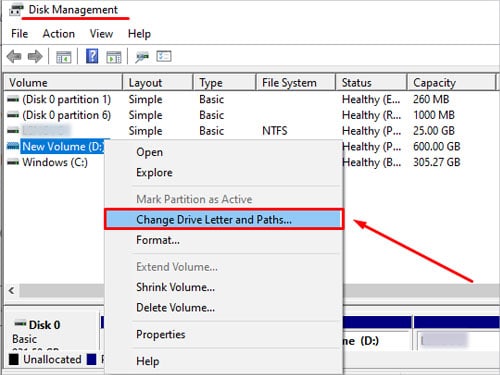
What is an SSD drive letter? It is simply the letter assigned to a hard drive so that you can differentiate between the various installed hard drives on your computer. To see the current letter associated with your main hard drive, go to the start menu and locate the tab called “this PC’. Typically the primary storage is called “C”, and the reserved or secondary ones are “F” and “E”.To apply and assign a new letter to a drive, you need to open the Disk Management tool.Surprisingly, just applying this fix can sometimes force your PC to recognize an unknown hard drive correctly (windows coding works in mysterious ways).
Check for Memory-related Issues Associated With a Faulty SSD
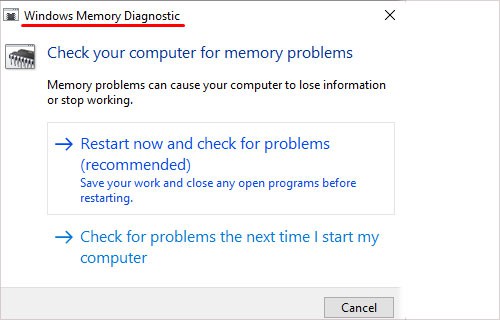
There are certain times when the SSD itself is appropriately working. Still, due to an error generated in the RAM, this can hinder the detection of a newly added hard drive. RAM is responsible for assigning easily accessible memory to all computer components in need, including hard drives. For proper communication between both devices, make sure to fix any present memory issues with a simple to run diagnostics tool.Running the windows memory troubleshooter can take a long time. Time taken depends on the severity of the memory leak or issue; make sure you don’t have any immediately urgent work on that computer. After the process finishes, the computer will automatically reboot itself.If you have performed all the steps above and the new SSD still doesn’t show up, you should be covered by a warranty. In that case, return the SSD to the seller and ask for a replacement.
Can You Recover Data From a Faulty SSD?
Suppose you already have essential information and data stored on the SSD. In that case, it is still not showing up as adequately connected/missing or malfunctioning.The best resort is to send the SSD to a specialist dealing with data extraction. You can also do this yourself, but it would require a computer with an already working primary drive. Here is the only step to recover data yourself:
Download any reputable third party Data Recovery software and run it on the drive
Let the software run its course and see which files it could recover. The more read/write cycles that SSD has had, the harder it is to recover. But it’s worth trying before you throw it away.
How to Detect if Your System Is Not Recognizing Your SSD
From my personal experience, sometimes a newly installed SSD will not show up in the BIOS but instead, appear in the devices tab.How to check if the SSD is listed under the hardware section in the device manager
Open the start menu for windows and type in “Devices and Printers” in the search field.Double click on the device with a PC/laptop icon and select hardware Scroll down in the menu until you find “Disk drives” in the Type field Confirm if the SSD you just plugged in is present or missing in that list.
How to Set an SSD Drive as the Primary Hard Drive?
The primary drive refers to the drive that your computer uses to load up any installed operating system, be it Windows Mac or Linux. A mismatch occurs the most when installing more than one hard drive simultaneously, as the motherboard will struggle to guess which one has an operating system.
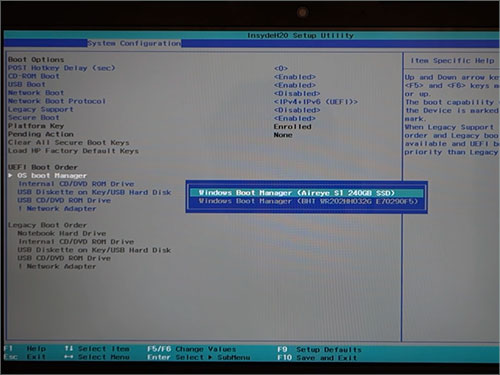
Open the BIOS/UEFI menuNavigate to the section with hard drives/storage devices Find the option called “Boot Priority” or find something similar Set the SSD to number one, or change it to the first position if applicable
How to Initialize Any SSD (Windows)
Before you do these steps, your SSD must be selected as a secondary drive, not a primary one (see the steps above on how to change priority). Plug any new SSD and start your computer for the initializing prompt to appear.For Windows 7 and older versions, the procedure is different
Right-click on your computer icon and click “Manage.”Click on Disk Management from the control panel
For Windows 8 and newer versions, the steps are:
Click on Start, and then type in “Disk Management” in the search.When the Disk Management screen opens up, you will get a notification asking you for permission to initialize your SSD.There will be a tab with two different options presents:Choose “GUID partition table (GPT)” and click OK.MBR stands for Master Boot Record and should only be selected in legacy software compatibility issues. For all other cases, GPT is superior.Right-click on the tab “Unallocated” and click “New Simple Volume.”Follow all remaining steps by clicking on “Next.” You will be asked to assign the newly initialized SSD a drive letterMake sure that the drive letter is different from “C” to prevent any crashesThe last screen is a prompt to perform a Formatting Partition. This step partitions the newly added hard drive so that information can be written and removed as fast as possible.
You have successfully formatted the SSD, and it is ready to be used.
My SSD Just Disappeared From My System After a Shutdown
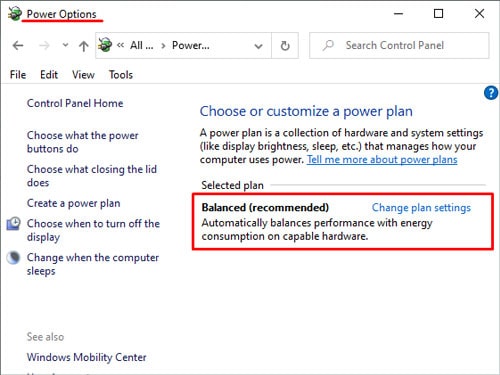
Suppose you experience an unexpected power outage or accidental system shutdown. In that case, the operating system can fail to recognize an SSD drive upon reboot. The first way to solve this issue is to reconfigure your Windows power optionsTo optimize the power settings (of the battery, UPS or wall power draw), follow these steps:
Open the Start menu and type the keyword “Power Options.”Press Enter and locate the tab that says “Balanced Power Plan.”
Tick the box and reboot your computer.An alternative way to solve this issue is to connect the SSD that is not recognized via a USB cable directly to one of your USB ports. Use the set of USB connectors on the back of your Desktop for optimal power draw.After your computer recognizes the hard drive, unplug it and then install it directly to the motherboard.
Summary
Two leading causes for an SSD that is not showing up as plugged in
The drive is physically not correctly connected via the cables. The drive is not configured correctly and formatted
When it comes to troubleshooting SSD’s more often than not, the solution is something incredibly mundane and simplistic. Something as minor as how Windows assigns that drive its letter can be the difference between the System recognizing the presence of an SSDA last note about the second-hand market for complex drive parts in particular:Abstain from buying used SSD drives! You never know if they have bad sectors or have too many write/read cycles already to the point where performance is horrific.
