It is reported that on many models of HyperX headsets mic does not work. This is particularly seen more on the HyperX Cloud model. nThis problem appears to be caused primarily by bugs in the headset firmware and audio drivers. HyperX has already addressed the issue by issuing firmware updates.There are other reasons too for this microphone issue on The HyperX headsets, which we will discuss throughout this article.
What are the Reasons for Hyperx Mic not working?
How To Fix A Hyperx Mic That Isn’t Working?
First of all, ensure that your HyperX headset is connected properly. Most HyperX headset mics models have a dedicated Mic mute button. If you see the status LED on the mic is muted. To make the Mic active, press and hold the Mic mute button for a few seconds. When the mic becomes active, the headset will play a notification beep.
Allow Access to Microphone
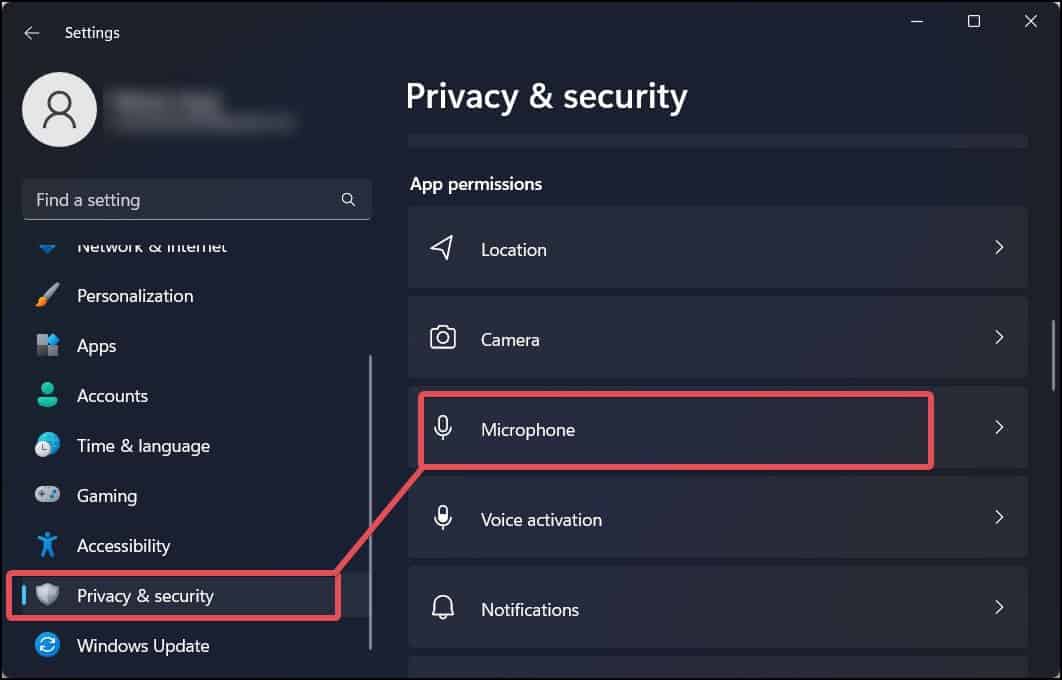
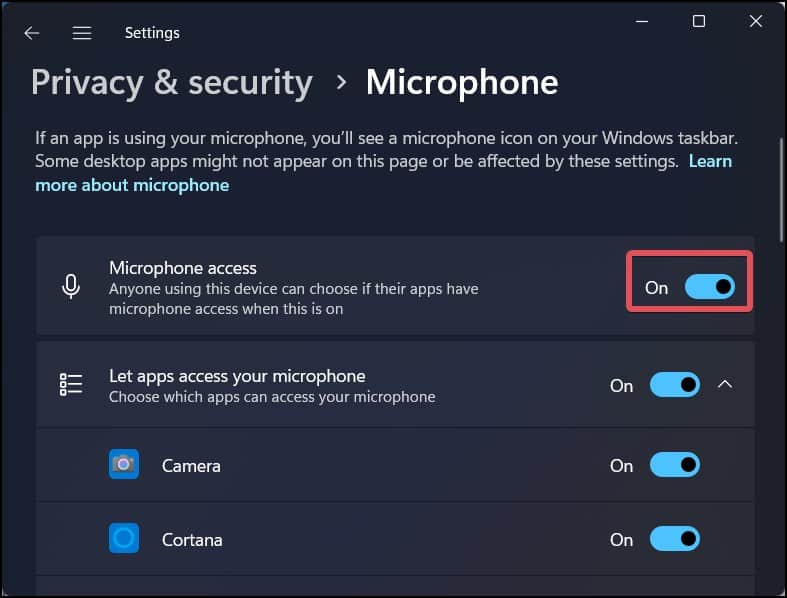
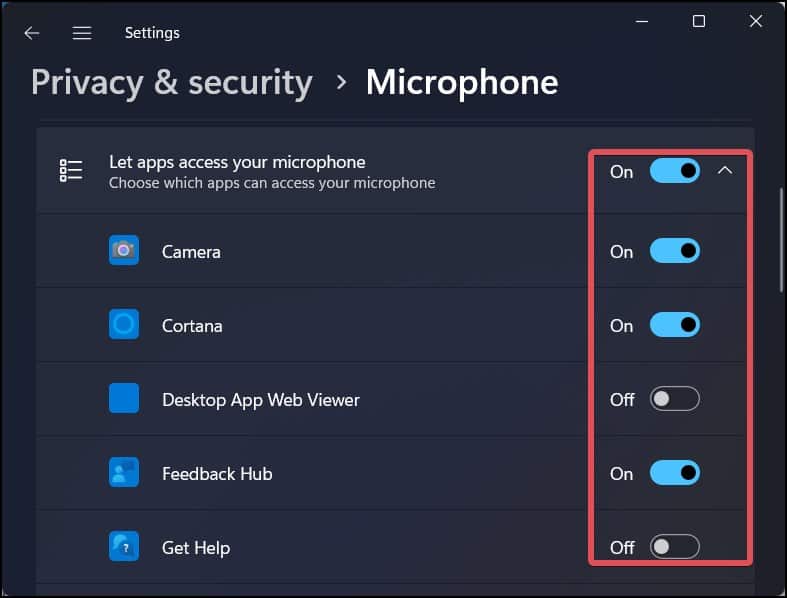
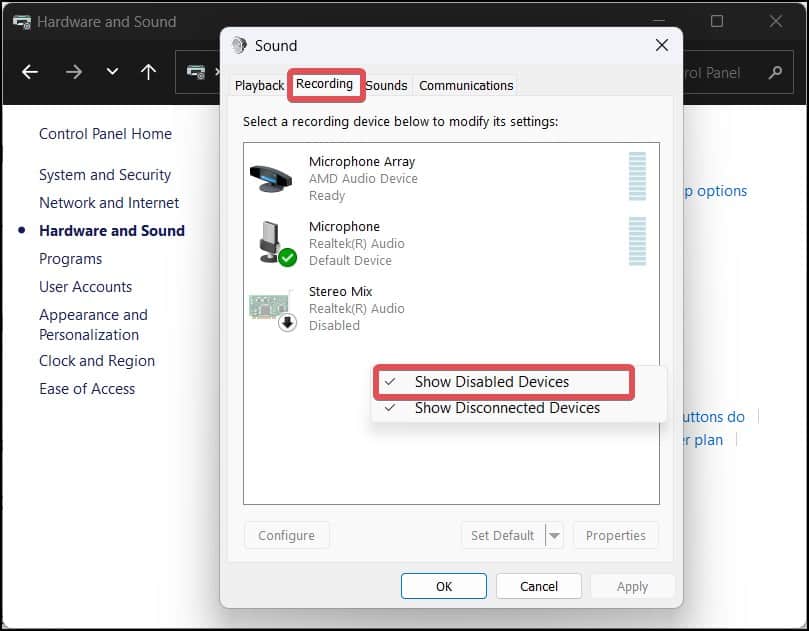
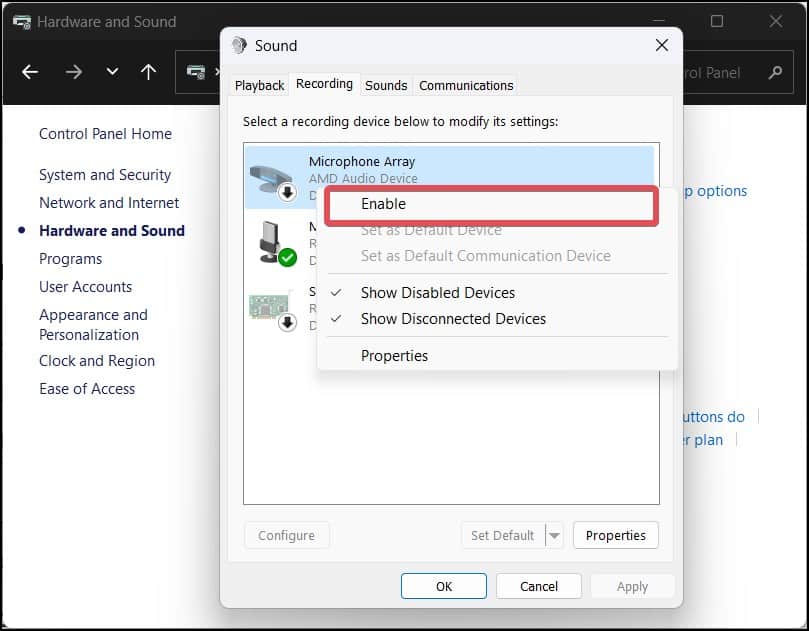
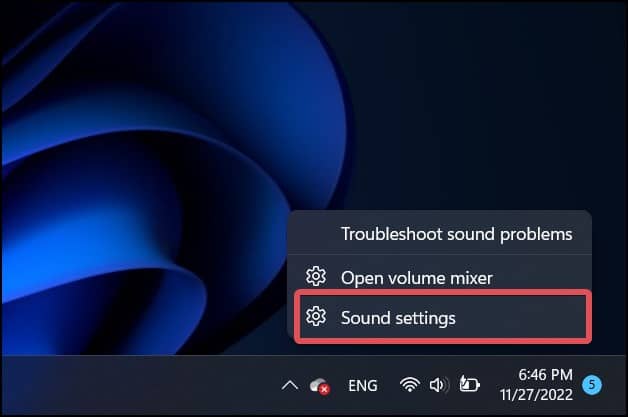
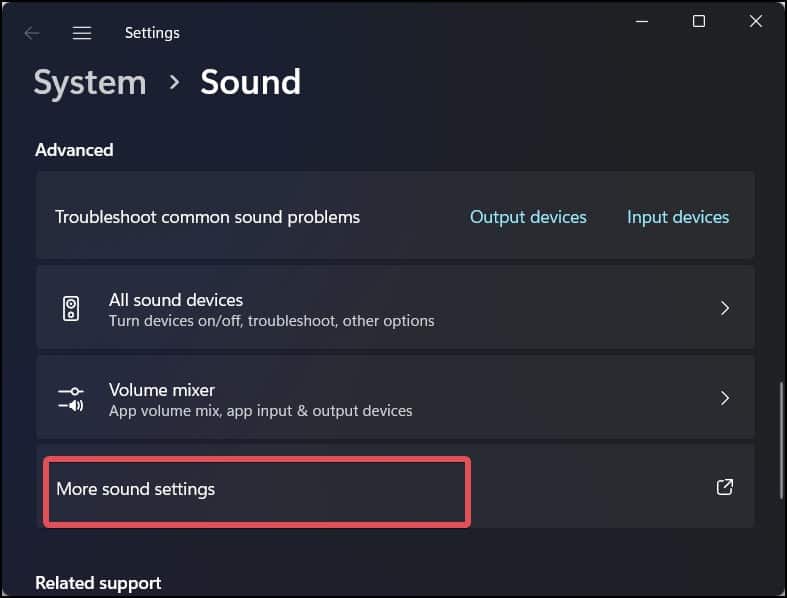
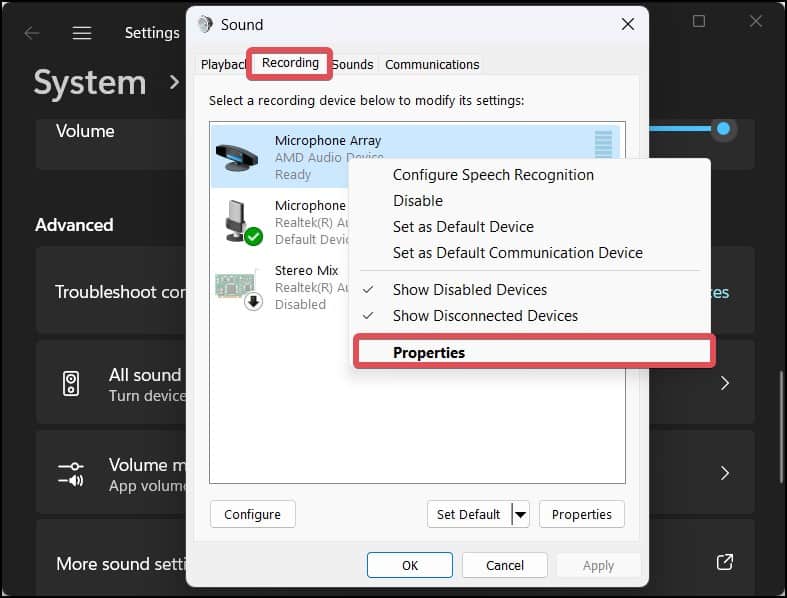
Most of the time, the microphone is disabled in the Windows settings. The microphone access also may be restricted to some specific apps as well. As a result, the HyperX mic works well in some apps but not in others. To enable the HyperX mic and to allow its access to restricted applications, follow these steps.
Set the Microphone as Default Device
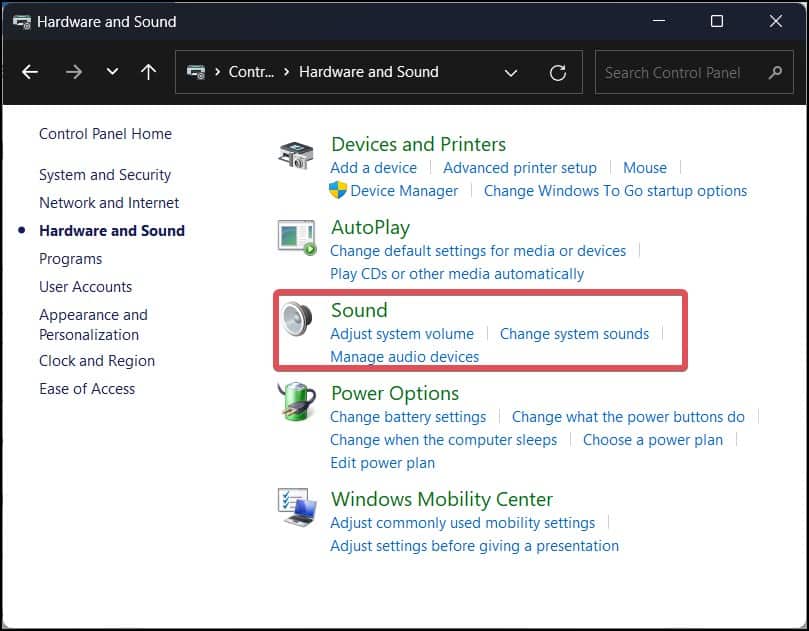
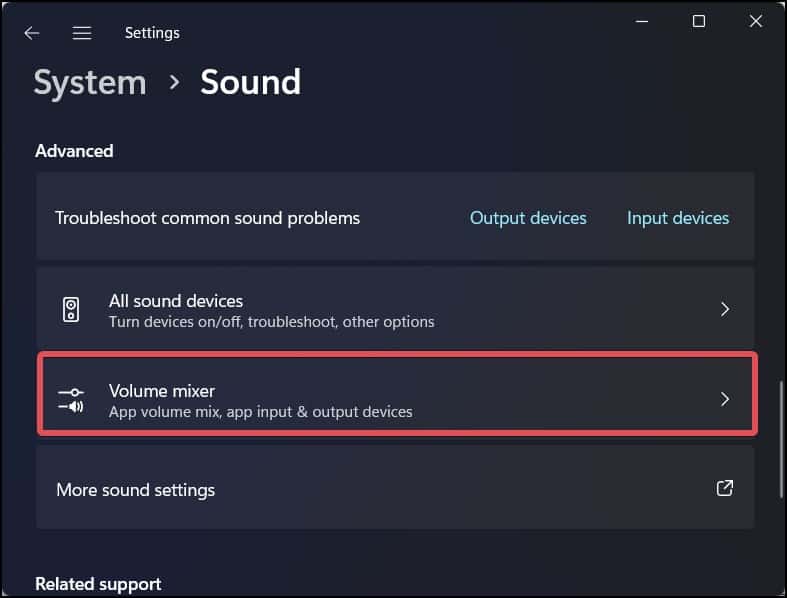
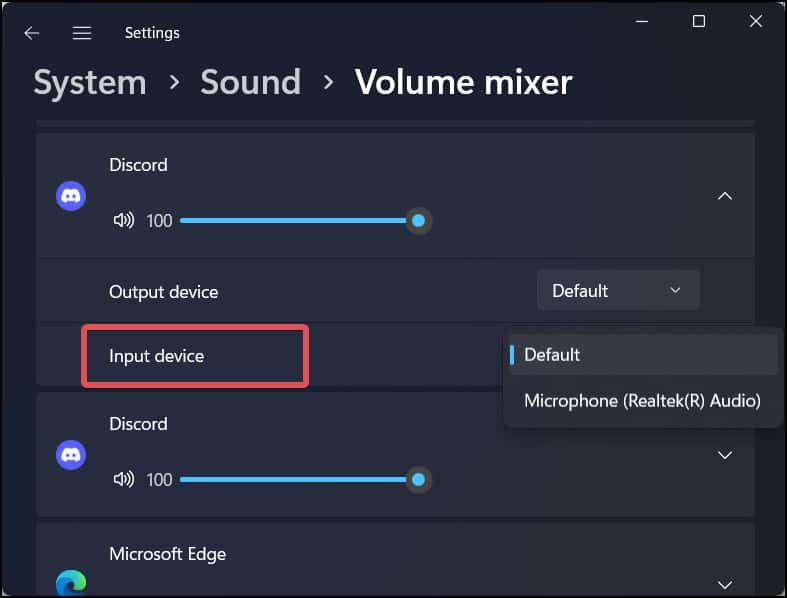
If you are constantly switching around the sound input on your computer, the default recording devices might not be configured correctly. When this happens, the mic on your HyperX headset might not function. You can change this by setting the HyperX mic to default. If you prefer having the HyperX mic as the default one for specific apps, follow these steps to do so.
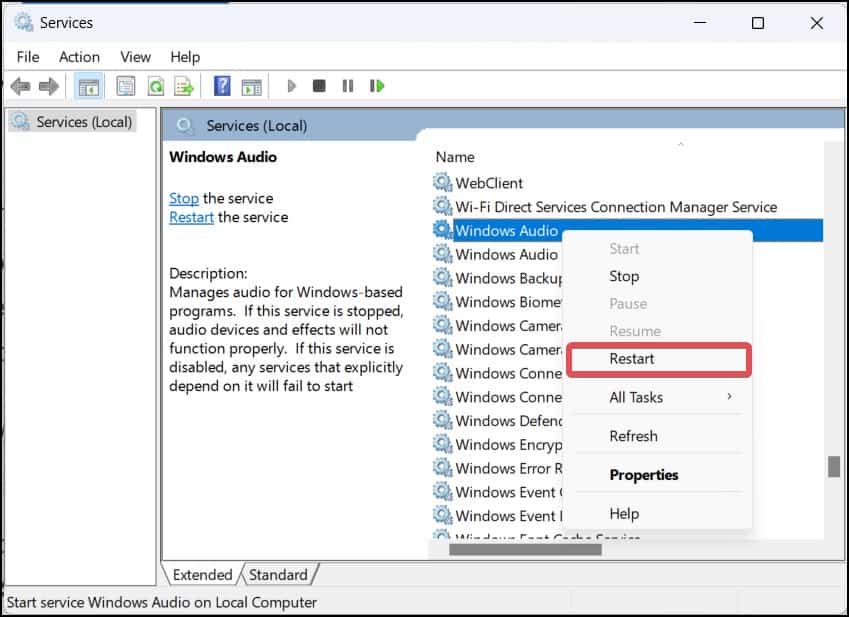
Reset Windows Audio Service
Windows audio services manage all the audio devices connected to the computer. This service starts during the system startup. If it fails to do so, it can lead to issues with the sounds and microphones. Sometimes minor glitches in the service also can bring issues to your audio peripherals. Restarting this service can help you bring the microphone back to life.
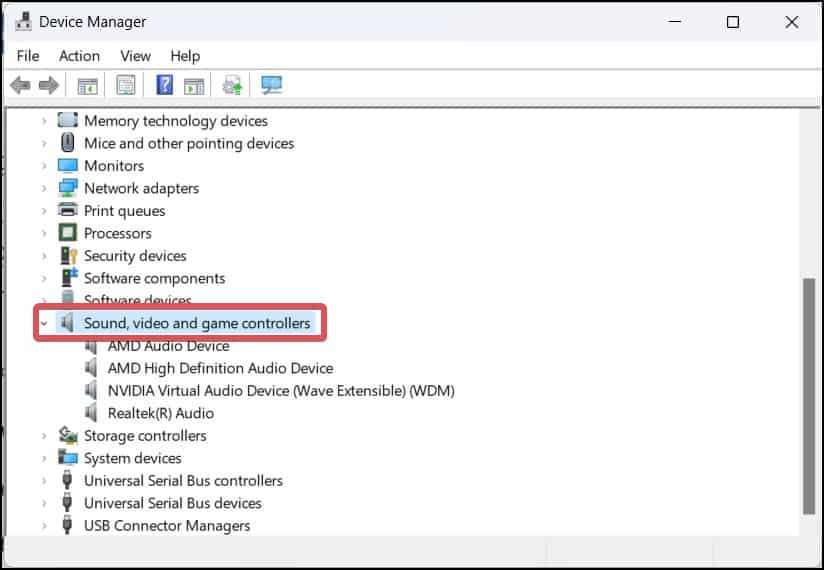
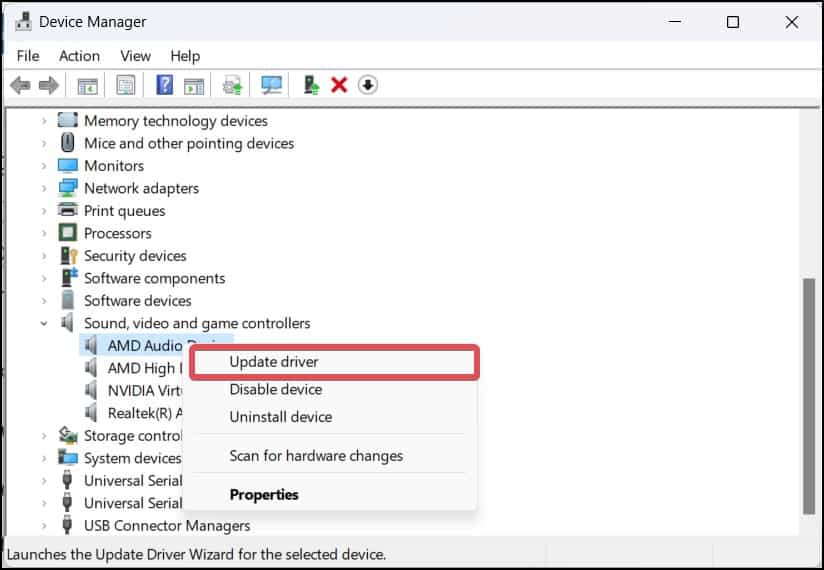
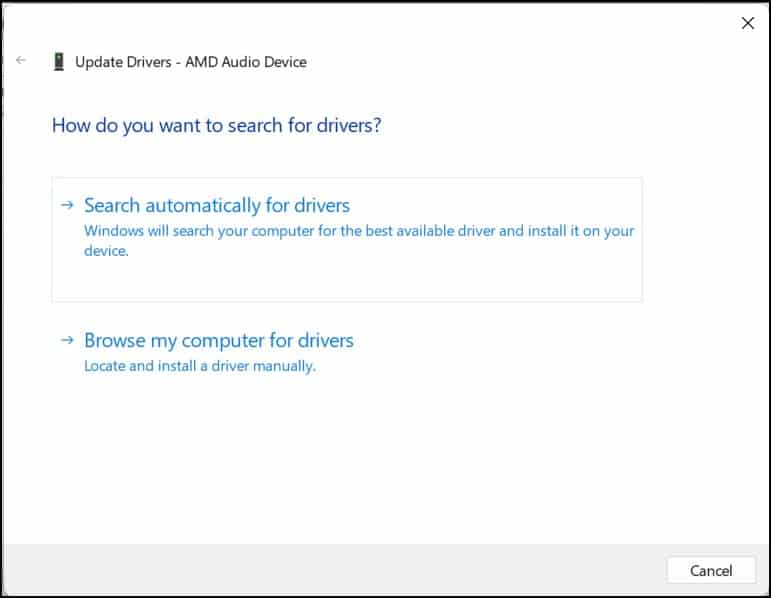
Update the Audio drivers and Firmware
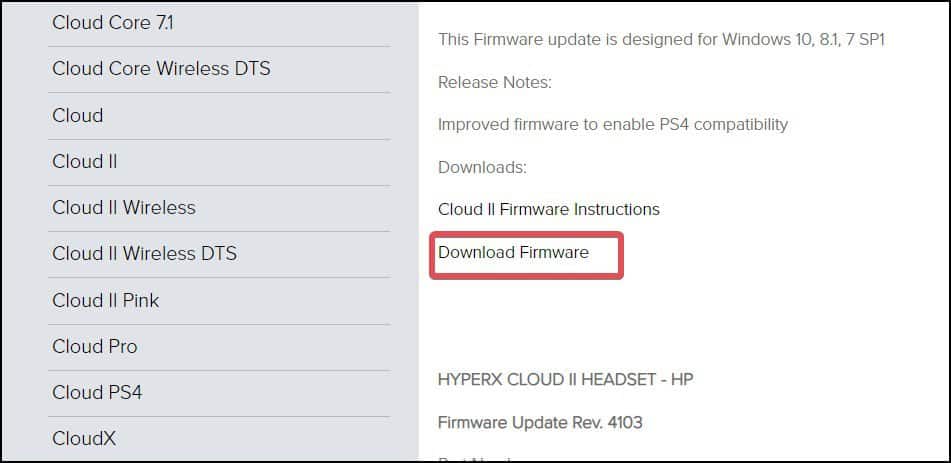
It is not uncommon for drivers to get corrupted. They also fail to perform properly when they get outdated. Especially with audio drivers, OEM or even generic driver updates are rolled out to enhance the performance of the audio devices and get rid of the existing bugs. Therefore, it is ideal to manually install audio drivers and perform firmware updates at regular intervals. Hyper X also releases Firmware update for headsets that can solve the glitches in the drivers and also improves the performance of the Headset and the mic. Here’s how to manually update the firmware of HyperX headsets.
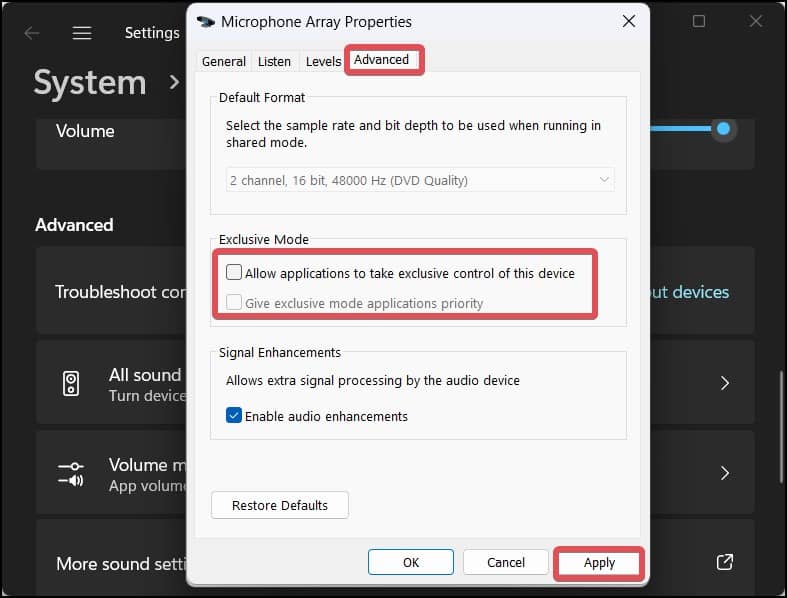
Disable Third-party audio software
If there is third-party audio software installed in your Windows device, they can take control of your audio peripherals and cause issues like this one. To restrict this, you can disable such software.
Reset Windows
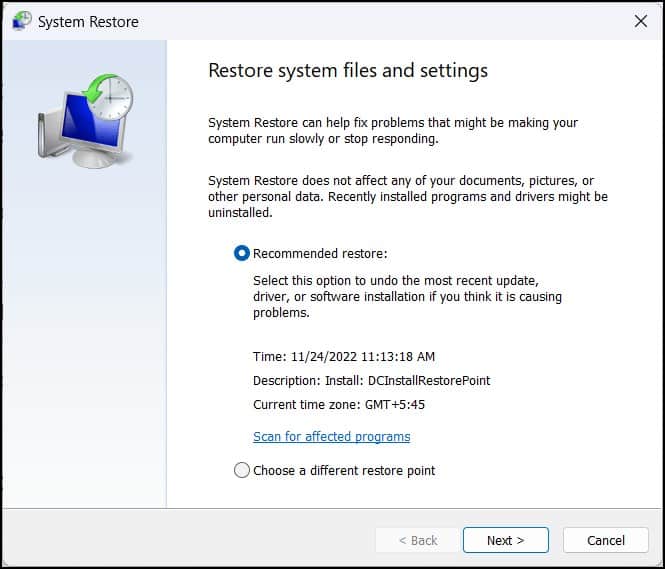
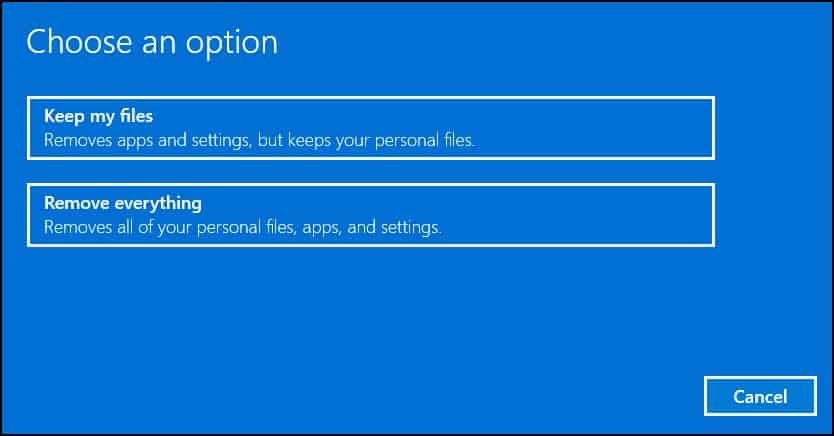
The issues with the audio and microphones are sometimes even triggered by the glitches in the operating system. Also, if some of the major settings are misconfigured, it can bring such consequences. You can also try a system restore before performing the reset. This will revert the system to the point before the problem occurred. However, this only works if you have created a restore point prior to the microphone issue. Check the mic after the restoration. If this does not work for you, perform these steps for a System reset. This will fresh install the Windows and solve most of the problems with the system, including your microphone.This process will Reinstall the Windows, remove the apps that you have installed, restore all of the changes you made to the settings, and restore apps installed by the manufacturer. This will most probably solve the issue of your microphone.
Contact the Service Center
If none of the suggested fixes works, the issue must probably lie with the physical unit of the HyperX. Your unit’s microphone must have been defective from the start, or it may have been damaged for some reason. In such cases, it is recommended to contact the HyperX support centre.
