Interestingly, Logitech has introduced various types of mice since 1982. Whether you’re looking for a normal mouse for your work or you need a multi-functioning gaming mouse, Logitech provides a variety of models.Well, each type of mouse has a different way of setup. So, let’s jump into how you can use a wired, wireless, and Bluetooth-supporting Logitech mouse.
How to Setup a Wired Logitech Mouse
With the advancement in technology, most of us have started using wireless mice. But, some still prefer a wired mouse over the wireless one.While using a wireless mouse, you may face issues with the batteries or their connection. The same thing applies to a Bluetooth-supporting mouse. However, when you use a wired one, all you have to do is connect the two ends, and your mouse works completely fine unless there are faults in the cables.Thus, when we buy a wireless Logitech mouse, we often receive a cable along with it. This is to ensure that if there’s a fault in our wireless connection, we can use the device with the help of the wire.Well, setting up a wired Logitech mouse is not a difficult task for anyone. Here’s a general idea of how to do it the correct way so that you do not face any issues with the connection:
How Can I Setup a Wireless Logitech Mouse?
A wireless mouse runs with the help of radio frequency. Hence, you can even control it from a long distance compared to a wired mouse. However, the obstacles in between may not help you use the mouse from a much larger distance.If you possess a wireless Logitech mouse, you do not require a dedicated cable to use the device. Nonetheless, you need to check whether your mouse has a USB dongle or not. Well, most Logitech models provide this inside the box containing your mouse. If you have lost it, you can use the Logitech Unifying receiver that helps connect multiple Logitech input devices.Before proceeding with the steps below, ensure the wireless Logitech mouse supports your operating system. Now, let’s dive into the detailed guide on setting it up.
Configure Your Mouse Battery
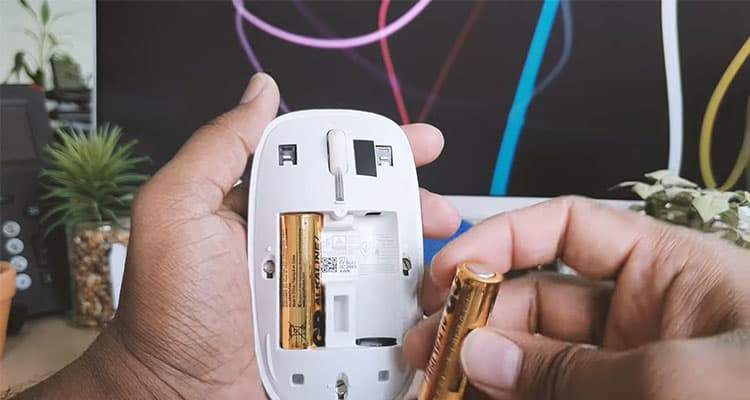
A wireless mouse won’t function if your battery is drained. So, it’s important to insert batteries that are working.Well, the cells on your Logitech mouse support mostly AA and AAA batteries. For any confusion, we have a comprehensive guide on how to change batteries of a wireless mouse.In some Logitech mouse models, you have an option to charge your mouse battery. When the device is charging, you see a green light glowing on its dedicated LED.
Plug in Your Wireless USB Dongle
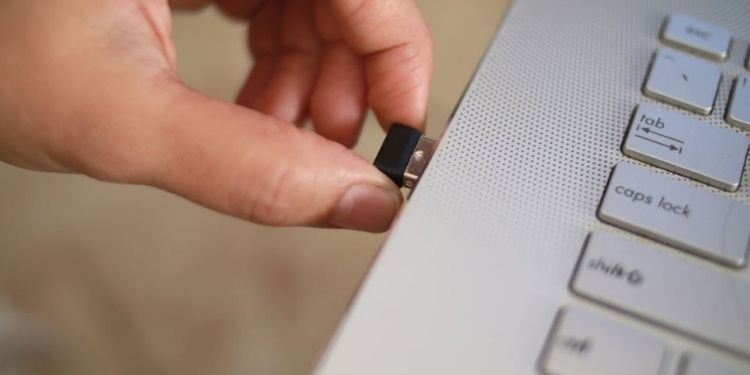
Once you’ve configured your mouse batteries, now you need the dedicated USB dongle. Remember that you can’t use another device’s USB receiver. Well, all you have to do is take the USB dongle and insert it into an available port on your PC. Make sure you have plugged it well so there won’t be a connection issue.
Turn on the Mouse
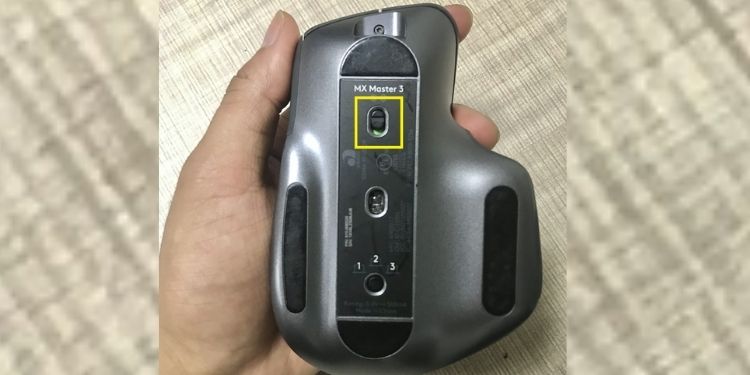
The next step is to turn on your Logitech mouse. The button you’re looking for should be in the bottom section of the device.By default, the mouse is turned off. To turn it on, simply drag the slider toward the On letter printed on the device. Depending on your Logitech mouse, you’ll have to slide it upwards/downwards, while in some models, you’ll have to drag it sideways. In some models, you can simply press the ON button to turn on the mouse.Check for the glowing light to ensure your Logitech mouse has turned on. For some reason, your light may not work. In such a case, simply unplug the USB dongle and plug it back again. Then, turn on the mouse, which should now light the LED.Note: We recommend turning off the mouse once you’ve finished using it. This way, your battery is saved.
Check Connection
In some Logitech mice, you may have to press the Connector button in your mouse. However, most modern mice have removed this option. This means that once you plug in the USB and turn on your mouse, the connection will establish automatically.But, if your model requires a connection to be set up, simply find the connector button on your mouse. Then, use a pin to press it.Finally, check if your wireless Logitech mouse is working or not. To do so, drag your mouse around; if the pointer is moving well, Bravo! You’ve done it.
Install a Logitech Software [Optional]
The advantage of using a Logitech mouse is that you can use Logitech software to gain additional mouse functionalities.Well, you can download and install either Logi Options+ or Logitech G Hub. These programs help you change the mouse DPI or even increase the polling rate.
How Do You Set up a Bluetooth Logitech Mouse?
Unlike wireless mice, a Bluetooth mouse works only for a shorter distance. Even they use radio waves for communication but in a lower GHz. Well, the advantage of using this mouse is that you do not need to connect to any ports on your PC. This works with the help of a Bluetooth connection between the mouse and your computer.Setting up a Bluetooth Logitech mouse is quite similar to a wireless mouse setup. However, there are a few more added steps you need to do to ensure proper connection.Before moving on, make sure your Logitech mouse supports your OS. Also, ensure your battery is fine. Then, turn on your mouse and press the Connector button, if available. Now, head to the below guide to set up your input device.
Turn on Bluetooth
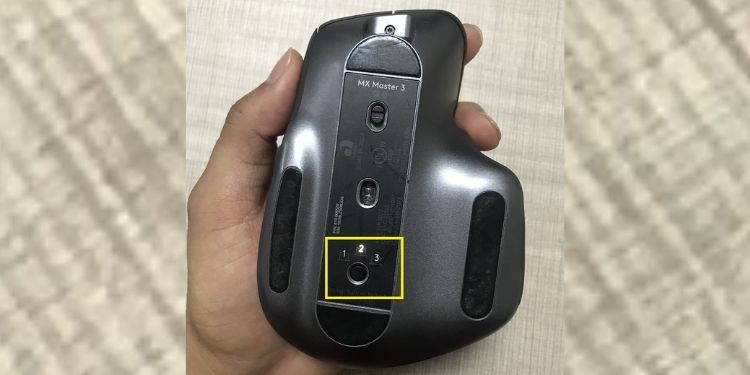
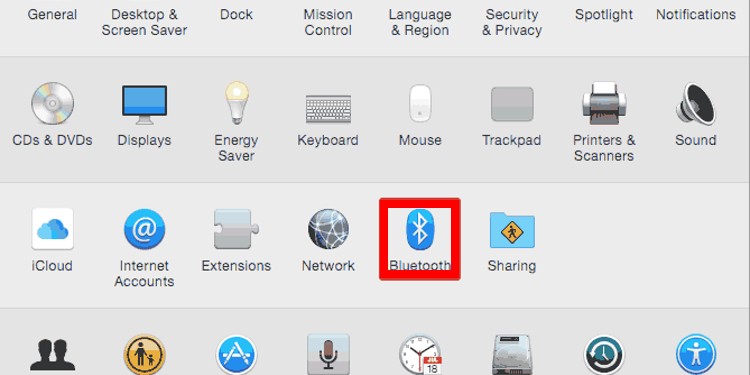
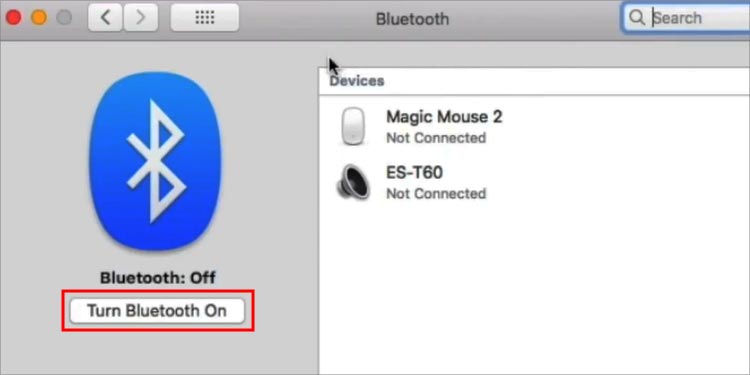
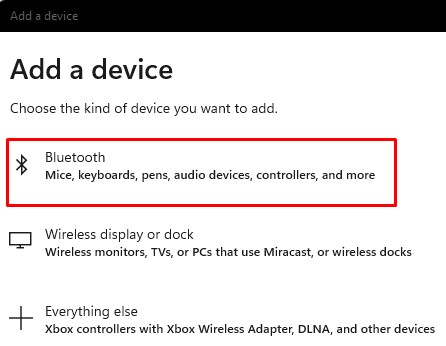
Firstly, you must turn on Bluetooth on your mouse and your PC. To turn on the Bluetooth of your mouse, navigate to the bottom and hold the Bluetooth button for a few seconds. This will make the light on your device blink continuously, meaning your mouse is in pairing mode.Along with the mouse, you need to turn on the Bluetooth of your PC. Here, we will explore the steps on both Windows and macOS.On Windows 11On MacOS
Pair Mouse With PC
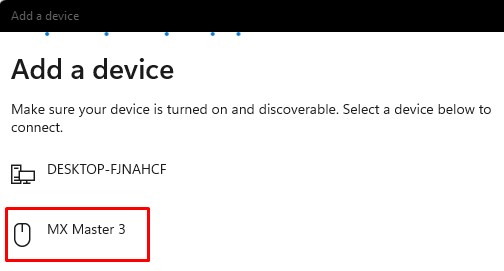
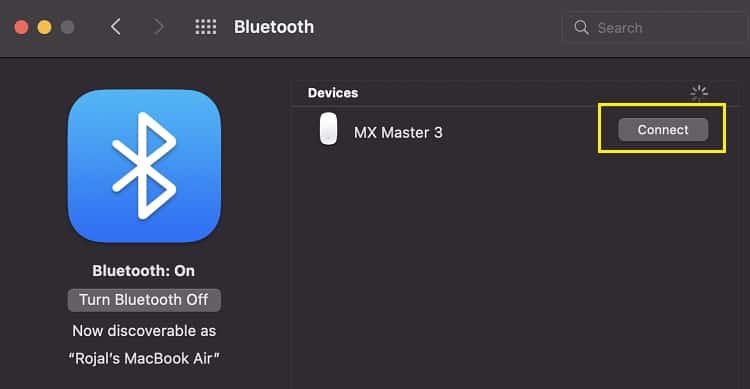
After you have turned on the Bluetooth on both mouse and PC, now you need to pair the Logitech mouse with your PC. Here’s a simple guideline to walk you through on both Windows and Mac.On WindowsOn MacOnce you set up the Bluetooth mouse, you can download and install compatible Logitech software to access additional features. But, if your Bluetooth mouse is lagging, read our other article that will help you fix it.
