The installation process itself is very simple, but some of the Windows 11 requirements, such as Secure Boot capable UEFI with GPT partition flavor, TPM 2.0, CPU, etc., have left many users stumped.So, in this article, we’ve detailed the entire process, from creating a bootable USB to meeting or bypassing the requirements as appropriate, and finally installing Windows 11.
Install Windows 11 Using Bootable Media
First things first, you’ll need a Windows 11 ISO. You’ll use this ISO to create a bootable USB and install Windows 11. CD-ROMs are rarely used these days, but if your PC has one, you can also apply the steps in this article to install Windows 11 using a DVD.
Step 1 – Create Bootable USB
You can use Diskpart if you’re trying to install Windows 11 on your current PC. But if you’re not familiar with diskpart, it’s easy to mess up. Or perhaps you’re creating a bootable USB for future use on other PCs. In such cases, the Media Creation Tool or Rufus would be better options.
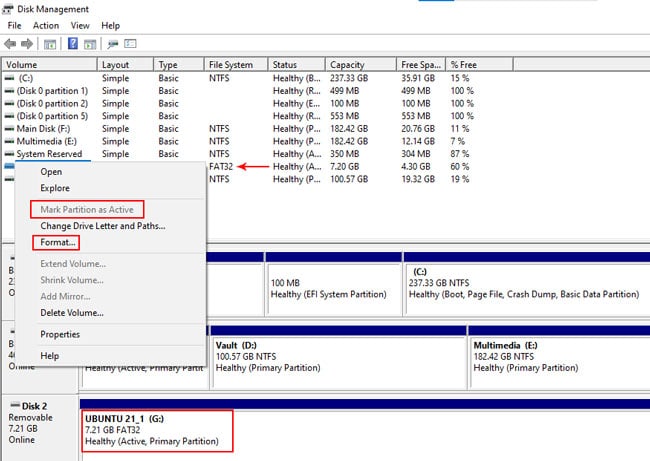
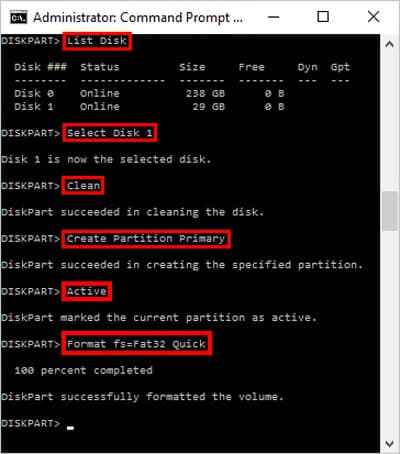
Disk Management / Diskpart
Here are the steps to create a bootable USB using Disk Management:On GPT drives, the Mark Partition as Active option will be grayed out. In this case, you should use diskpart instead, as detailed below.
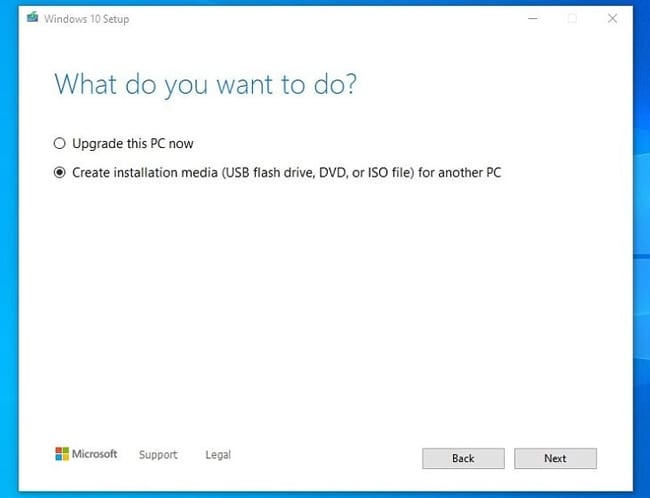
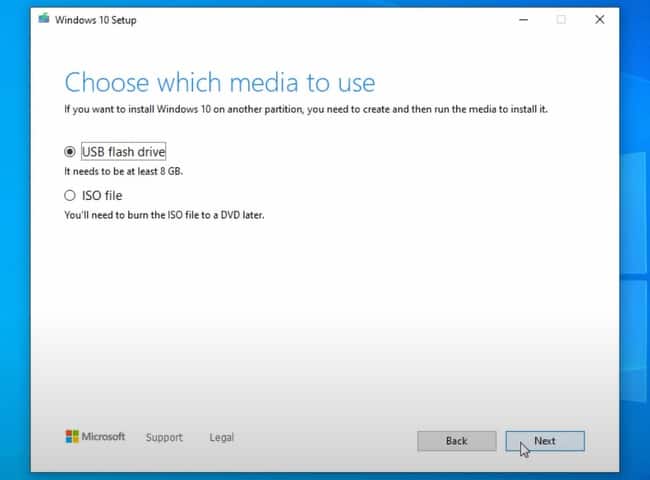
Media Creation Tool
Here are the steps to create a bootable USB using the Media Creation Tool:
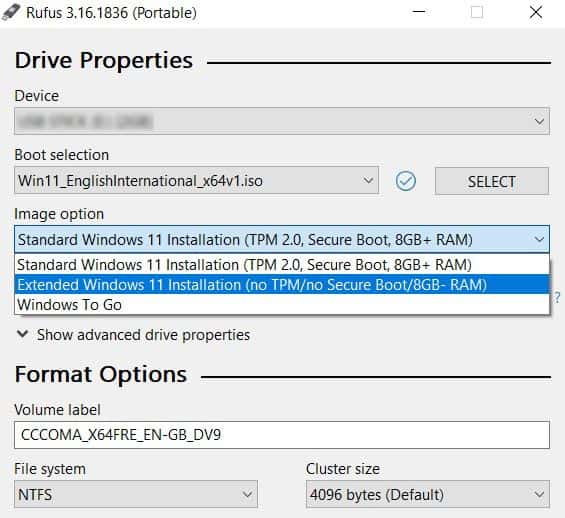
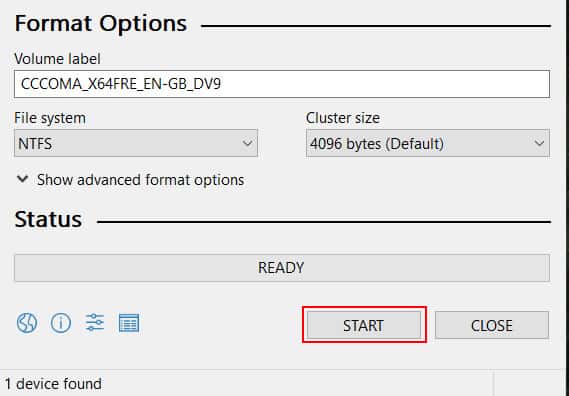
Rufus
Here are the steps to create a bootable USB using Rufus:
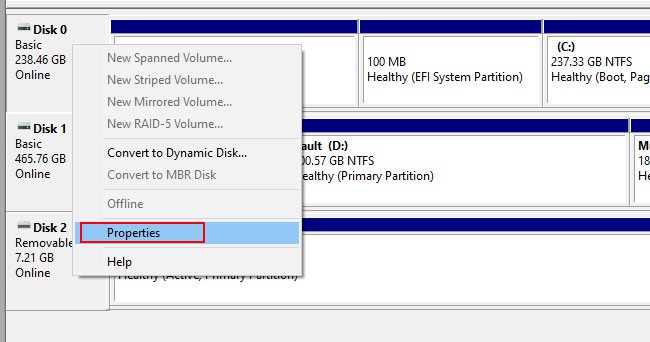
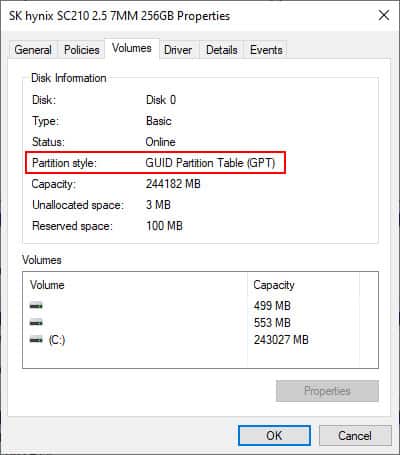
Situational – Convert MBR to GPT
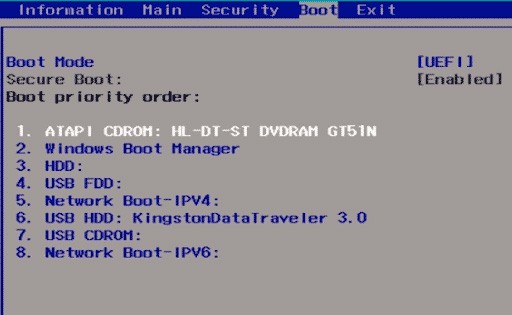
Windows 11 requires your PC to be running UEFI firmware with GPT partitioning. So, first, check if you’re currently using the MBR partitioning style on your system drive with the following steps:
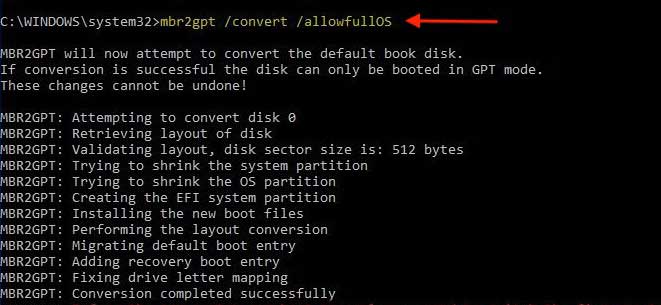
MBR2GPT
You can use the mbr2gpt.exe tool with the following steps:
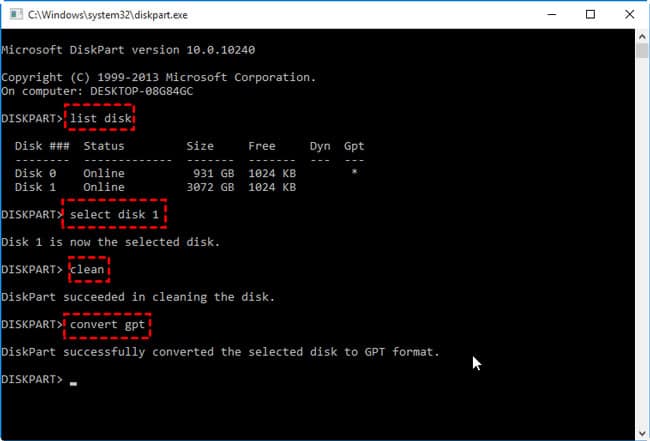
Diskpart
Unlike the mbr2gpt tool, the diskpart method requires you to delete all the data on the drive. So only use this method in case of empty drives or ones whose contents are backed up elsewhere.
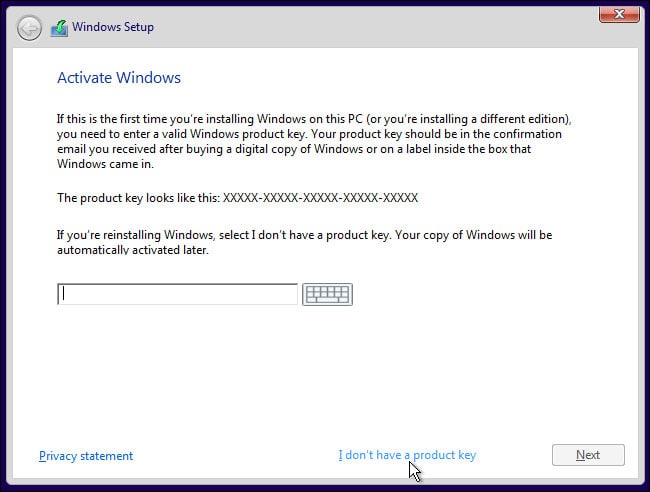
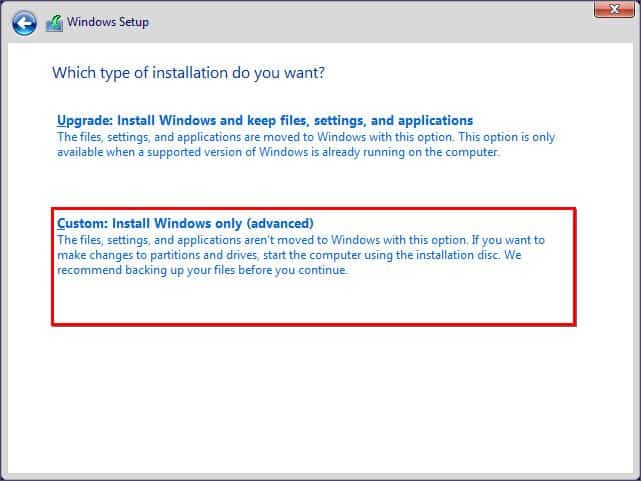
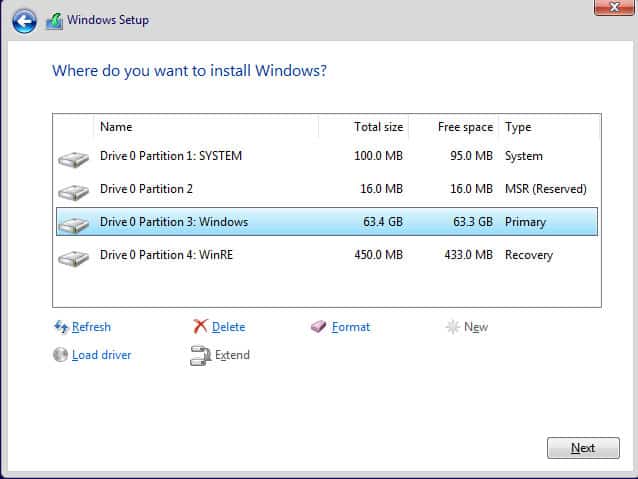
Step 2 – Install Windows 11
The final part of the puzzle is to simply use the bootable media to install Windows 11. Ideally, you should back up any personal files from the system partition (usually C:) so that you can format it later for a clean installation.
Related Questions
What to Do If My Windows Image Is Larger Than 4GB?
If your Windows image exceeds the FAT32 file size limit (4GB), you can split the image into smaller parts with the following steps: