This can happen if there are some issues with the sound drivers or if the audio settings are not tuned correctly. Generally, updating the drivers and toggling with the sound configurations solves the problem for most users. In this article, we have comprehensively discussed these fixes that can get rid of the problem for you and bring back your device’s sound.
Reasons for the Failed to Play Test Tone Error
How to Fix “The Failed to Play Test Tone” Error
Perform basic troubleshooting by restarting the computer. This error can sometimes generate due to minor system bugs, which get resolved with the device restart.
Outdated or corrupted sound drivers: The problem is commonly experienced by users with Realtek audio devices. In such cases, you get the message Realtek Audio failed to play test tone message. This can occur if the Realtek audio drivers are outdated or corrupted. Misconfigured Audio settings: You will get an Unable to play sound message with the test tone error. This happens if the audio configurations, like enhancements, sample rates, etc., are not adjusted correctly. Issues with the Audio hardware: This generally generates a Test tone error if you are using a faulty sound card with a USB connector or USB-based audio devices. Conflicting Audio Drivers installed by graphic card: This type of test tone error occurs with the message AMD HDMI audio failed to play test tone and affects the sound drivers when HDMI cable is used with the graphic card. Issues with the Operating system Viruses and Malware
Windows updates can sometimes fix the existing flaws in the system that can initiate such errors; therefore, ensure you have the system up to date. Also, perform a Malware scan as these troublemakers can be the reason for the problem with your audio.
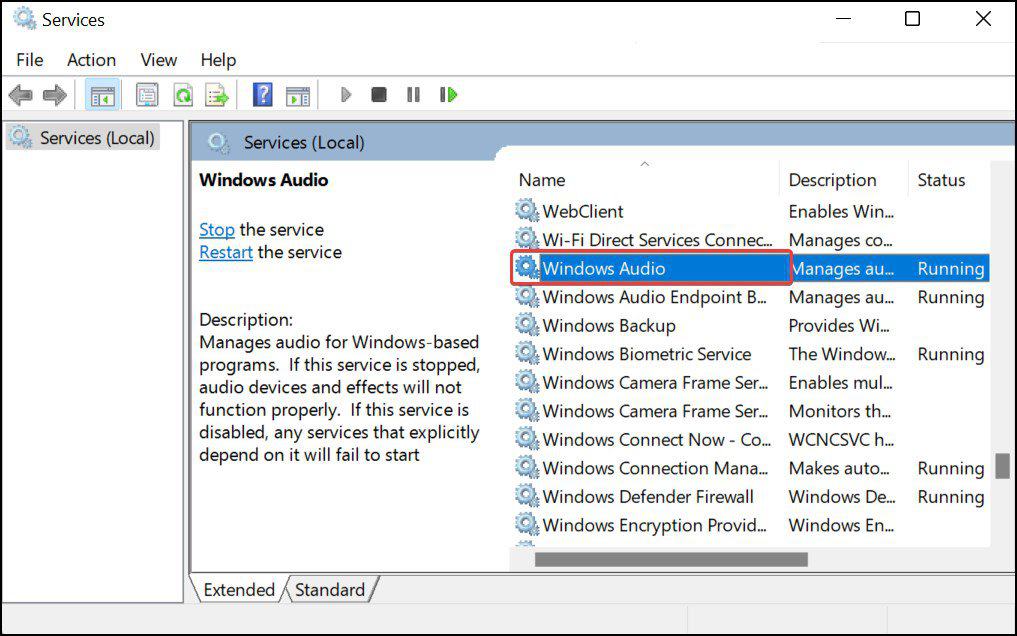
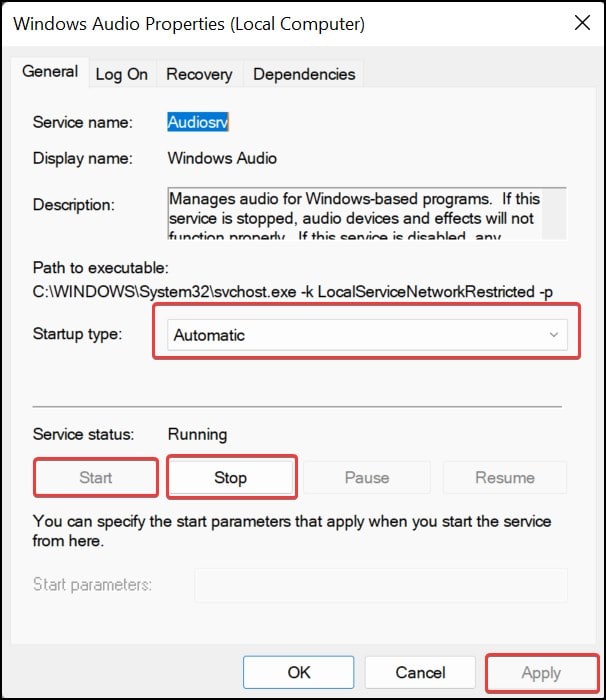
Restart Windows Audio Service
Windows Audio service is responsible for handling all the audio devices on Windows. This service, by default, loads up on startup. Because of some minor glitches with this service, the Failed to Play Test Tone error can pop up. To resolve this, restart this service from the Windows Services.
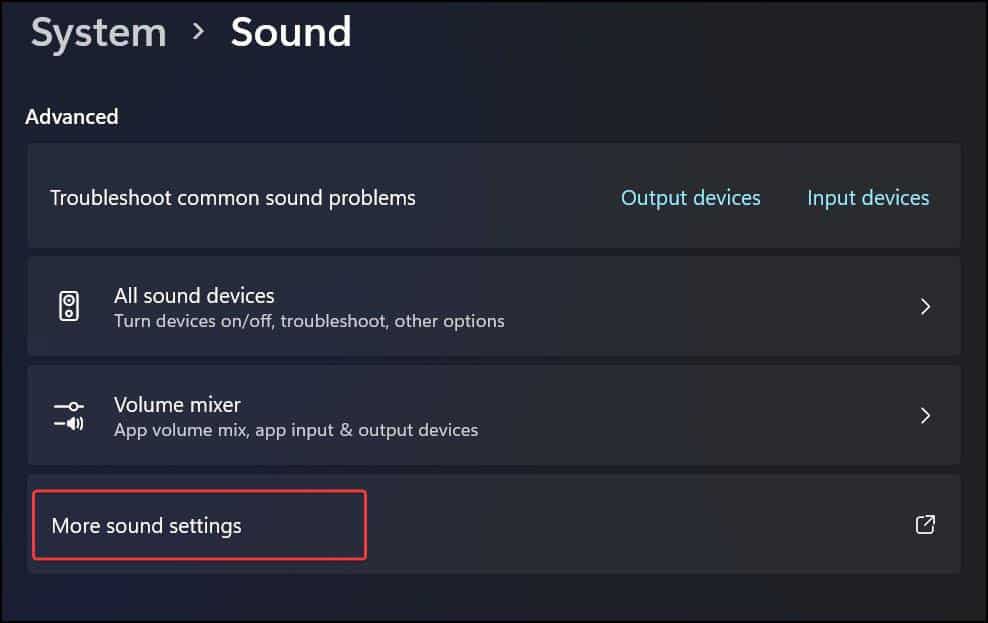
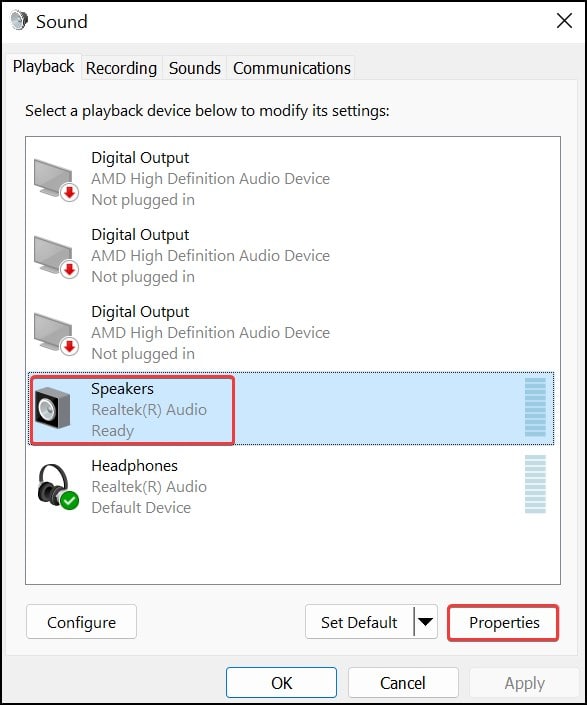
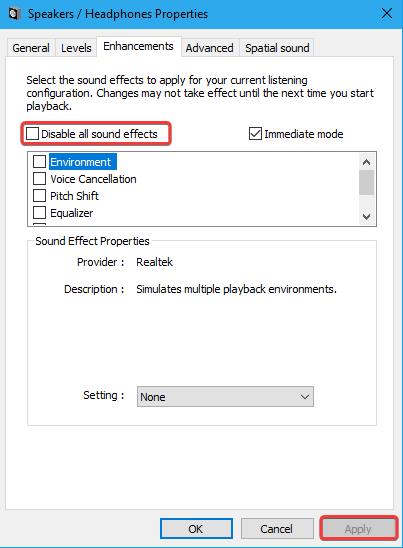
Disable Audio Enhancements
The Audio Enhancements features boosts the audio capabilities of the devices, which are by default enabled on Windows Devices for some audio devices. However, the system may not comply with these adjustments properly, and thus, the Failed to Play Test Tone may be generated. You can try disabling these enhancements and see if the issue persists.
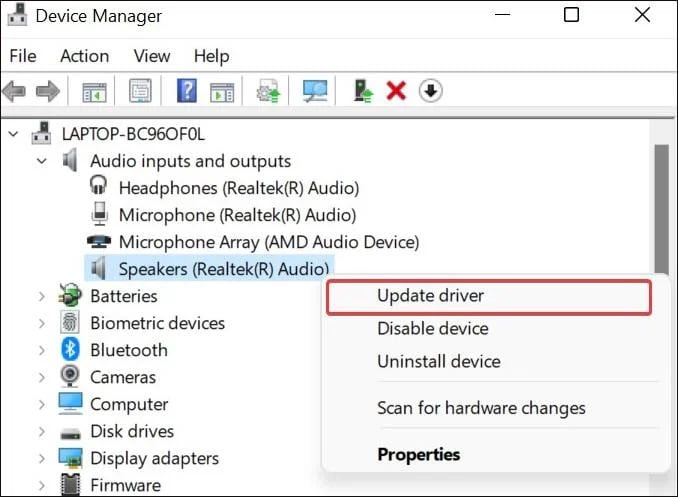
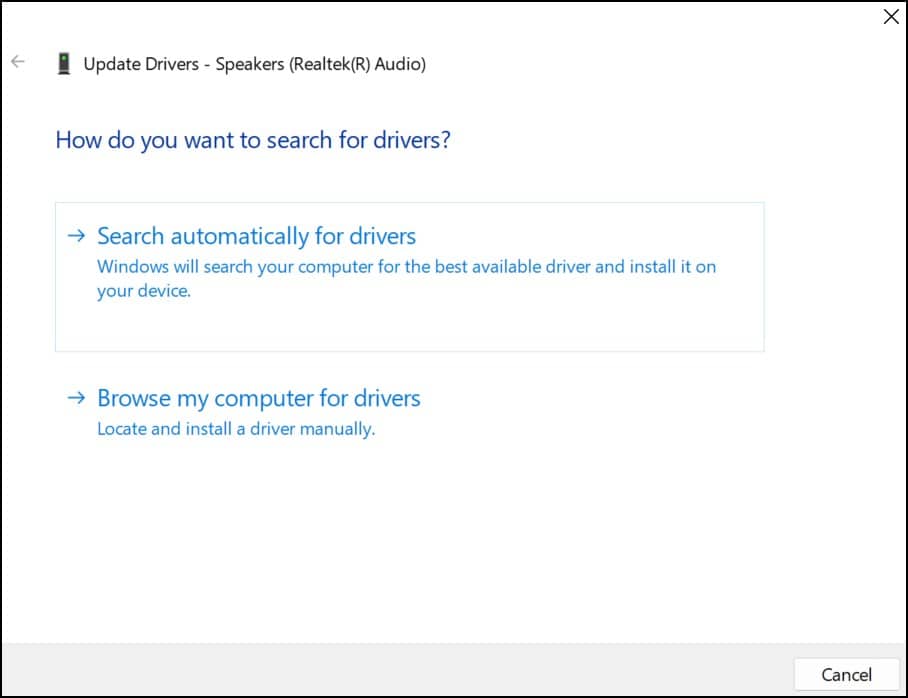
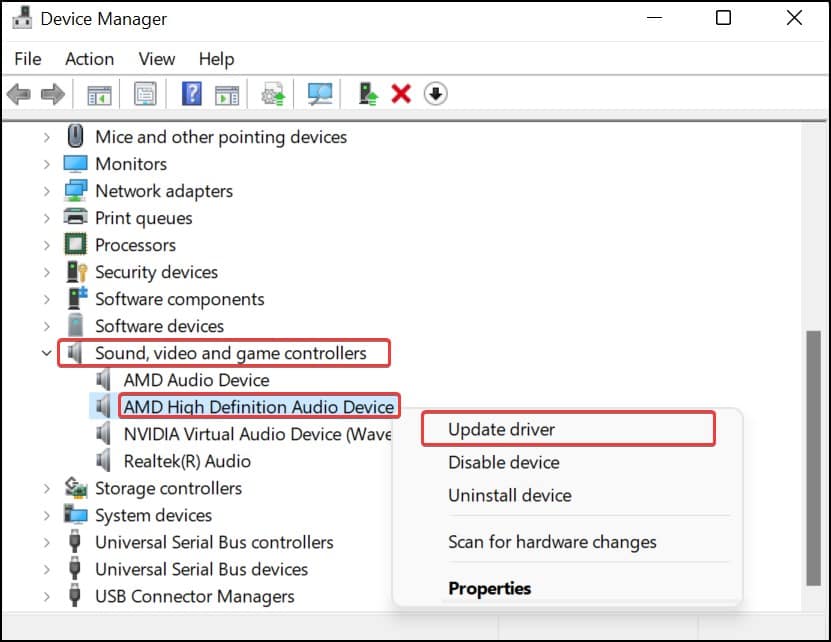
Update the Audio Drivers
Updating fixes the malfunctioning drivers and ensures compatibility with the system. Since issues like the Failed to Play Test Tone appear most likely due to the issues in the audio drivers, updating it offers a high chance of resolving the issue. Here’s how to update the drivers.You can manually update the audio drivers by downloading them from the manufacturer’s website. The drivers from the manufacturer are pretty stable and free of bugs and can get rid of Failed to play test tone error. In order to update manually, download the driver from the download center, extract the file, run the installer and restart the system when finished.
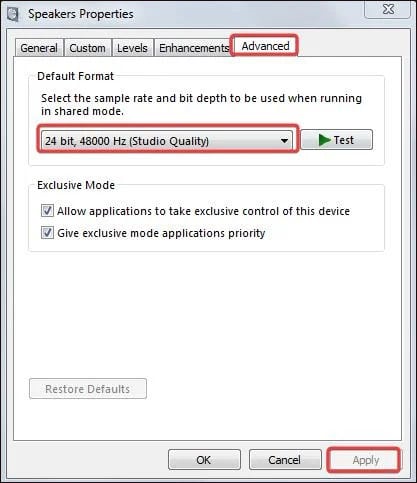
Change the Sample Rate and Bit Depth
The sample rate and the bit depth determine the quantity and precision of audio samples. If the sample rate and the bit depth are mismatched or misconfigured, you will get audio issues like distorted audio and even the Failed to Play Test Tone error.
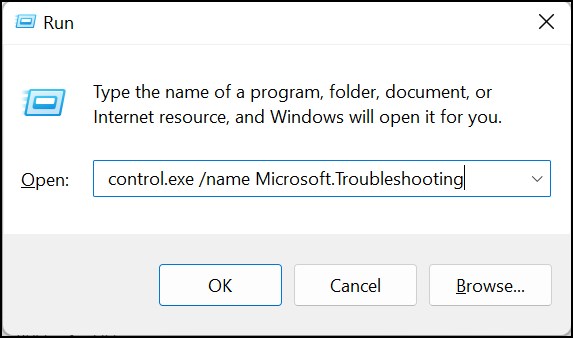
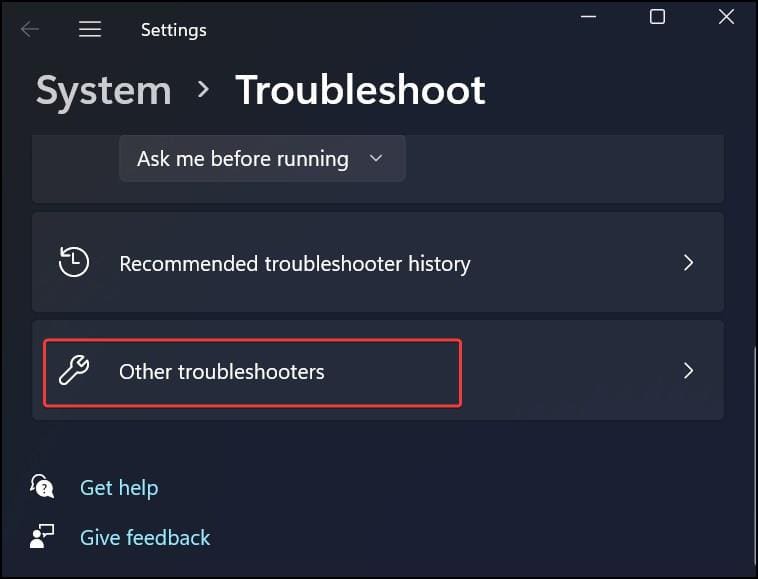
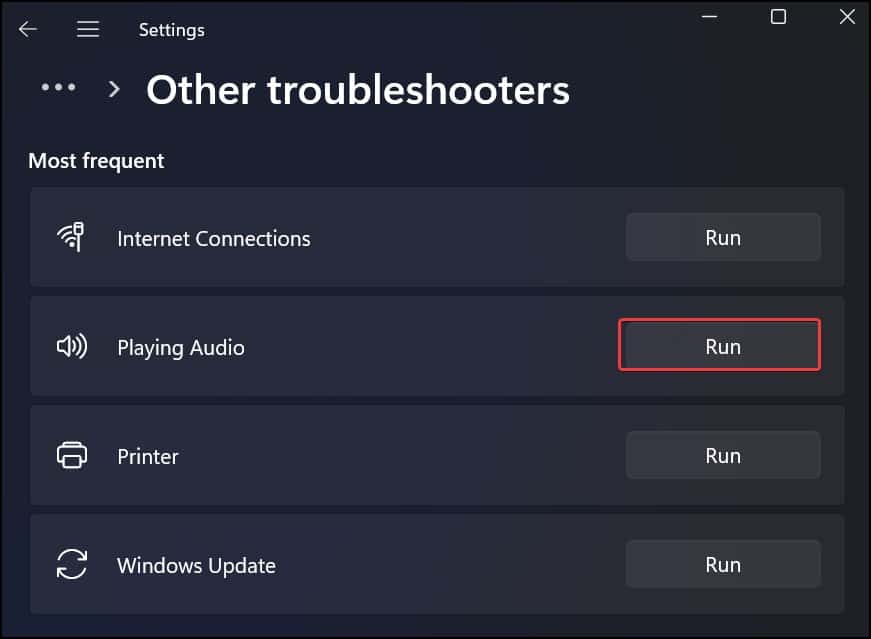
Use Audio Troubleshooter
The Windows operating system has a feature to troubleshoot the common issues of the network, system updates, and other hardware and software-related problems. You can also use the Windows troubleshooter to fix the common audio issues of the audio driver, headphones, and speakers.
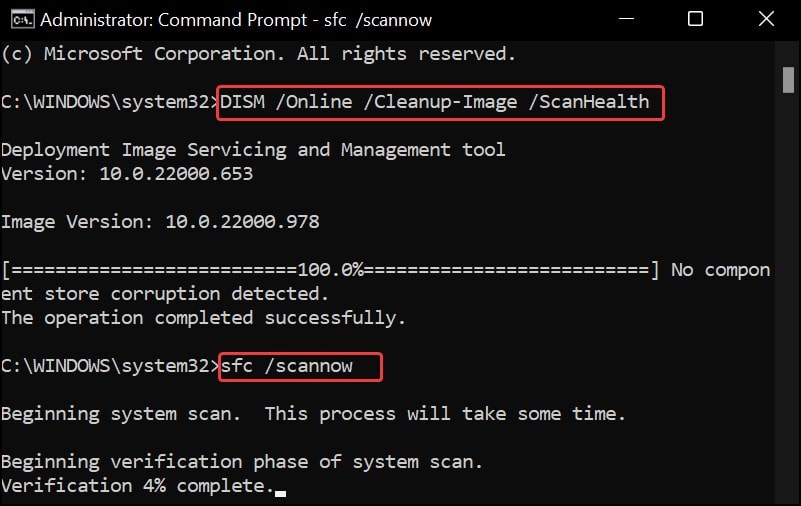
Run DISM and SFC scans
These type of issues can be generated if the system files related to the audio has suffered corruption. To deal with it, you can run the DISM and SFC scans. The DISM scan restores the Windows image, which contains the basic components to operate the Windows, including the audio configurations and files. While the SFC scans can diagnose and fix the integrating issues with the system files related to audio.
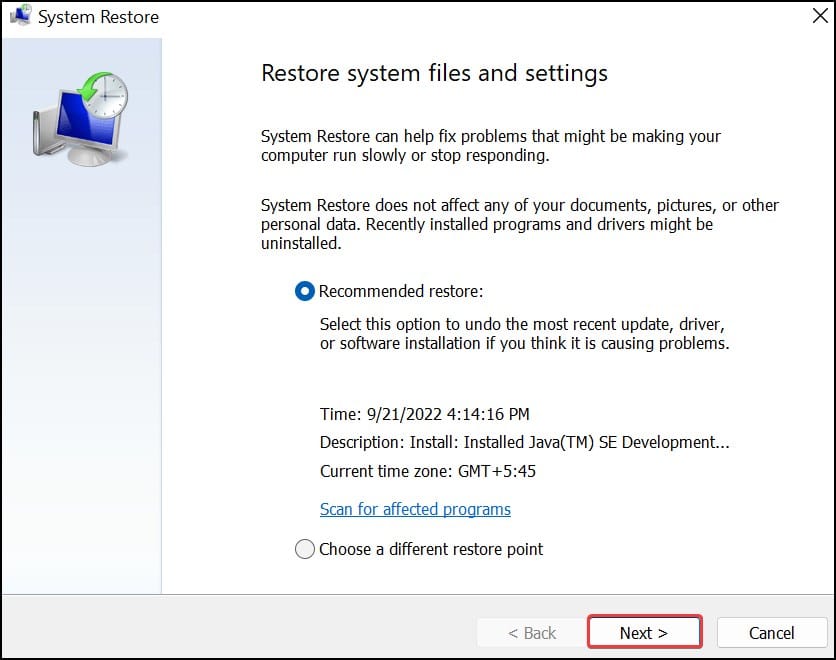
Perform System Restore
If any newly installed application, system updates, or configurations have caused this audio issue, performing system restore can revert them to their restore point and fix the problem. The system restore does not remove the user’s data and is a safe process to take the system back into its working state.1. Press Windows Key + R, type rstrui.exe, and hit enter.2. Click on Next. You will now see the saved restore point.3. Select the preferred restore point and click on Next.4. Finally, click on Finish to start the restore process.