Generally, you get a little chime sound when you connect the lightning port to your iPhone. But, if the sound plays/resumes erratically and charging also stops multiple times, a loose charging port is likely the reason behind it. Or it’s just the dirt causing the charging port to appear loose.However, if you are still able to charge the phone and can’t figure out why the port is loose, you can continue reading the article.
Why Is the Charging Port Loose?
How to Fix a Loose iPhone Charging Port?
Repairing or replacing the charging port may seem an obvious option. However, it’s pretty expensive, and the cause of the loose port may be completely different than what you expected.
Dropping the phone: While you may not notice any damage on the phone after dropping it, the port might have been affected. And even though you cannot prevent every accidental drop, you can protect it using a phone cover. The cover absorbs the shock and prevents the port from being loose. Low-quality chargers: Using non-certified or third-party chargers can make your charging port loose as they don’t fit in perfectly. So, use the lightning cable that originally came with your iPhone device so that it fits perfectly onto the port. Using the phone while charging: Many people use their mobile phones while charging, due to which the phone goes through many bends and turns. Also, it puts up a lot of stress on the charging port. And if you continue doing it, the port becomes loose over time. Thus, let the phone charge without any movement.
So, before spending money fixing your port, consider the following fixes to save you unnecessary costs.
Clean the Charging Port
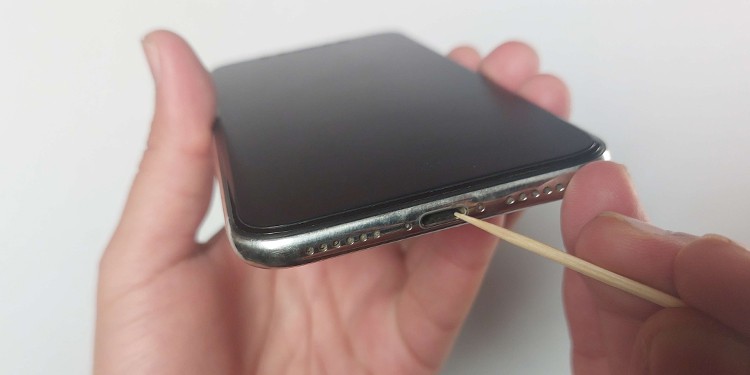
If your lighting cable doesn’t fit perfectly inside the charging port, it’s likely because of dirt/lint trapped inside. You may not realize, but the lint can quickly build up inside the charging port. This can happen even for a simple reason, like keeping the phone inside your pocket. Once there’s too much of it, your charger may not go all the way in and thus keep falling out. Therefore, cleaning it is worth a shot before you actually consider repairing it.First, turn on a flashlight to determine where the dirt is most collected. Then, insert the toothpick and gently scrape the surface inside the port. Consider using a toothpick(preferably a plastic one) so that it doesn’t scratch or cause any damage to the port. Also, clean your smartphone once in a while to avoid such issues in the future.
Use a Different Lightning Cable
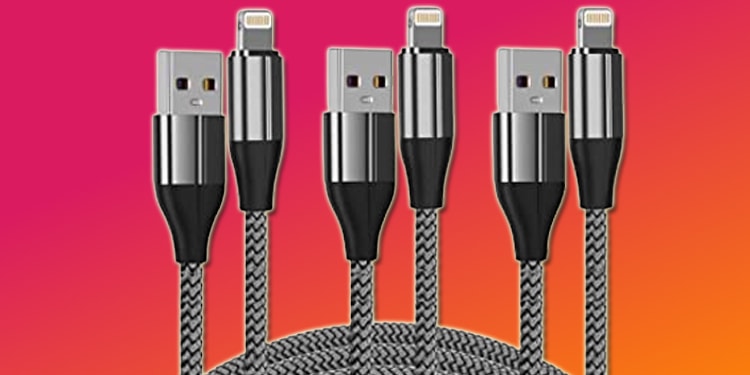
While the port could be faulty and loose on its own, ensure the cable you are connecting to it isn’t the actual problem. Sometimes the phone displays an alert message such as “This accessory may not be supported.” This can happen if you use a charger that isn’t Apple certified.Therefore, try switching to another Apple lightning cable and see if it fits/connects to the port firmly. If it is also loose, your port might be damaged and require repairing.On the other hand, if your iPhone supports it, you can use a wireless charger so that the port isn’t affected by any movement. For this, you should have an iPhone version 8 or newer.
Use an Electric Tape
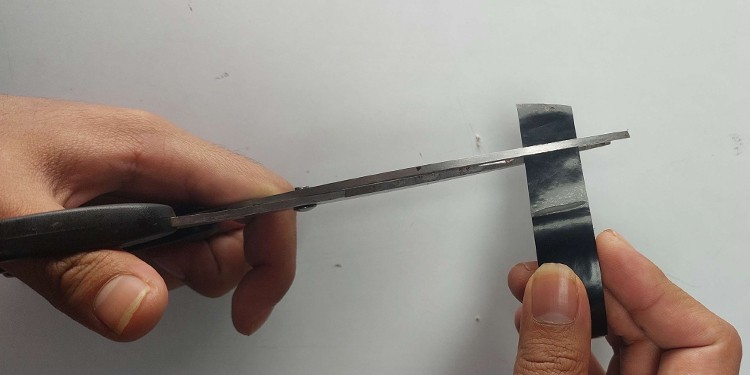
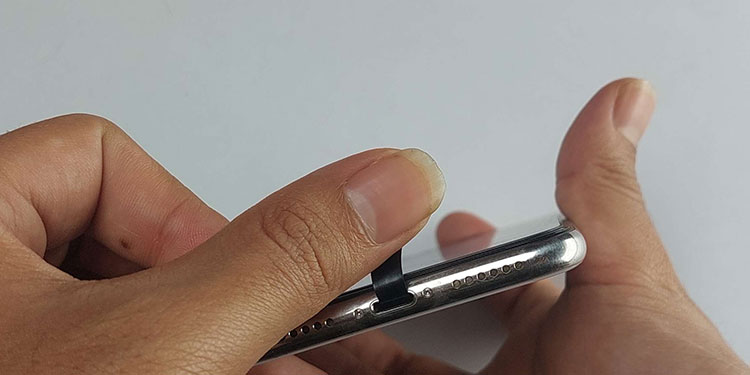
If the port is loose, but you are still able to charge your iPhone at a specific angle or position, try using electrical tape for a tighter connection. While this isn’t a permanent solution, you can charge your iPhone without the frequent disconnection for the time being.Nonetheless, here’s how to do it.Now, the charging cable should hopefully be less loose and sticks well inside the port, at least for some time.
Replace the Port
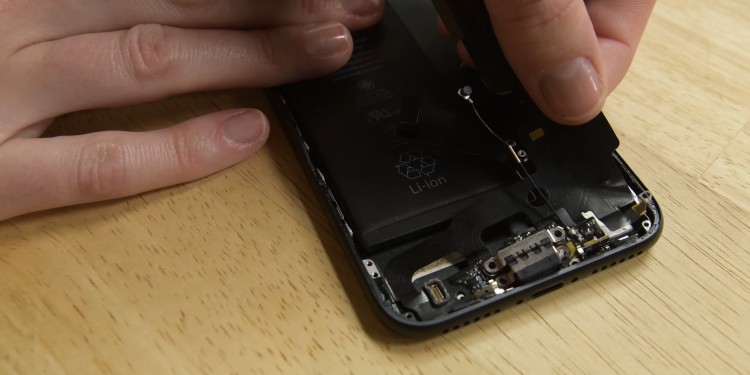
If you have previous experience with replacing iPhone parts, you can replace the faulty one with a new one. And, since you may need to disassemble all the iPhone parts, it is pretty complex and can damage your phone further if not done carefully. Plus, you need to have all the right tools for this task.Nonetheless, consider doing it at your own risk with the steps below.Step 1: Detach the Display Screen
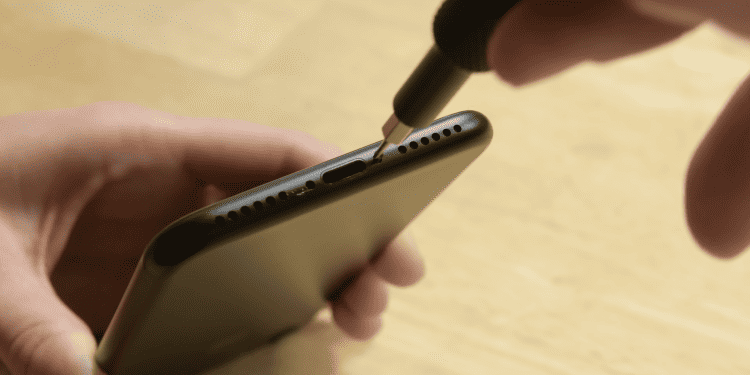
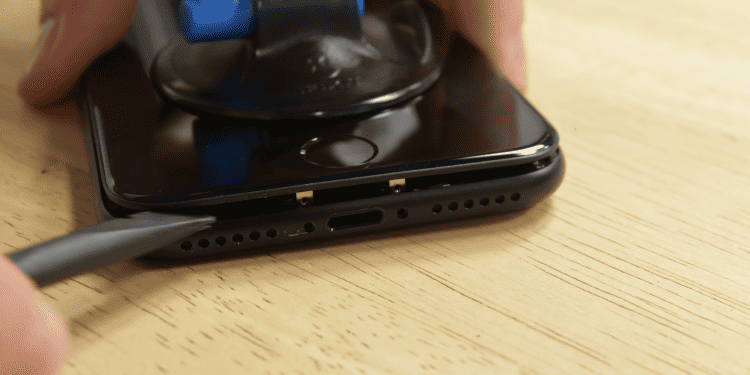
Power off the device and start by removing the two screws next to the charging port. Then, use the double-sided cup and drag the triangular picker/spudger between a gap across the whole display.Use a heat gun/hair dryer to soften up the adhesive that holds the display, similar to glue.
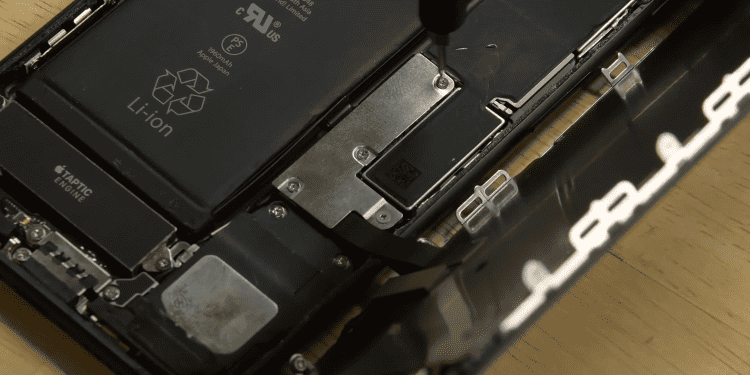
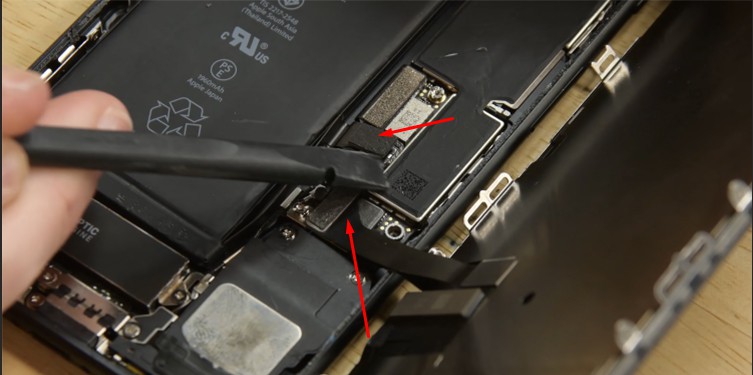
Now, you need to disassemble several components before you can replace the lightning port. However, you basically repeat two things for the entire process; removing the bracket and unscrewing the screws.Along the way, you will also encounter several cable connectors, which you can remove using one edge of the spudger. Apart from that, you mainly unscrew the screws using an appropriate screwdriver. Generally, the P2 pentalobe screwdriver is suitable for disassembling iPhone devices.Step 2: Remove the Camera Sensor
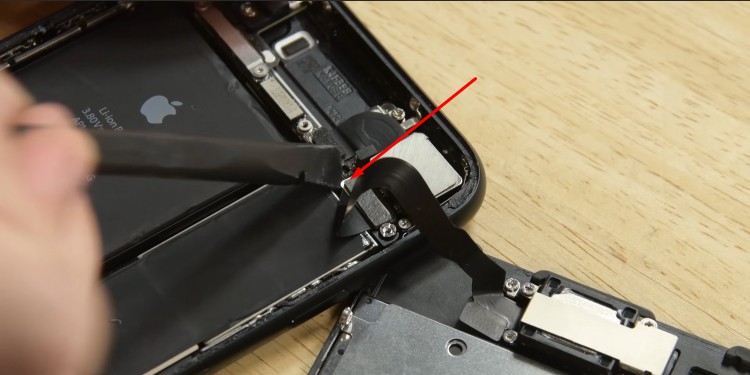
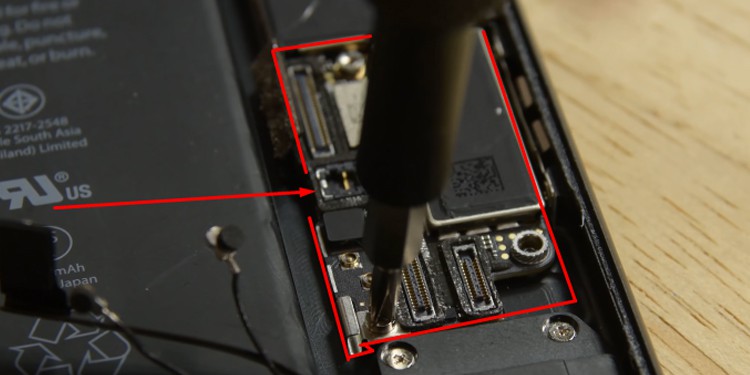
First, detach the battery connector bracket with the spudger.Next, remove the display connectors one by one using spudger.Unscrew the sensor assembly bracket from the top.Use the spudger to disconnect the front sensor assembly.
Step 3: Remove the Barometric Vent
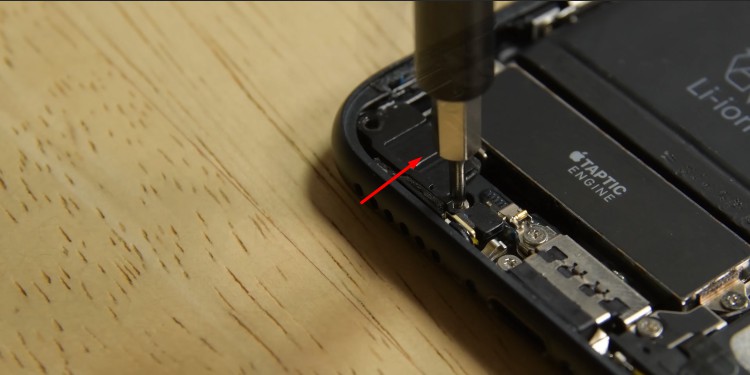
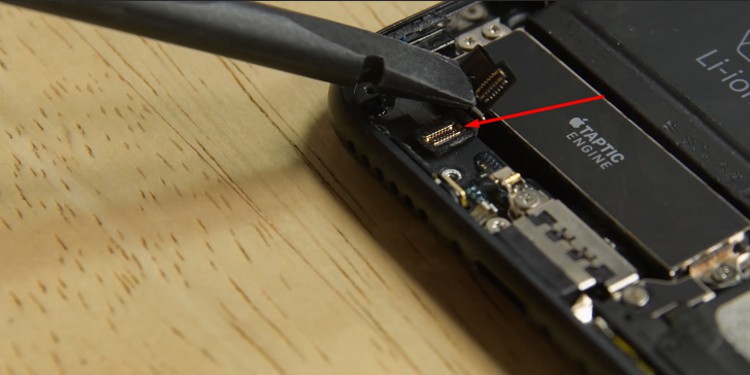
Unscrew all the screws to decouple the barometric vent.Next, unlink the Taptic engine connector using the spudger.Unlock the screw holding the taptic engine and remove it.
Step 4: Remove the Antenna Connector Cables
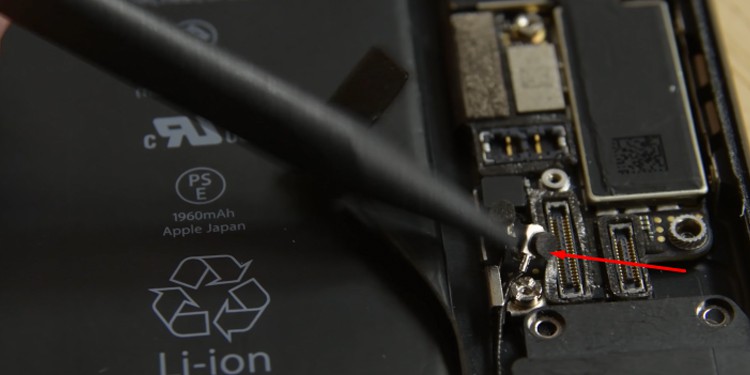
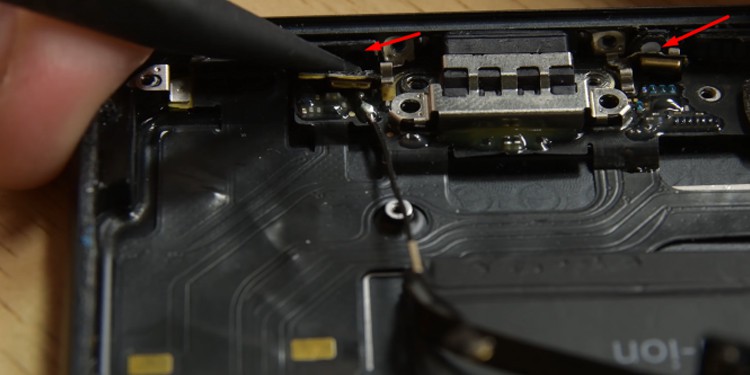
Gently insert the pointed end of the spudger below the Wi-Fi diversity antenna.
Step 5: Remove the Speaker and Eject the Sim Tray with a Sim Ejector Pin
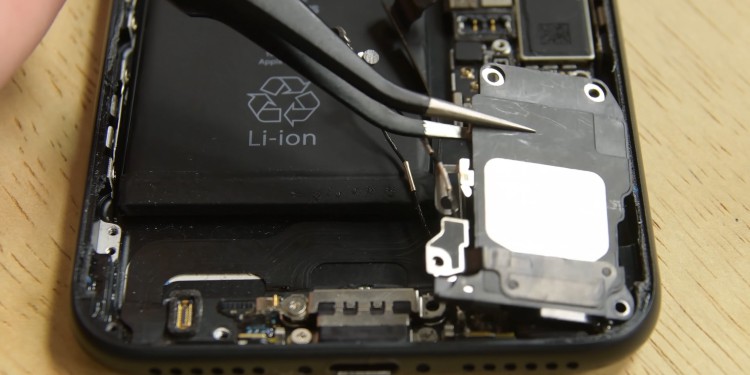
Unscrew and remove the pins above the speaker and remove it using tweezers.Remove the SIM tray with a SIM ejector pin.
Step 6: Detach the Logic Board
Unscrew all the screws and gently unhook the logic board.
Step 7: Remove the Lightning Port
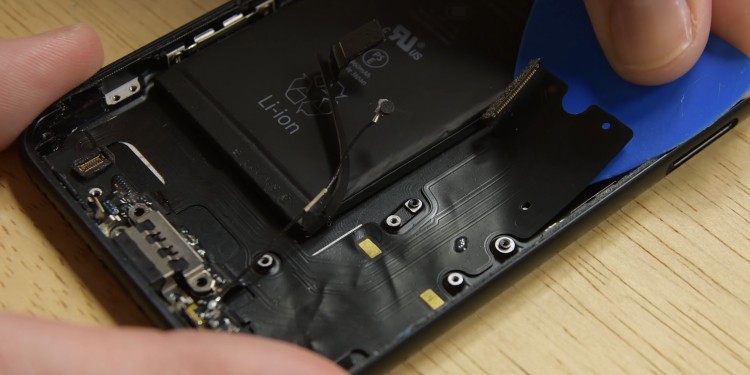
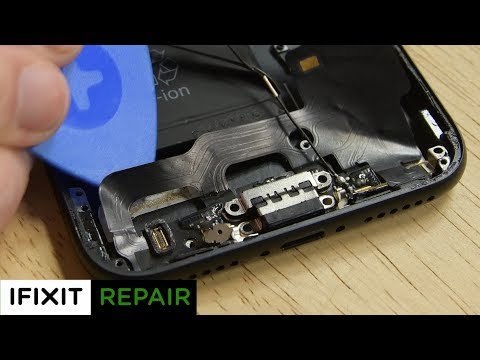
Detach the two microphones with the edge of the spudger.Place the heat pad or heat gun at the lower part of the device to soften up the assembly.Slide the triangular picker below the assembly and move toward the lightning port. Then, unhook the lightning connector.
Step 8: Replace the Lightning Charging Port
Detach the old charging port.Place the new lightning charging port horizontally so that all its screws are in their original position. Apply slight pressure to reseat appropriately.
Step 9: Assemble the Parts
Put all the screws in their respective places.Start with the microphones, then the logic board, taptic engine, antenna connector cable, barometric vent, and camera sensor.Attach the brackets and the connector cables for each part along the way.
Step 10: Place a Display Adhesive for Water Resistance
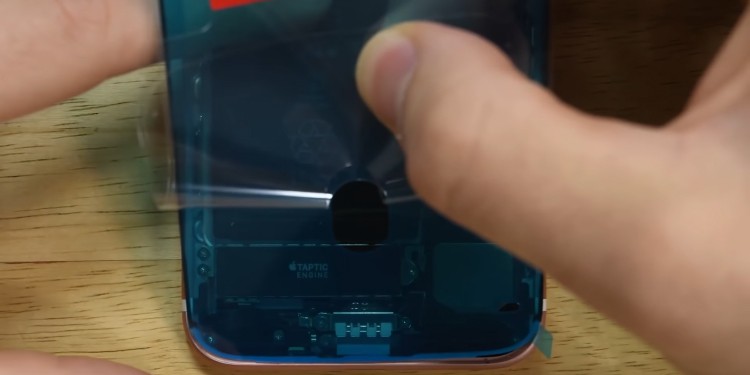
Use the tweezer/spudger to clean any previous adhesive residue.Apply the adhesive and press it firmly on the phone so that it positions perfectly on your phone. Otherwise, you may have to start over again. Additionally, use the spudger to press the adhesive.
Step 11: Reattach the Display
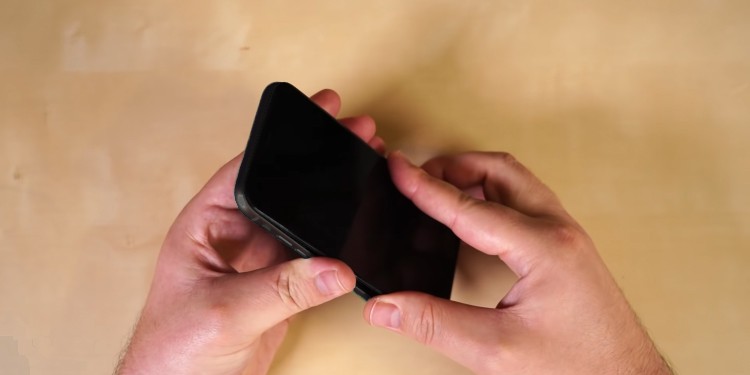
Hold the display at 45 degrees and insert it onto the top edge.Press the remaining part of the display and check if they fit correctly.Finally, screw back the two pentelobe screws next to the charging port.
Visit a Repair Center
If the port is too loose or you see cracks on it, there’s no option but to repair it. And even though you could try to replace the port yourself, this can void your warranty and cause further damage to the phone. So, you should only consider taking help from a professional repair technician to fix it.But before you decide to repair it, check if your warranty period isn’t over yet. If so, contact Apple support and ask if they can replace the port.On the other hand, if your phone is old, the problem can repeat, and the repair may cost you even more. In this case, you are well off buying a new phone instead.
