However, if your total GPU usage or usage for certain games shows 0%, the processes are likely to use your CPU instead. You can easily fix it by changing the graphics settings.So, let’s move on to your problem’s potential reasons and solutions.
Why Is My GPU Usage at 0%?
How to Fix GPU Usage at 0%?
First, make sure to connect your display cable to the GPU ports, not your motherboard. If the GPU usage stays at 0%, apply the possible solutions below to fix the issue:
System using CPU integrated GPU rather than the dedicated GPU.Task Manager displaying incorrect data.GPU driver issues.
Use Alternative Monitoring Software
Most users use the Task Manager to check the utilization of your system resources. However, sometimes, it does not show accurate data, especially concerning GPU. If you are running GPU-intensive applications, such as video games, chances are the usage you can see on the Task Manager is false.We recommend using GPU overlays or GPU monitoring applications to get the correct GPU usage.
Force Applications to Use GPU
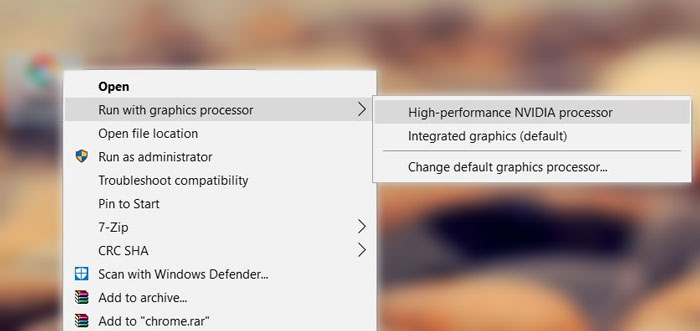
If you are using any applications that render images or videos, they should use your GPU. By default, your system decides whether the CPU integrated or the dedicated GPU handles the application.Sometimes, when the app uses the CPU integrated graphics processor, the Task Manager shows activity at the CPU. So, you need to force such apps to use your dedicated GPU before running it. To do so,Then, run the program. You can also click on Change default graphics processor and to make all apps use the GPU you want.
Enable Hardware-accelerated GPU Scheduling
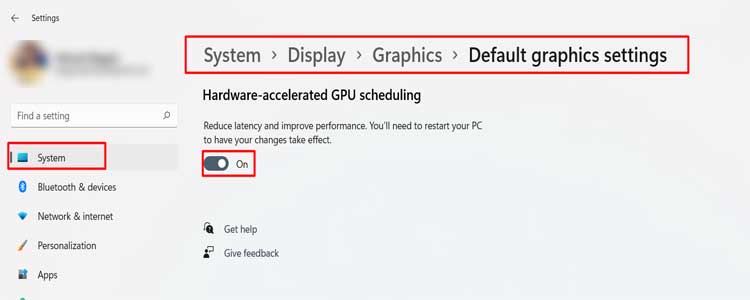
Low GPU usage is normal if you are not using any process requiring a dedicated GPU. That said, if your total GPU usage is 0%, it might be because your display is running on the CPU.We recommend enabling Hardware-accelerated GPU Scheduling to fix this issue. It allocates some high-priority tasks to the GPU to reduce CPU load. Your graphics card and driver must support this process. Moreover, you need to have the Windows 10 May 2020 update as well.Here are the necessary steps for this method:
Set NVIDIA as PhysX Processor
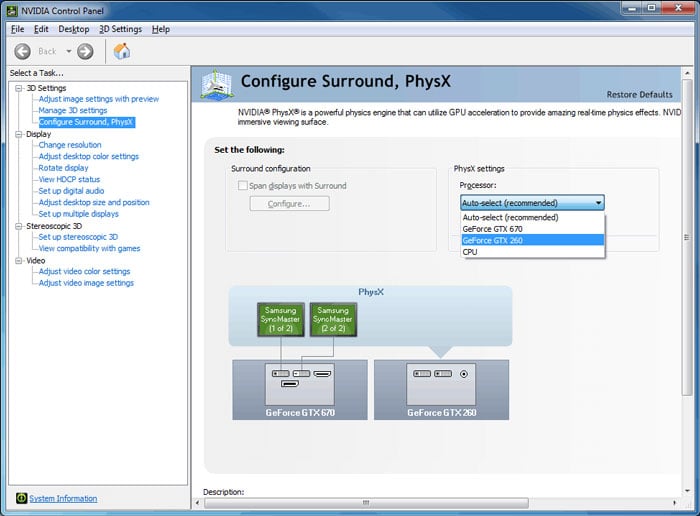
NVIDIA GPUs have the PhysX hardware accelerator engine for better graphics performance. If your current PhysX processor is the CPU instead of your GPU, your system transfers all heavy load to the CPU. Here’s how you can change this setting:
Change BIOS Graphics Settings
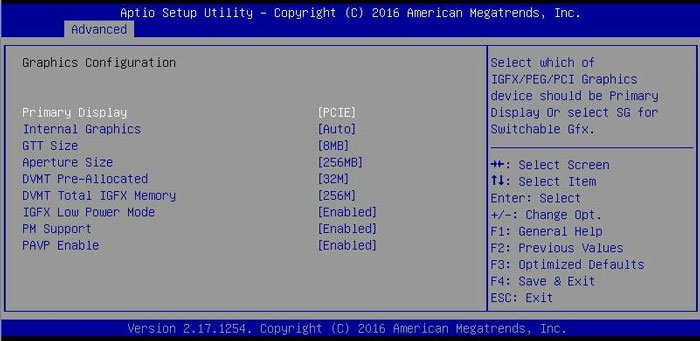
As we mentioned earlier, your system can also allocate the graphics-related tasks to the CPU’s integrated GPU instead of the dedicated one. You can also force the system to use GPU by changing a BIOS setting. Here’s how you can do so:Visit the official website of the motherboard to find out the option.
Update or Reinstall Display Drivers
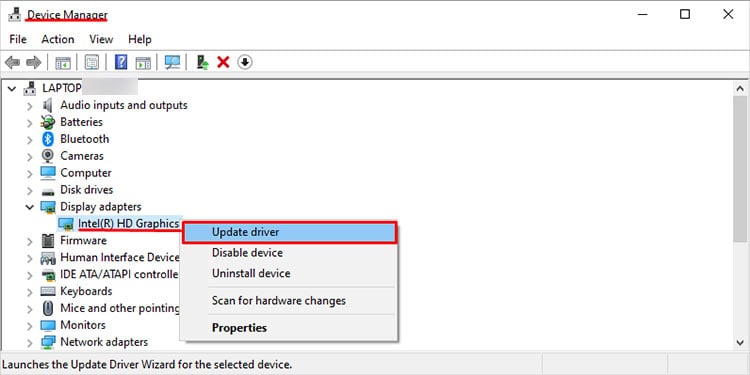
Outdated graphics drivers may also be responsible for your system using the CPU instead of the GPU. This happens as the OS erroneously determines the GPU to be defective. You should always have your drivers fully updated to prevent such issues.It’s better to install the latest drivers from the official website. But you can also update the drivers from the Device Manager using the steps below:If you already have the latest drivers, uninstall and then reinstall them. For NVIDIA GPU, we recommend using the Display Driver Uninstaller (DDU) to uninstall the software.
Related Questions
How to Check GPU Usage?
You can usually check the GPU usage using the Task Manager. But as we mentioned earlier, it doesn’t always give accurate information. We have a dedicated article on How to Check GPU Usage. You can visit to find additional methods to check GPU usage.
What Do GPU 0 and GPU 1 mean?
If you have more than one GPU on your system they will show up as GPU 0,1, and so on on the Task Manager. You can find which GPUs they represent from the Performance tab.
