Secure boot allows your system to boot up only by using the trusted software from the Original Equipment Manufacturer (OEM). It provides a unique protection strategy by detecting and preventing malware from hijacking and infecting your system.So, how do you enable it? The guide below can help you understand and effectively enable secure boot in your system.
How to Check if Secure Boot Is Enabled
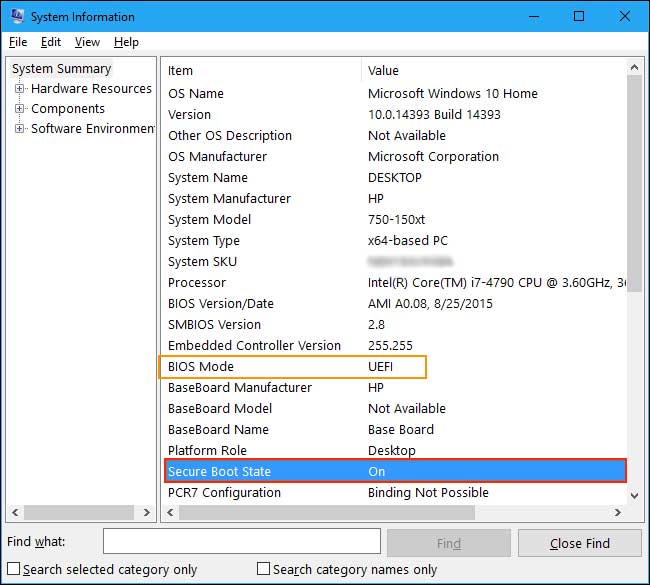
Before entering the BIOS, it’s smart to check if secure boot is enabled and available in your system. You can do so by following the steps shown below:
How to Enable Secure Boot
Your system will be more secure once you enable secure boot as it helps resist attacks to boot loaders and key operating system files of your PC. There are a few steps you can follow before you enable secure boot in your system.Converting MBR to GPT partition and changing the BIOS mode to UEFI is not a prerequisite to enabling secure boot in your system. But these steps are handy if you are upgrading your operating system to Windows 11.
Convert MBR Drive Partition to GPT
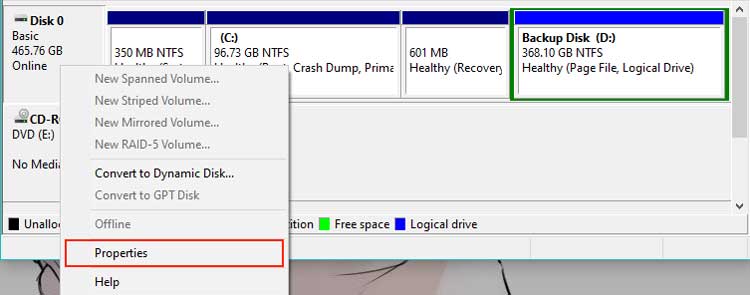
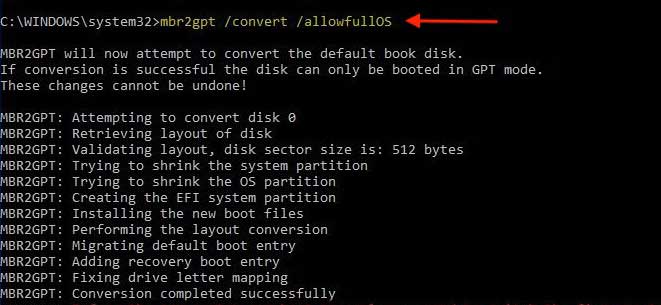
Windows 11 does not boot up on the MBR drive partition. Hence, you should first convert the disk partition from MBR to GPT. Additionally, it’s recommended to back up your files before changing the disk partition as a safety measure. The steps below show you how to change your disk partition to GPT.
Change the BIOS Mode From Legacy to UEFI
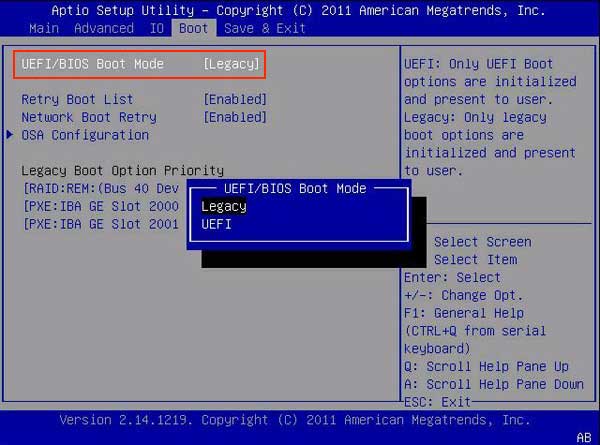
The UEFI firmware interface is known to address the limitations of the Legacy firmware. UEFI is more efficient and has additional security features than the Legacy firmware. It’s also more user-friendly and uses a GPT disk partition that can support up to 9.4ZB of storage. The steps below show how to change your firmware to UEFI.
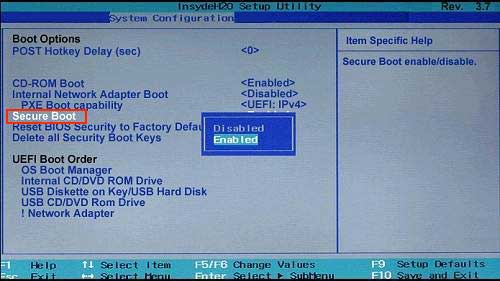
Enable Secure Boot
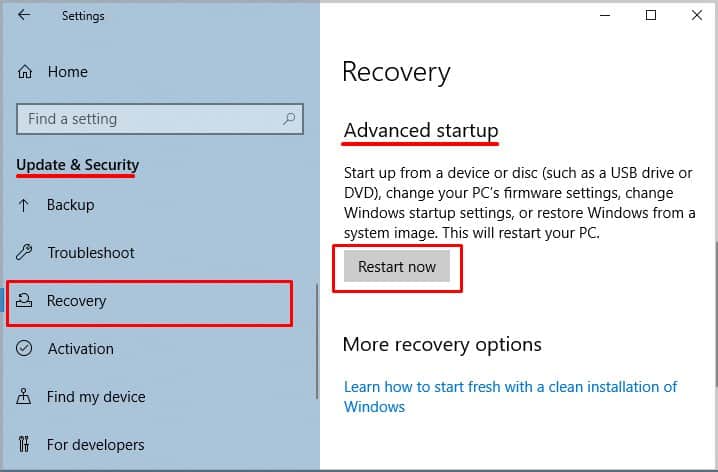
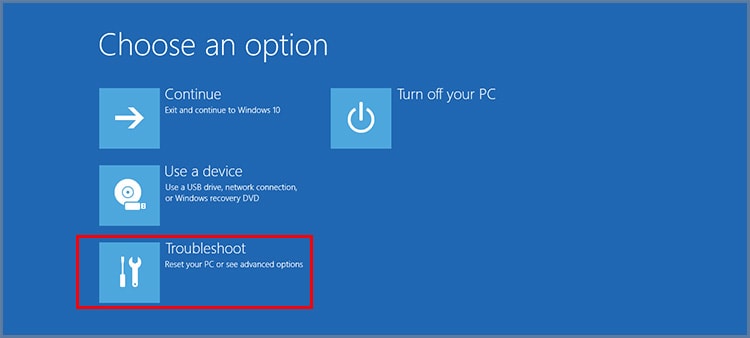
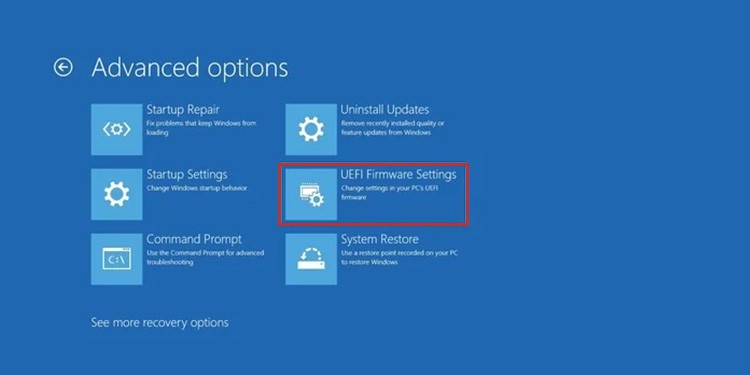
If the secure boot state is not enabled on your system, you should manually enable it through the BIOS settings. The general layout of the BIOS will be different depending on your system manufacturer, however, the core idea remains the same. The steps below show how you can enable secure boot in your system. Alternatively, you can enter the BIOS and enable the secure boot through the Windows recovery environment as well. This companion feature of Windows 10 can help a user in troubleshooting, recovering and the booting up processes.Here’re the steps:And, Voila! Secure Boot is now enabled on your PC. Furthermore, the entire process is the same if you want to enable secure boot through Windows 11 user mode.