Whether you own a mechanical or optical Razer keyboard, every model needs to be cleaned properly if you want to enhance your typing and gaming experience. Moreover, cleaning the peripheral can keep your setup germ-free, which is an additional health benefit.Unlike other manufacturers, Razer crafts dedicated switches for different kinds of keyboards. So, you’ll need to consider some additional things before cleaning it. In this article, we will guide you step by step on how to clean a Razer keyboard safely.
What Types of Keyboard Does Razer Manufacture?
Undoubtedly, Razer produces one of the best wireless mechanical keyboards. This is because the electronics company claims that their keyboards have a durability of 80 million keystrokes.Well, Razer manufactures three different keyboards that all follow the switch mechanism. In fact, they craft their own switches for each type. In this section, we will explain them in detail.
Mechanical Keyboard
In 2010, Razer introduced the first-ever mechanical gaming keyboard, The Razer BlackWidow. Since then, their keyboards have attracted professional gamers from all over the globe as they are e-sports validated and have optimized actuation.While most manufacturers adopt CHERRY MX standard switches, the Razer keyboards have their own blueprint for switch production. In their mechanical gaming keyboard, you’ll find different colors in the three switches: yellow for linear, orange for tactile, and green for clicky.Well, a Razer mechanical keyboard is similar to other gaming keyboards. So, cleaning them is also similar to cleaning any mechanical gaming keyboard.
Mecha-Membrane Keyboard
Basically, a mecha-membrane keyboard is a combination of both mechanical and membrane keyboards. Interestingly, they integrate both switch and rubber dome.This way, you get a cushioned touch and a clicky sound both at the same time. Indeed, these kinds of keyboards haven’t gone mainstream yet but is definitely an emerging product in the gaming community.Since the keyboard adopts both rubber dome and switches, you need to put extra care when removing the keys. Also, cleaning and lubing become a much more tedious task.
Ultra-Low-Profile Keyboard
The ultra-low-profile keyboard suits you if you’re a big fan of a chiclet keyboard. Apart from providing the facilities of a normal chiclet-type keyboard, you’ll get to experience tactile feedback, thanks to the mechanical switches.The keycaps are comparatively harder to remove in this type of keyboard. Thus, you’ll require some additional tools to take off and clean them.
Tools Required For Cleaning a Razer Keyboard
Before cleaning your Razer keyboard, it’s important to collect all the essential cleaning tools and products.
How to Clean Razer Keyboard (Step-By-Step Guide)
Despite remarkable features, even a Razer keyboard needs constant care, and the only thing we can do is clean it when possible. This won’t just keep it neat and tidy but can also help to preserve its lifetime in the long run.Most probably, you’ve got all the tools as we discussed earlier. Now, without further ado, let’s jump right into how to clean Razer keyboard step-by-step.
Disconnect Your Keyboard Connection
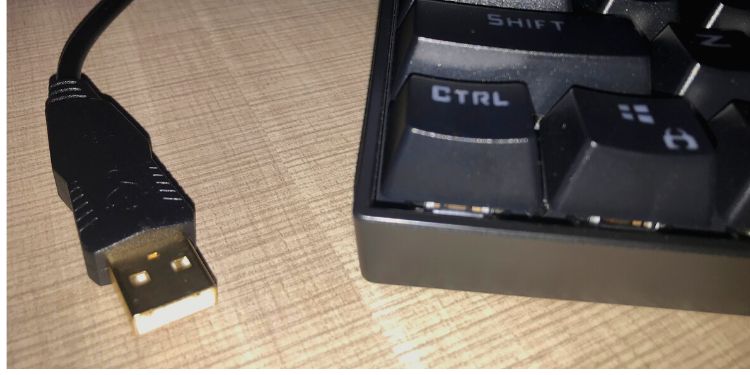
Whether your keyboard is spill-resistant or not, we recommend disconnecting your Razer keyboard cables before cleaning it. This is because we’re going to use some forms of liquid, and even small drops can damage the PCB if not handled with care. Indeed, it’s best to remove the power cord for your own safety. When water or flammable isopropyl alcohol is left in the ports, there’s a risk of getting a shock if the cable is not unplugged. Also, if you’ve accidentally spilled water or coffee on your keyboard, we recommend cutting off the connection immediately. This is because it may short-circuit the device, and your keyboard may randomly stop working. Well, some Razer keyboards come with a passthrough port. So, we recommend disconnecting this cable as well.
Lightly Clean Dust From Keyboard
Before moving on with the deep cleaning process, let’s first focus on how to normally wipe away dust and food crumbs. Follow the guideline below to start cleaning your Razer keyboard lightly:
Pull off All Keycaps
Once you clean dust and food crumbs using cleaning gel, your keyboard will look a bit shiny. Nonetheless, this doesn’t mean your keyboard is cleaned properly. Now, from this section, we move on to the deep cleaning process. Here, you to remove dirt from the inner parts of your keyboard.So, the first method is to pull off all the keycaps on your keyboard. Follow the simple steps below to learn how you can do just that:
Soak Keycaps
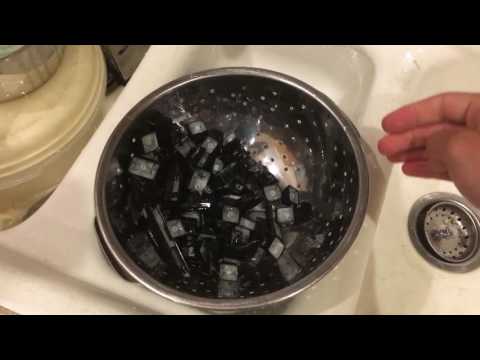
Once you’ve removed all your keycaps, you need to wash them using a cleaning solution. Here’s the complete process on how to do it:
Clean Razer Keyboard Surface Below Keycaps
When you leave the keys soaked, you can start wiping the dust from your keyboard surface beneath the keycaps. Once all the keys are removed, you’ll notice the debris lying on the surface. Here’s how you can clean them the right way:
Clean & Lube Keyboard Switches
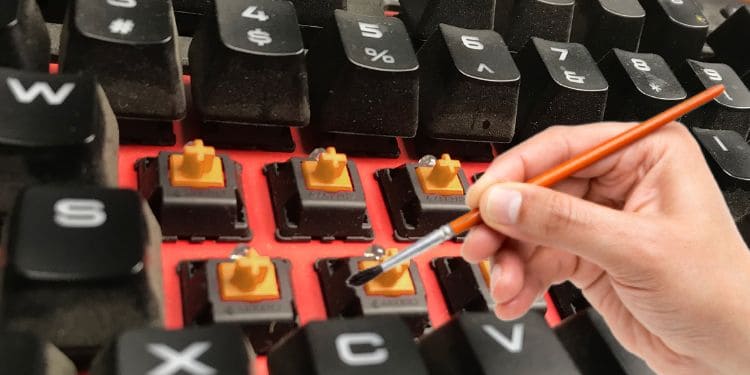
The first thing to remember is that Razer keyboards are not hot-swappable. So, you cannot change its switch or plug them off the PCB. Hence, we recommend the simple method of lubricating switches, and here’s exactly what you need to do:Unfortunately, this simple technique may not help you lube and deep clean them. In fact, your spring and the leaves present in the bottom housing are left unlubed. So, if you want to clean and lube them, here’s what you need to do:
Reattach Keyboard Keys
Once you’ve lubed the Razer switches, it’s time to reattach all the keycaps back to the keyboard:
Let Dry Your Keyboard & Connect the Powercord
Now, the final step is to let dry your keyboard. Indeed, your Razer keyboard is left with moisture after deep cleaning. So for safety purposes, we recommend not to connect the power cord until and unless the peripheral is completely dry.Well, you can let the dry air do its job or use a can of compressed air. Once the Razer keyboard is moisture-free, plug in the power cord and start using your mechanical, mecha-membrane, or ultra-low-profile keyboard.